FSN Series • User’s Guide • Rev 01 73
3. Control Panel Orientation
Control Panel Descriptions
aáëéä~ó=pÉÅíáçå
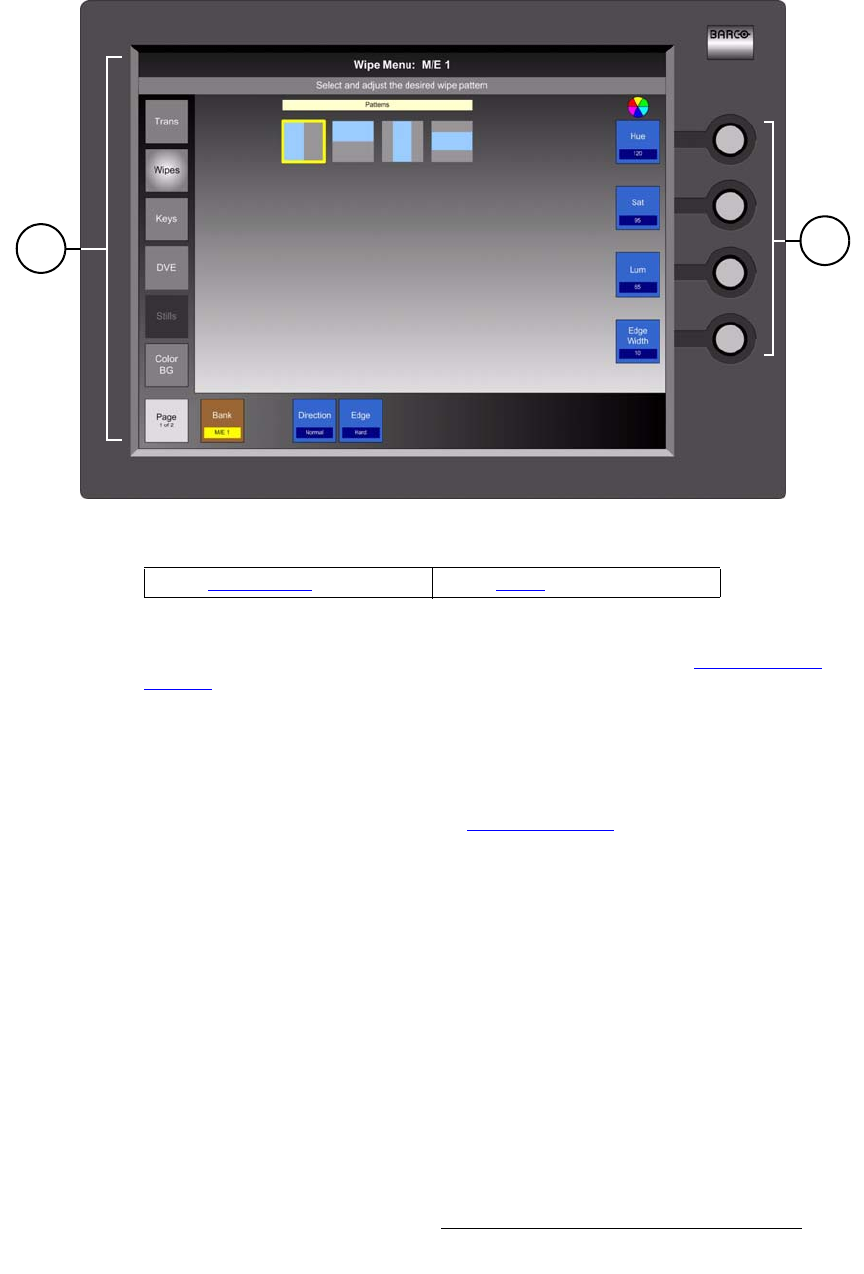
The figure below illustrates the Display Section:
Figure 3-4. Display Section (with sample menu)
The Display Section provides the controls for adjusting system parameters. The display
itself can be mounted in a variety of ways. In Chapter 4, refer to the “Display Mount
Options” section on page 109 for details.
Following are descriptions of each section:
1) Touch Screen
The high-resolution Touch Screen is a multi-menu user interface that enables
you to set up the switcher, adjust parameters, view status, and manage all
functions. Refer to Chapter 5, “Menu Orientation
” on page 131 for details.
2) Knobs
Four Knobs are provided to the right of the Touch Screen. When one or more
“value buttons” appear on the Touch Screen, or when a line is drawn to a table,
the adjacent knob(s) enable you to adjust those specific parameters.
Please note:
~ Turning a knob to the right (clockwise) increases a parameter’s value, or
in a table, scrolls the highlight down. Turning a knob to the left (counter-
clockwise) decreases a value, or scrolls the highlight up.
~ If you adjust a numeric value using a Knob, you do not need to press
Enter. Using this method, the new value is immediately active.
~ If you enter a numeric value using the “on-screen” Keypad or the control
panel’s Keypad, the Enter button must be pressed.
1
2
1) Touch Screen 2) Knobs
