


5 - 87
Chapter 5 Data Used for Positioning Control
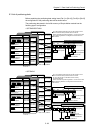
[Da.1] Operation pattern
The operation pattern designates whether positioning of a certain data No. is to be
ended with just that data, or whether the positioning for the next data No. is to be
carried out in succession.
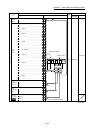
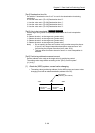
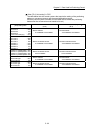
[Operation pattern]
Positioning complete Independent positioning control
(Positioning complete)
Positioning
continued
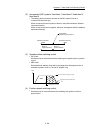
Continuous positioning with one start signal Continuous positioning control
Continuous path positioning with speed change Continuous path control
......................................................................
.....
..........
1) Positioning complete .................... Set to execute positioning to the designated
address, and then complete positioning.
2) Continuous positioning control ..... Positioning is carried out successively in
order of data Nos. with one start signal.
The operation halts at each position
indicated by a positioning data.
3) Continuous path control ................ Positioning is carried out successively in
order of data Nos. with one start signal.
The operation does not stop at each
positioning data.
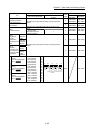
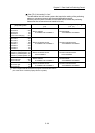
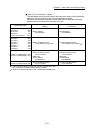
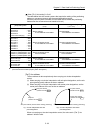
[Da.2] Control system
Set the "control system" for carrying out positioning control.
Note)
When "JUMP instruction" is set for the control system, the "[Da.9] Dwell
time/JUMP destination positioning data No. " and "[Da.10] M
code/Condition data No./Number of LOOP to LEND repetitions" setting
details will differ.
In case you selected "LOOP" as the control system, the "[Da.10] M
code/Condition data No./Number of LOOP to LEND repetitions" should
be set differently from other cases.
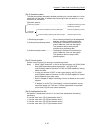
Refer to Chapter 9 "Major Positioning Control" for details on the control
systems.
If "degree" is set for "[Pr.1] Unit setting", circular interpolation control
cannot be carried out. (The error "Circular interpolation not possible"
(error code: 535) will occur when executed.)
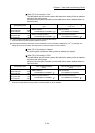
[Da.3] Acceleration time No.
Set which of "acceleration time 0 to 3" to use for the acceleration time during
positioning.
0: Use the value set in "[Pr.9] Acceleration time 0".
1: Use the value set in "[Pr.25] Acceleration time 1".
2: Use the value set in "[Pr.26] Acceleration time 2".
3: Use the value set in "[Pr.27] Acceleration time 3".