31
Step 3) TG-2000A setup
Run the setup program for TG-2000A. Perform the setup in accordance with the instructions on the
screen.
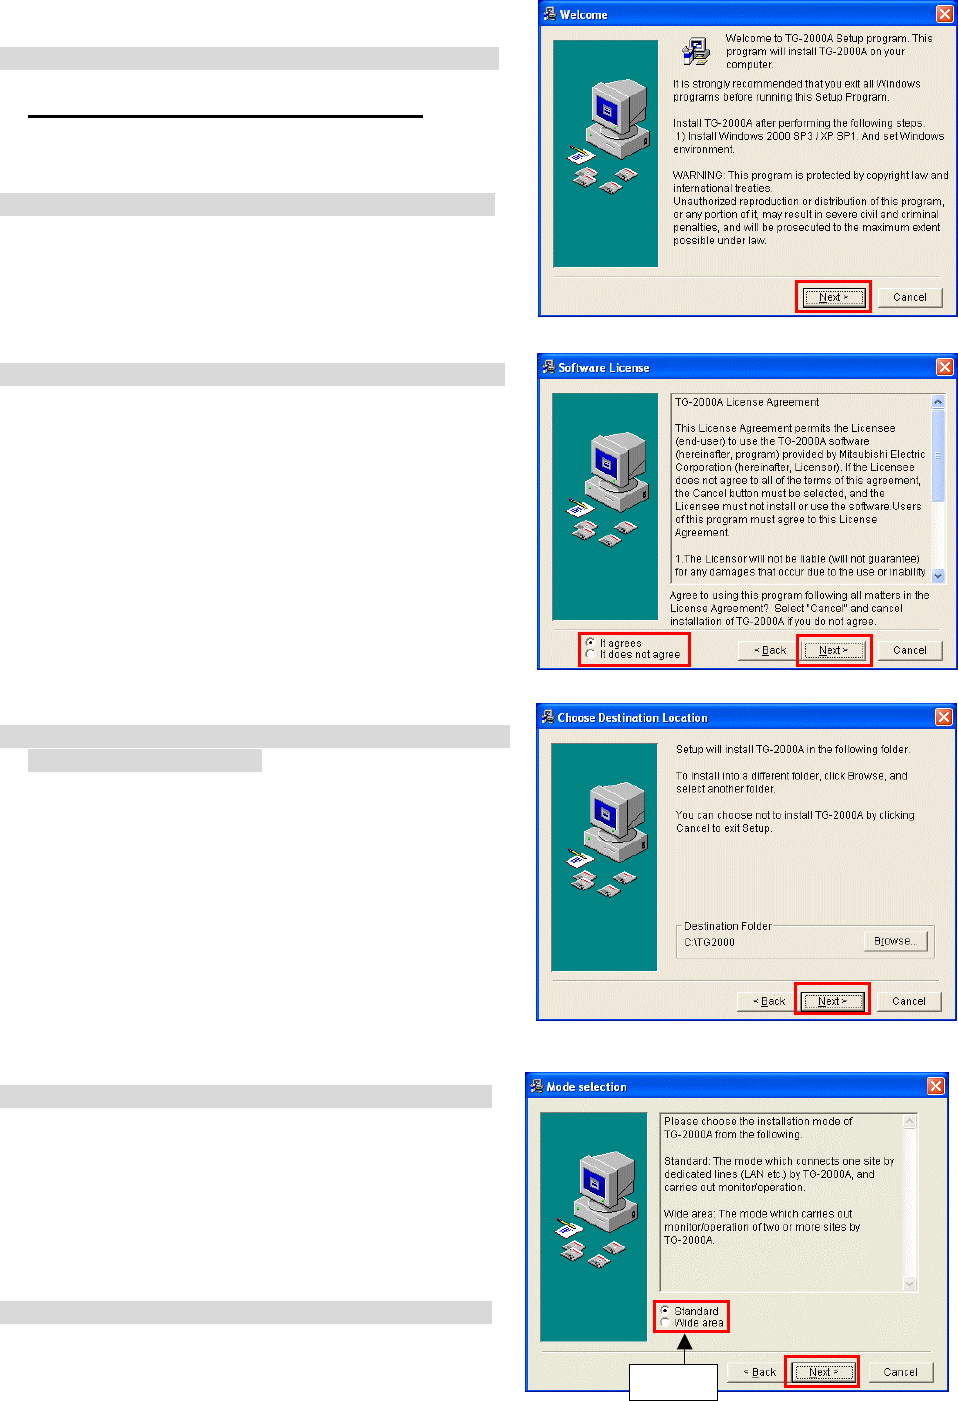
(1) Starting the setup program
1) Starting SetupTG.exe
Use Windows Start-Run to execute Run the
¥WindowsXP ¥Setup¥Step3¥SetupTG.exe
in the
root directory of the Setup CD.
The setup start confirmation window appears. Read
and check the cautions which appear on the screen.
2) Check the displayed items and click the [Next] button.
If there is no problem with the cautions, click the [Next]
button to continue on to the next screen.
* Click the [Cancel] button to stop the setup.
(2) Read the license agreement
1) Read the license agreement and click the [Next] button.
The license agreement screens will be displayed one at
a time. Carefully read all of the agreement and check
that you agree with each item before selecting “It
agrees” and clicking [Next] to continue.
* If you cannot agree with the license agreement,
click the [Cancel] button and stop the installation of
TG-2000A.
(3) Check the installation folder
1) Check the location where the program is to be installed
and click the [Next] button.
Check the location where the program is to be installed.
If the location needs to be changed, set the new
location by clicking the [Browse] button.
After checking the installation location, click the [Next]
button.
* Click the [Cancel] button to stop the installation.
(4) Mode selection
1) Choose “Standard” or “Wide area” mode.
Choose the installation mode.
Standard: The mode which carries out
monitor/operation of one site
(Same function as up to Ver.4.50)
Wide area: The mode which carries out
monitor/operation of two or more
sites
(Usable function is limited)
2) Click the [Next] button.
After choosing the mode, click the [Next] button.
Select
