94
8.13.1 Setting Procedure and Restrictions
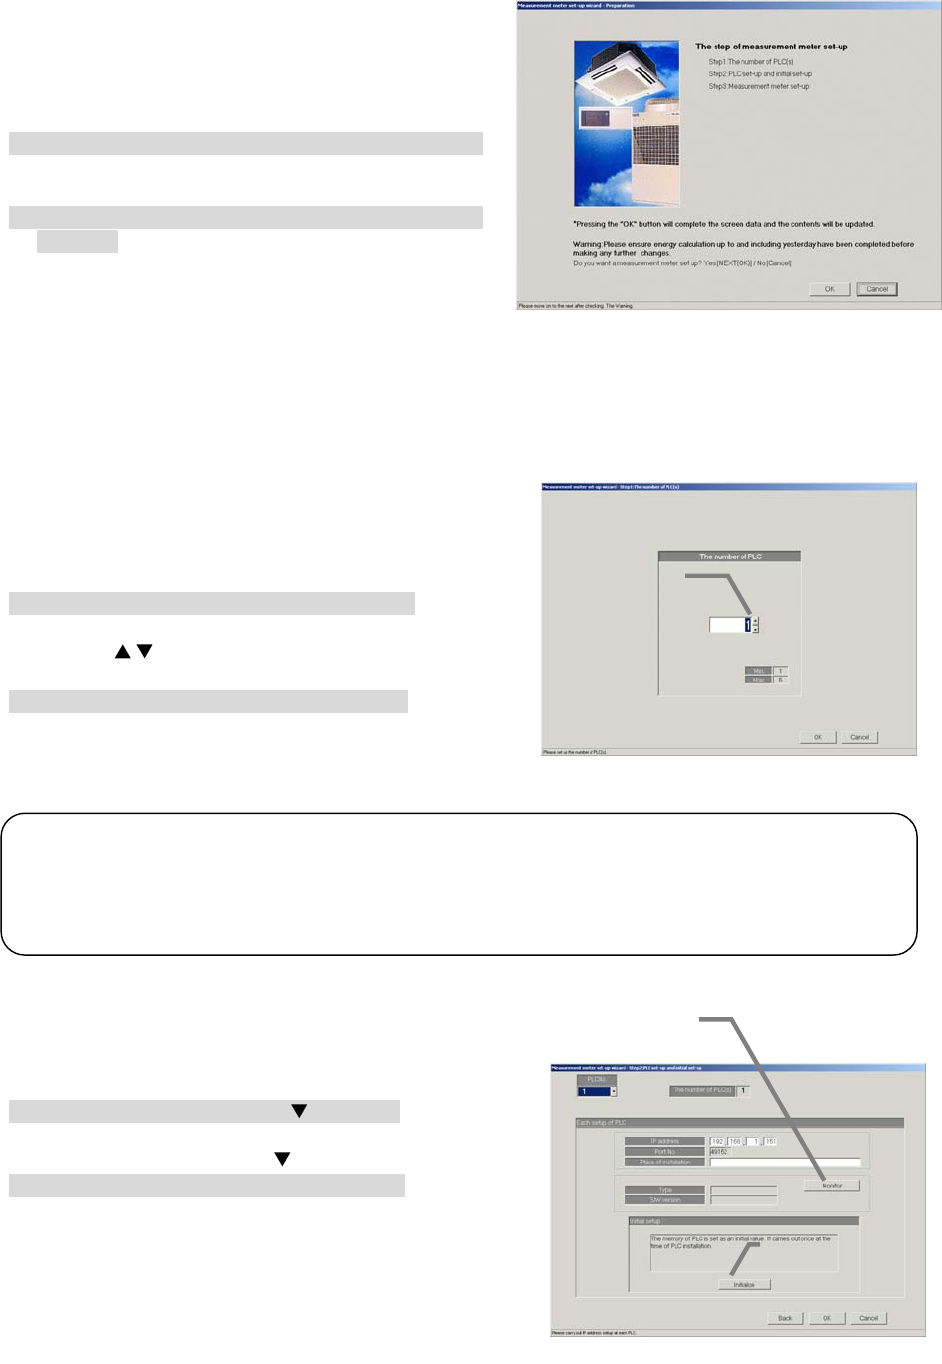
Before setting or changing the watt hour meter,
check the precautions.
Prepare the meter set-up.
[Procedure]
1) Click the [WHM Set-up] button.
From the initial window, click the [WHM Set-up]
button in the System Settings group.
2) Click the [OK] button after checking the display
contents.
Check the details displayed in the warning, and
then click the [OK] button.
* If the [Cancel] button is clicked, the settings are interrupted
and the screen returns to the initial window.
The watt hour meter (WHM) is set in the following order.
Step 1 Number of PLC unit set-up
Step 2 PLC set-up and initial setting
Step 3 Meter set-up
8.13.2 The number of PLC(s) (Step1)
Set the number of connected PLC units.
[Procedure]
1) Select the number of connected PLC units.
Select the number of connected PLC units by
clicking “
/
” button.
* Number of connected units: 1 to 5 units
2) Click the [OK] button.
After making the settings, click the [OK] button.
* When the [Cancel] button is clicked, this setting is terminated
to return to the initial window.
8.13.3 PLC set-up and initial set-up (Step 2)
Set the PLC IP address.
[Procedure]
1) Select the PLC No. with the
button.
Select the No. of the PLC for which the IP address
is to be set by clicking the
button.
2) Set the IP address
Register the PLC IP address in the integrated
software.
* The IP address is set in the PLC using the PLC.
* Recommended IP address: 192.168.1.151 to 155
Set the IP address for all connected PLC for
general equipments by repeating steps 1) and 2).
Note:
• Up to 32 meters (including WHMs) can be set for one PLC.
• The meters can be set only to the models with a pulse transmitter, and are not compatible with
the level output type.
(Refer to the power rate count software installation manual.)
Meter Set-up Preparation screen
Number of PLC unit set-up screen
Number of unit
set-up buttons
PLC connection set-up screen
Monitor button
Initial request button
