


T1 Lines
DSX Software Manual Features ◆ 339
Features
Programming
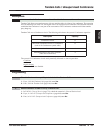
1. Be sure your T1PCB is installed and connected, and that your telco is providing T1 service.
2. In 3101-01: Line Type (page 809), enter the correct circuit type for each T1 line.
• 00 for uninstalled
• 01 for Loop start
• 02 for Ground Start
• 03 for DID Wink Start
• 04 for DID Immediate Start
• 05 for E&M Wink Start
• 06 for E&M Immediate Start
3. In 3101-03: DTMF Dialing (page 811), indicate whether the line is DTMF (1) or Dial Pulse (0).
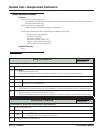
1. Review the following timers for compatibility with your connected T1 service.
- 1631-Incoming (page 695)
- 1632-Outgoing (page 698)
- 1641-Ring Detect (page 700)
- 1642-Call Control (page 702)
- 1651-TX (Transmit Timers) (page 704)
- 1652-RX (Receive Timers) (page 706)
- 1653-MFC Incoming Timers (page 710)
- 1654-MFC Outgoing Timers (page 712)
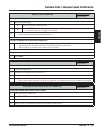
1. Review the following options for compatibility with your connected T1 service.
- 1213-01: Number of PCM Channels (page 616)
(By default, this entry is 0 - all channels active.)
- 1213-02: Clock Control (page 616)
(By default, this entry is 1 - T1 PCB is the clock master.)
- 1213-03: Transmit Pulse Amplitude (page 617)
(By default, this setting is 0 for 0dB.)
- 1213-04: Framer Type (page 617)
(By default, this entry is Yes for ESF - Extended Super Frame.)
- 1213-05: Zero Suppression (page 618)
(By default, this entry is
Yes for B8ZS enabled.)
- 1213-06: Loopback Mode (page 618)
(By default, this option is
0 - no rollback.)
1. Set the circuit type for each T1 line.
2. Review the T1/E1 timers.
3. Review the T1 PCB configuration options.