78
NAVIGATING, ZOOMING, AND SELECTING CHP. 5
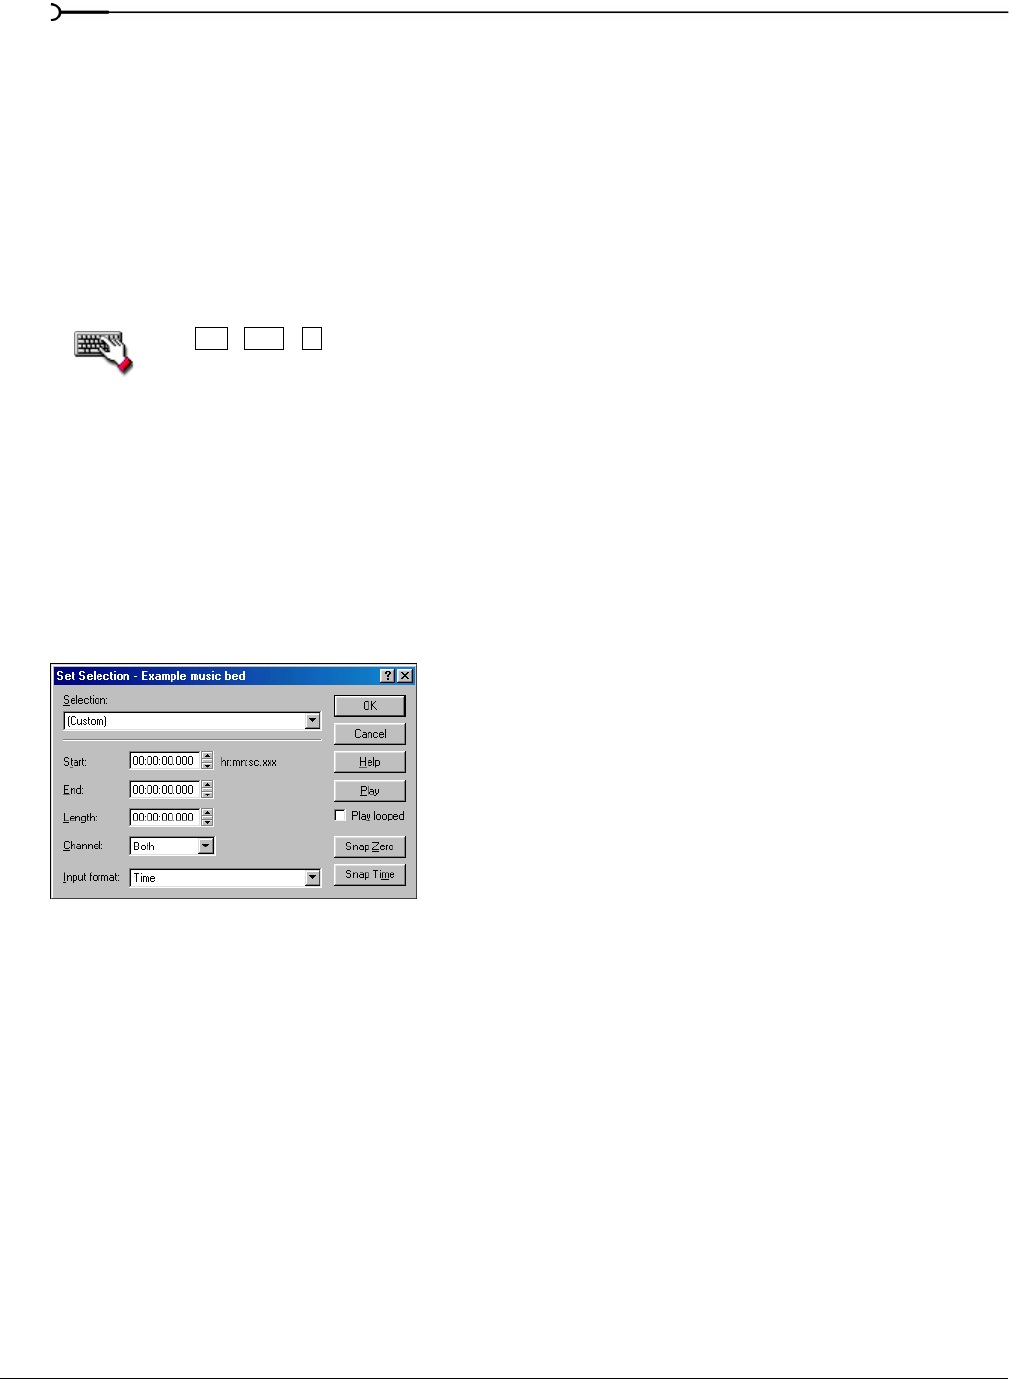
Selecting audio using start and end values
You can select audio by dragging the mouse or by using keyboard shortcuts (pg. 261). For the sake of accuracy,
however, it is often useful to create selections by entering specific start and end point values. The Set Selection
dialog allows you to create selections in this way or by choosing a preset selection from the
Selection drop-
down list.
1.
For users of the full version of Sound Forge: from the Edit menu, choose Selection, and choose Set from
the submenu.
For users of Screenblast Sound Forge: from the
Edit menu, choose Selection.
The Set Selection dialog appears.
Press + + .
2.
From the Input format drop-down list, choose the format to be used for creating the selection. The values in
the
Start, End, and Length boxes change to reflect the specified format.
3.
Configure the selection by entering appropriate values in the Start and End or the Start and Length boxes.
4.
If you are working with a stereo file, choose Left, Right, or Both from the Channel drop-down list.
5.
Click OK.
Using the Set Selection dialog
The following sections briefly describe additional controls located in the Set Selection dialog.
Play
Clicking Play plays the current selection.
Play looped
Selecting the Play looped check box allows you to play the selection in Looped Playback mode.
Snap Zero
Clicking Snap Zero forces the Start and End values of the selected area to the next zero-crossing.
Snap Time
Clicking Snap Time forces the Start and End values of the selected area to a whole time division as designated
by the markings on the data window’s time ruler.
Ctrl
Shift
D
Set Selection dialog


