


48
GETTING STARTED CHP. 4
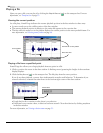
Extracting audio from CD
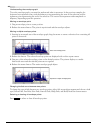
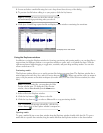
The Explorer window allows you to easily extract audio from a CD into a data window. Each audio track on
the CD is extracted into a separate data window.
1.
Use the Explorer window to browse to and select your CD drive. The CD’s audio tracks display in the
right pane of the Explorer window.
2.
Select the track(s) you want to extract.
3.
Drag the track(s) to the main Sound Forge workspace. Sound Forge begins extracting the selected tracks
into individual data windows.
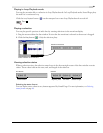
4.
To stop the extraction process, you can click the Cancel button on the status bar to stop the whole process
or on the individual data windows to stop extracting a specific track.
Tip:
To extract a single audio track into a new data window,
double-click the track in the right pane of the Explorer
window.
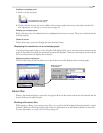
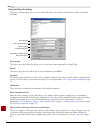
Using Explorer views
You can control the information that is displayed in the Explorer window by clicking the Views button ( )
and selecting a view. These options are explained below:
Peak files
When you first open a file, Sound Forge scans the entire file and creates a peak file. The peak file is stored
with the same name and in the same location as the audio file, but it is given an .sfk extension. Sound Forge
automatically updates this peak file whenever the original file is edited.
If you modify a file in an application other than Sound Forge, you can regenerate the peak file by choosing
Rebuild Peak Data from the Special menu.
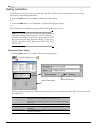
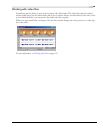
Item Description
Tree View Displays all of the available drives and folders that you may choose
from to find files.
Region View Displays any regions that have been defined in the selected media file.
Summary View Displays a short description of the selected media file at the bottom of
the Explorer window.
Details Displays the file size, date and when the file was last created or last
modified.
All Files Displays all file types in the active folder.