8
CHP. 8 RECORDING, EXTRACTING, AND BURNING
CHAPTER
113
Recording,
Extracting, and
Burning
This chapter describes recording audio in Sound Forge, extracting audio from a CD, and writing audio to a
CD.
Recording audio
Sound Forge has two central methods for recording: manual (normal) and automatic. In normal recording,
you choose your settings and control your recording session while you’re sitting at your PC. With automatic
recording, you can choose your settings and set your trigger parameters for recording automatically—
whether you’re at your PC or not.
Recording manually
You can record into an existing data window or create a new window at the time of recording.
1.
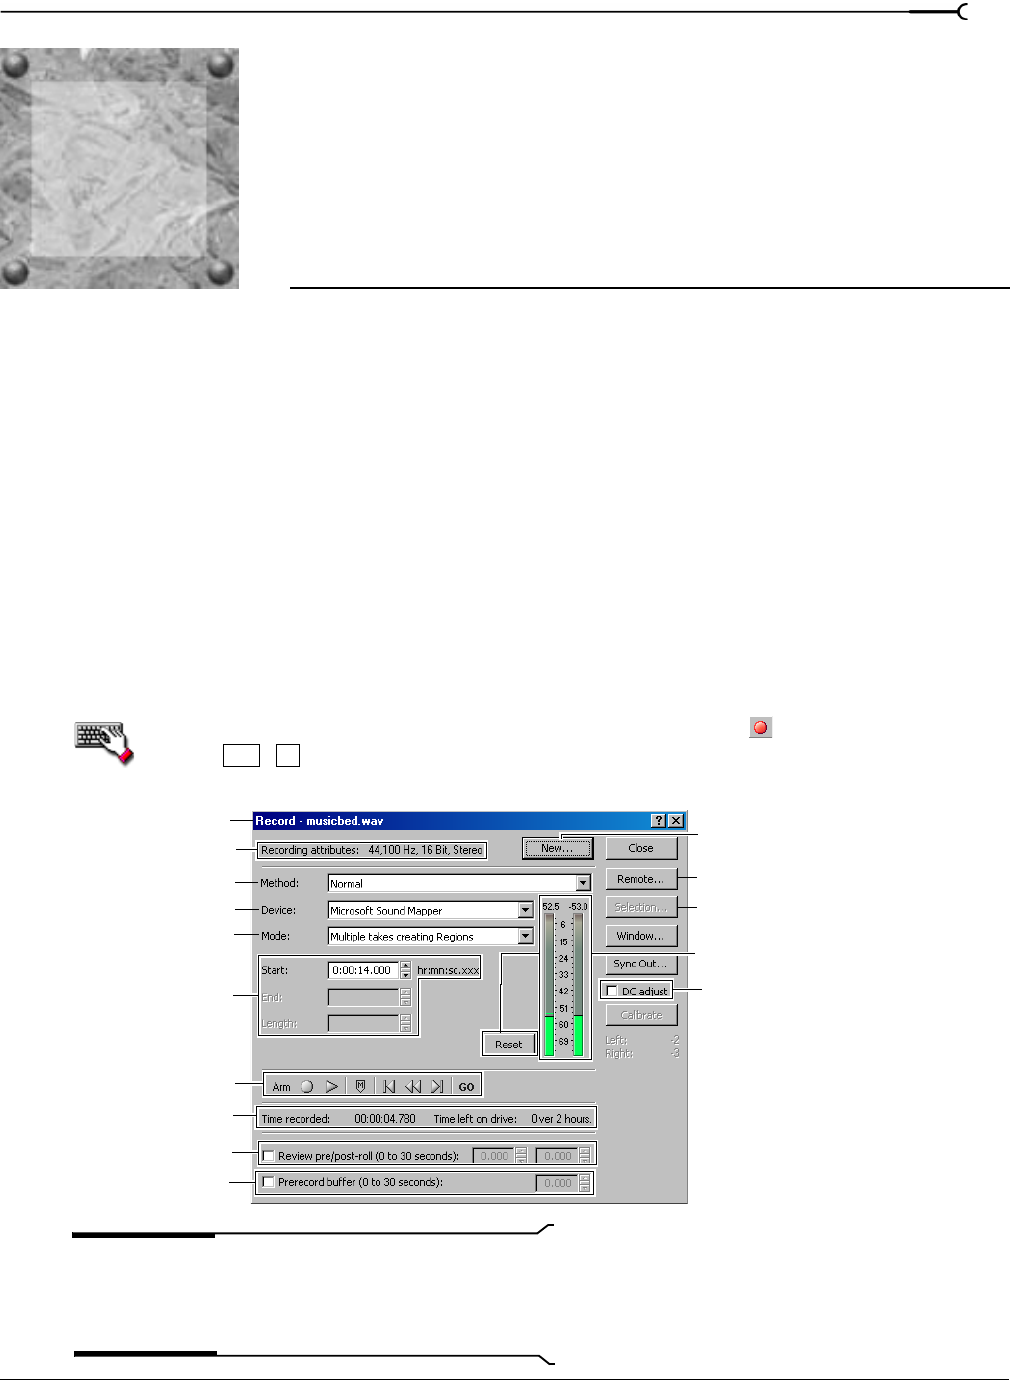
From the Special menu, choose Transport, and choose Record from the submenu. The Record dialog
appears.
You can also open the Record dialog by clicking the
Record button ( ) on the transport bar or
pressing + .
Note:
The Record dialog shown above is from the full
version of Sound Forge. If you are using Screenblast Sound
Forge, not all of the controls displayed above will be available
to you.
Ctrl
R
Recording attributes
Meters and
Title bar
Record to
new window
meter reset
DC adjust
Recording mode
Recording device
Recording method
Pre/post roll
Recording time
Transport bar
Remote recording
Set selection
Prerecording buffer
Punch-in spinners
8
