


CHP. 8 RECORDING, EXTRACTING, AND BURNING
117
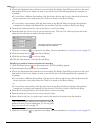
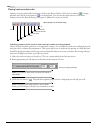
Triggering by MIDI timecode
Note:
You can specify a MIDI input port in the MIDI/Sync
tab in the Preferences dialog (from the
Options menu,
choose
Preferences). For more information, see
Synchronizing with other devices on page 124.
1.
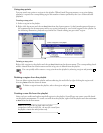
From the Special menu, choose Transport, and then choose Record from the submenu.
Click the
Record button ( ) on the transport bar or press + .
2.
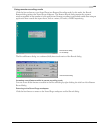
From the Method drop-down list, choose Automatic: MIDI Timecode.
3.
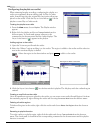
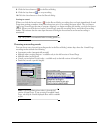
Choose the destination data window for your recording. By default, Sound Forge records into the active
data window. If this is not where you want to record, use one of the following methods to prepare for
recording:
• To record into a different data window, click the
Window button and choose a data window from the
Record destination window drop-down list. Click OK to return to the Record dialog.
-or-
• To record into a new window, click the New button in the Record dialog and specify the attributes
(sample rate, bit depth, and channels) for the new file. Click
OK to return to the Record dialog.
4.
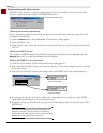
From the Device drop-down list, choose the device to use for recording.
5.
From the Mode drop-down list, choose a recording mode. For more information, see Choosing a recording
mode on page 119.
6.
Select the MIDI timecode start check box and enter the timecode at which Sound Forge should begin
recording.
7.
Select the MIDI timecode end check box and enter the timecode at which Sound Forge should stop
recording. If this check box is cleared, recording will continue until you click the Stop button ( ).
8.
Click the Arm button ( ). Sound Forge is armed for recording to begin when your timecode location is
reached.
9.
To end recording, click the Stop button ( ).
Note:
Recording will end automatically at the specified
timecode location if you selected the
MIDI timecode end check
box.
10.
Click the Close button to close the Record dialog.
Recording a specific length (punch-in)
You can make a selection in an audio file and record over it, or you can specify a punch-in location at the
time of recording.
Recording over a selection
1.
Select the audio that you wish to record over. For more information, see Fine-tuning a selection on page 79.
2.
Click the Record button ( ) in the transport bar. The Record dialog appears.
3.
From the Method drop-down list, choose Normal.
Ctrl R