


CHP. 8 RECORDING, EXTRACTING, AND BURNING
125
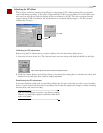
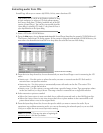
Viewing input levels
The input meters on the Record dialog show the level of the incoming signal. For recording purposes, the
incoming audio should remain primarily in the yellow, only occasionally entering the red.
Right-click the meters and choose
Show VU/PPM from the shortcut menu to toggle the display of VU/PPM
meters in the Record dialog.
Click the
Reset button (or press + ) to reset clip indicators or held peaks or valleys.
You can work with the record input meters in much the same way you do with other meters in Sound Forge.
For more information, see Meters on page 37.
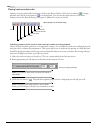
Setting the record level
The values displayed above the record meters are useful for maximizing the input level during recording. It is
particularly important to record input signals as loud as possible when planning to decrease the bit depth.
This maximizes the dynamic range.
However, the input signal must never exceed the range of values that can be recorded digitally. When the
input signal exceeds the safe digital recording range, the waveform peaks are clipped, resulting in audible
digital distortion.
1.
Open the Record dialog.
2.
From the Device drop-down list, choose the device to use for recording.
3.
Apply the input signal to be recorded. The meters display levels relative to the signal.
4.
Slowly increase the level of the input signal until the peak value is the -6 dB range. If the peak reaches
0 dB, the wave is clipped and a
Clip indicator appears above each meter.
If clipping occurs, decrease the level of the input signal until the record level is maximized without clipping.
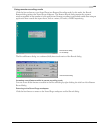
Scaling the record meters
Like the play meters, the record meters can be scaled to various dynamic ranges by right-clicking the meters
and choosing
Peak Range or VU/PPM scale from the shortcut menu and then choosing the desired range from
the submenu.
For typical recording situations, the -42 to 0 dB range is the most practical. However, when recording very
low-level audio signals, you should consider the -90 to 0 dB range. Scaling the record meter to this range is
also a good method of gauging the noise level in the system.
Updating the meters
Right-click the meters and choose Aggressive Update from the shortcut menu to increase the priority of
updating the meters. This results in more accurate metering, but increased CPU usage.
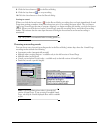
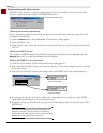
Inserting markers while recording
Click the Drop Marker button ( ) in the Record dialog’s mini-transport bar to insert a marker in the data
window during recording.
Press .
You can then use the
Markers to Regions command to convert markers into regions. For more information, see
Inserting regions based on marker positions on page 102.
Alt T
M