118
RECORDING, EXTRACTING, AND BURNING CHP. 8
4.
Choose the destination data window for your recording. By default, Sound Forge records into the active
data window. If this is not where you want to record, use one of the following methods to prepare for
recording:
• To record into a different data window, click the
Window button and choose a data window from the
Record destination window drop-down list. Click OK to return to the Record dialog.
-or-
• To record into a new window, click the
New button in the Record dialog and specify the attributes
(sample rate, bit depth, and channels) for the new file. Click
OK to return to the Record dialog.
5.
From the Device drop-down list, choose the device to use for recording.
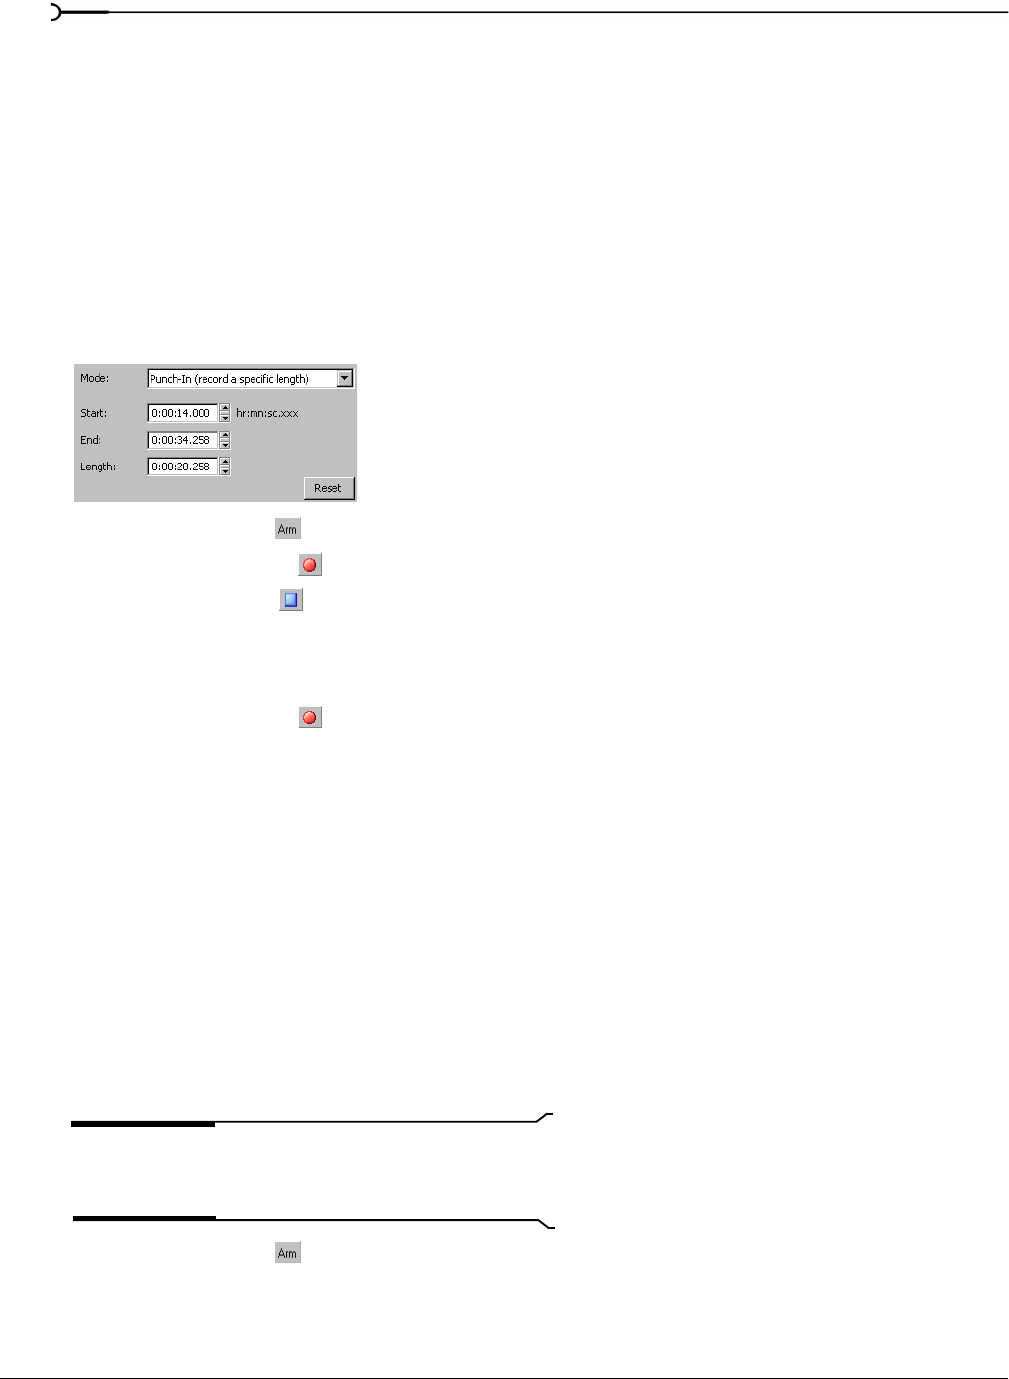
6.
From the Mode list, choose Punch-In (record a specific length). The Start, End, and Length boxes show the
values for the selection you made in the data window.
7.
Click the Arm button ( ) to prepare for recording. For more information, see Arming to record on page 119.
8.
Click the Record button ( ) in the Record dialog.
9.
Click the Stop button ( ) to stop recording.
10.
Click the Close button to close the Record dialog.
Specifying a punch-in location at the time of recording
1.
Click the Record button ( ) in the transport bar. The Record dialog appears.
2.
From the Method drop-down list, choose Normal.
3.
Choose the destination data window for your recording. By default, Sound Forge records into the active
data window. If this is not where you want to record, use one of the following methods to prepare for
recording:
• To record into a different data window, click the
Window button and choose a data window from the
Record destination window drop-down list. Click OK to return to the Record dialog.
-or-
• To record into a new window, click the
New button in the Record dialog and specify the attributes
(sample rate, bit depth, and channels) for the new file. Click
OK to return to the Record dialog.
4.
From the Device drop-down list, choose the device to use for recording.
5.
From the Mode list, choose Punch-In (record a specific length).
6.
Enter values in the Start, End, and Length boxes for the punch-in location in the data window.
Tip:
Click the Selection button for more options in creating a
punch-in selection. For more information, see Selecting audio
using start and end values on page 78.
7.
Click the Arm button ( ) to prepare for recording. For more information, see Arming to record on page 119.
The values in the Start, End, and Length
boxes reflect the current selection.


