


146
PROCESSING AUDIO CHP. 10
Creating presets
You can also create custom effects and save them as presets.
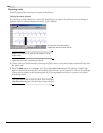
1.
Open the Voiceover.pca file.
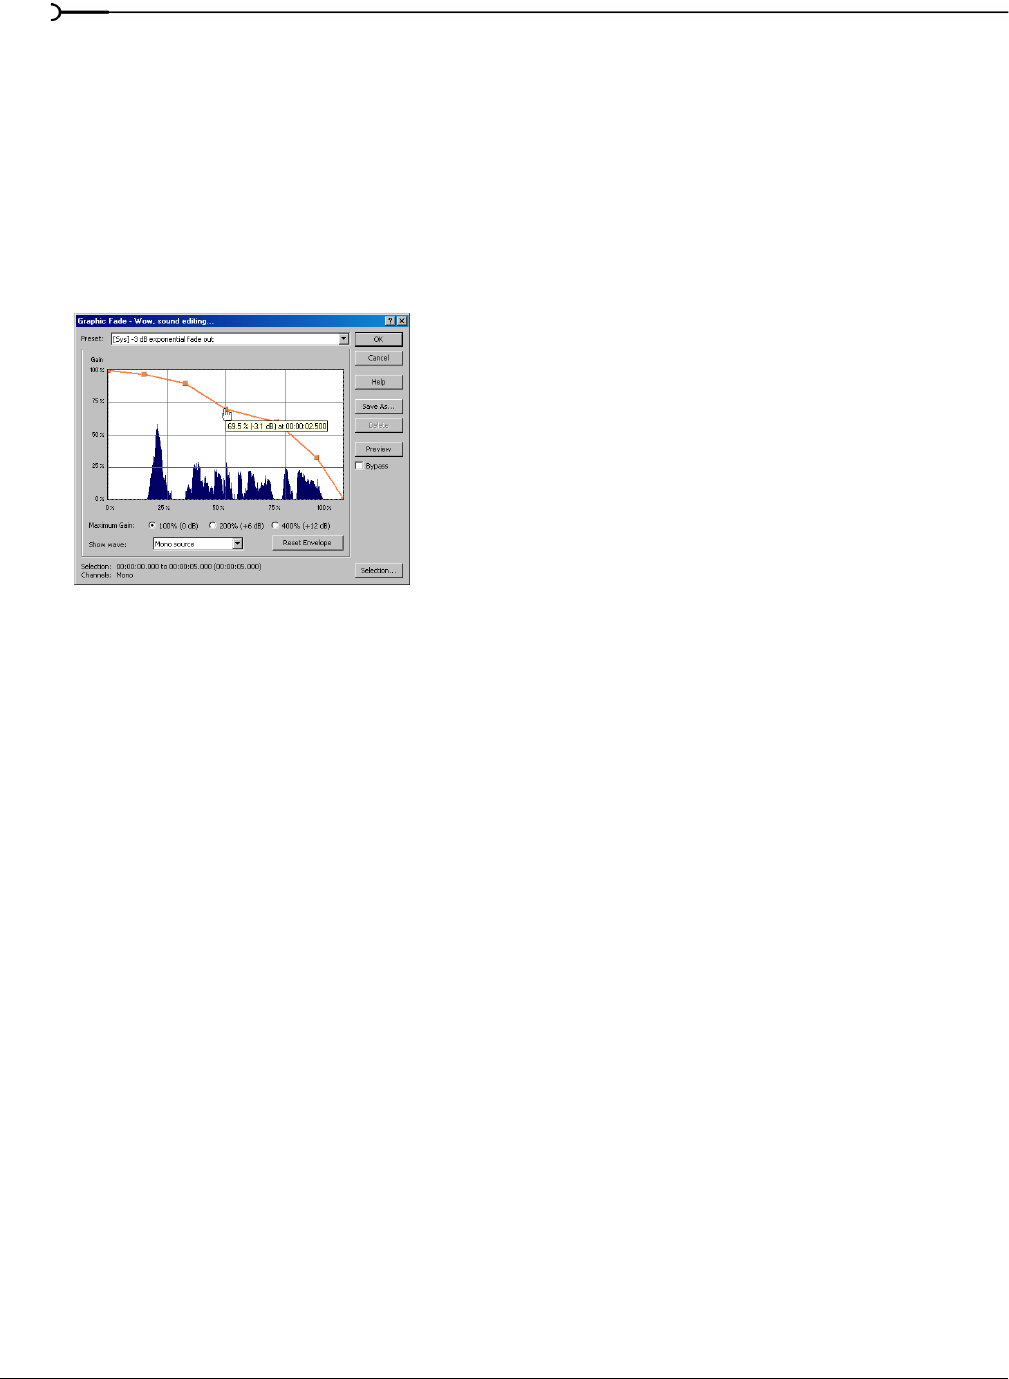
2.
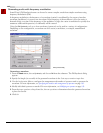
From the Process menu, choose Fade, and choose Graphic from the submenu. The Graphic Fade dialog
appears.
3.
From the Preset drop-down list, choose the -3 dB exponential fade out preset. The dialog’s controls change to
reflect the preset.
4.
Drag any of the graphic fade points to a new position.
5.
Click Save As. The Save Preset dialog appears.
6.
Enter a name for the preset and click OK. Sound Forge saves the new preset and adds it to the dialog’s
drop-down list.
Deleting presets
To delete a preset, choose it from the Preset drop-down list and click Delete. Built-in presets cannot be
deleted.
Resetting parameters
To reset all dialog controls to their default settings, right-click the dialog and choose Reset All from the
shortcut menu.
Managing presets
Once you have created custom presets, you can use the Sound Forge Preset Manager to back up, transfer, or
delete custom presets from any of the effects, processes, tools and plug-ins installed in Sound Forge. You can
also use the Preset Manager to manage your ACID® and Vegas® presets. For more information, see Using the
Preset Manager on page 177.
Previewing processed audio
You can preview the effect that a process has on a file by using the Preview button. This button is found in
most audio processing dialogs. You can use previews to fine-tune effect parameters without leaving the
dialog. More importantly, using previews reduces wasted processing time.
Setting custom preview parameters
You can customize the preview parameters to satisfy your editing preferences. You can save custom
previewing settings for the current process alone or for all processes.
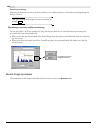
Edit the graphic
fade and click the
Save As button