11
CHP. 11 APPLYING EFFECTS
CHAPTER
169
Applying Effects
Effects, or plug-ins, can be used to improve the quality of the audio or to create special artistic effects.
Additional DirectX plug-in effects, both from Sony Pictures Digital and other third-party vendors, can also
be used.
Adding an effect
You can choose an effect from the Effects menu to apply to a file or just a portion of a file. If you’ve added
an effect to the
DX Favorites menu (available only in the full version of Sound Forge), you can select it
from that location as well. For more information, see Organizing effects in the DX Favorites menu on page 177.
1.
Select the data you want to process. If no data is selected, Sound Forge applies the effect to the entire file.
2.
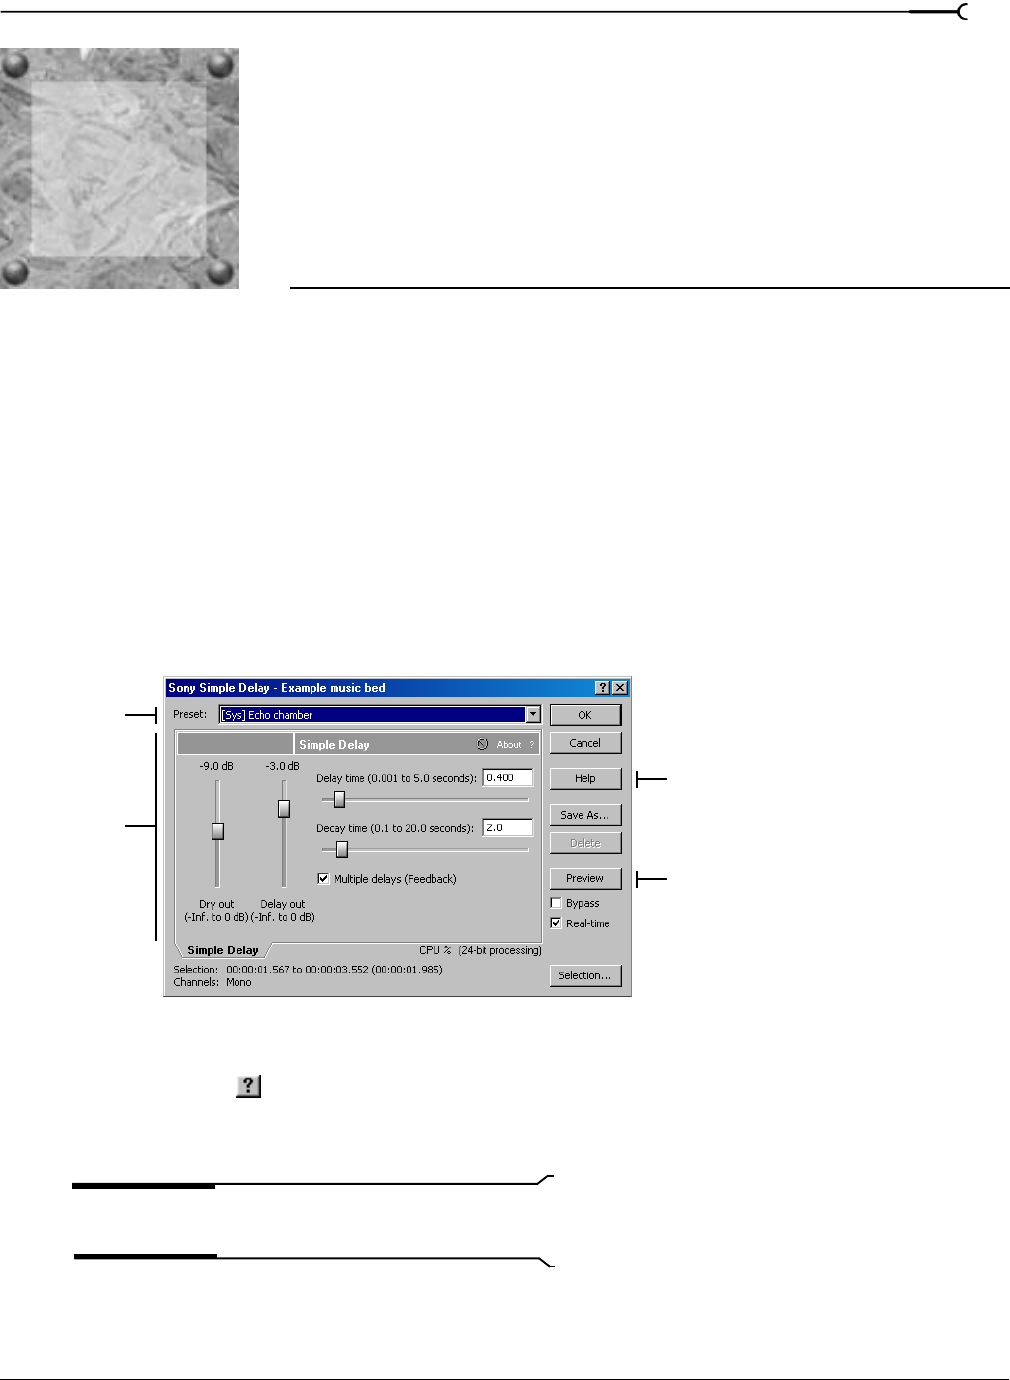
From the Effects menu or DX Favorites menu, choose the desired effect. The dialog for the selected
effect appears.
3.
Select a preset from the Preset drop-down list and adjust the parameters in the dialog to achieve the effect
you want. For help on the different controls in the effect dialog, click the
Help button or click the What’s
This? Help
button ( ) and click a control.
4.
Click the Preview button to test out the effect. Adjust the settings as needed and click Stop to end the
preview.
Tip:
If the selection you made in the data window needs to be
adjusted, click the Selection button to adjust the selection.
5.
Click OK. Sound Forge applies the effect.
Preset
Effect
controls
Preview/Stop
Plug-In
online help
11
