


3-21
Cisco Intrusion Prevention System CLI Sensor Configuration Guide for IPS 7.1
OL-19892-01
Chapter 3 Initializing the Sensor
Advanced Setup
signature-definition newSig
event-action-rules rules0
anomaly-detection
anomaly-detection-name ad0
exit
physical-interfaces PortChannel0/0
exit
exit
service event-action-rules rules0
overrides deny-packet-inline
override-item-status Disabled
risk-rating-range 90-100
exit
exit
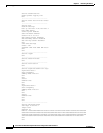
[0] Go to the command prompt without saving this config.
[1] Return back to the setup without saving this config.
[2] Save this configuration and exit setup.
Step 23 Enter 2 to save the configuration.
Enter your selection[2]: 2
Configuration Saved.
Step 24 Reboot the ASA 5500-X IPS SSP.
asa-ips# reset
Warning: Executing this command will stop all applications and reboot the node.
Continue with reset? []:
Step 25 Enter yes to continue the reboot.
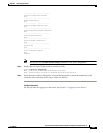
Step 26 After reboot, log in to the sensor, and display the self-signed X.509 certificate (needed by TLS).
asa-ips# show tls fingerprint
MD5: C4:BC:F2:92:C2:E2:4D:EB:92:0F:E4:86:53:6A:C6:01
SHA1: 64:9B:AC:DE:21:62:0C:D3:57:2E:9B:E5:3D:04:8F:A7:FD:CD:6F:27
Step 27 Write down the certificate fingerprints. You need the fingerprints to check the authenticity of the
certificate when using HTTPS to connect to this ASA 5500-X IPS SSP with a web browser.
Step 28 Apply the most recent service pack and signature update. You are now ready to configure the
ASA 5500-X IPS SSP for intrusion prevention.
For More Information
For the procedure for obtaining the most recent IPS software, see Obtaining Cisco IPS Software,
page 21-1.
Advanced Setup for the ASA 5585-X IPS SSP
To continue with advanced setup for the ASA 5585-X IPS SSP, follow these steps:
Step 1 Session in to the ASA 5585-X IPS SSP using an account with administrator privileges.
asa# session 1
Step 2 Enter the setup command. The System Configuration Dialog is displayed. Press Enter or the spacebar
to skip to the menu to access advanced setup.