15-3
Cisco Intrusion Prevention System CLI Sensor Configuration Guide for IPS 7.1
OL-19892-01
Chapter 15 Configuring SNMP
Configuring SNMP
Configuring SNMP General Parameters
To configure SNMP general parameters, follow these steps:
Step 1 Log in to the CLI using an account with administrator privileges.
Step 2 Enter notification submode.
sensor# configure terminal
sensor(config)# service notification
sensor(config-not)#
Step 3 Enable SNMP so that the SNMP management workstation can issue requests to the sensor SNMP agent.
sensor(config-not)# enable-set-get true
Step 4 Specify the SNMP agent parameters. These values configure the community name on the sensor SNMP
agent. A community name is a plain-text password mechanism that is used to weakly authenticate SNMP
queries.
a. Assign the read-only community string. The read-only community name specifies the password for
queries to the SNMP agent.
sensor(config-not)# read-only-community PUBLIC1
b. Assign the read-write community string. The read-write community name specifies the password for
sets to the SNMP agent.
sensor(config-not)# read-write-community PRIVATE1
Note The management workstation sends SNMP requests to the sensor SNMP agent, which
resides on the sensor. If the management workstation issues a request and the community
string does not match what is on the senor, the sensor rejects it.
c. Assign the sensor contact user ID.
sensor(config-not)# system-contact BUSINESS
d. Enter the location of the sensor.
sensor(config-not)# system-location AUSTIN
e. Enter the port of the sensor SNMP agent.
sensor(config-not)# snmp-agent-port 161
Note You must reboot the sensor if you change the port or protocol.
f. Specify the protocol the sensor SNMP agent will use.
sensor(config-not)# snmp-agent-protocol udp
Note You must reboot the sensor if you change the port or protocol.
Step 5 Verify the settings.
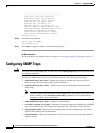
sensor(config-not)# show settings
trap-destinations (min: 0, max: 10, current: 0)


