


3-5
Cisco Intrusion Prevention System CLI Sensor Configuration Guide for IPS 7.1
OL-19892-01
Chapter 3 Initializing the Sensor
Basic Sensor Setup
This includes summary data on the Cisco IPS network traffic properties and how this
traffic was handled by the Cisco appliances. We do not collect the data content of
traffic or other sensitive business or personal information. All data is aggregated and
sent via secure HTTP to the Cisco SensorBase Network servers in periodic intervals. All
data shared with Cisco will be anonymous and treated as strictly confidential.
The table below describes how the data will be used by Cisco.
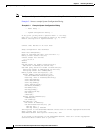
Participation Level = "Partial":
* Type of Data: Protocol Attributes (e.g. TCP max segment size and
options string)
Purpose: Track potential threats and understand threat exposure
* Type of Data: Attack Type (e.g. Signature Fired and Risk Rating)
Purpose: Used to understand current attacks and attack severity
* Type of Data: Connecting IP Address and port
Purpose: Identifies attack source
* Type of Data: Summary IPS performance (CPU utilization memory usage,
inline vs. promiscuous, etc)
Purpose: Tracks product efficacy
Participation Level = "Full" additionally includes:
* Type of Data: Victim IP Address and port
Purpose: Detect threat behavioral patterns
Do you agree to participate in the SensorBase Network?[no]:
Basic Sensor Setup
You can perform basic sensor setup using the setup command, and then finish setting up the sensor using
the CLI, IDM, or IME. To perform basic sensor setup using the setup command, follow these steps:
Step 1 Log in to the sensor using an account with administrator privileges.
Note Both the default username and password are cisco.
Step 2 The first time you log in to the sensor you are prompted to change the default password. Passwords must
be at least eight characters long and be strong, that is, not be a dictionary word. After you change the
password, basic setup begins.
Step 3 Enter the setup command. The System Configuration Dialog is displayed.
Step 4 Specify the hostname. The hostname is a case-sensitive character string up to 64 characters. Numbers,
“_” and “-” are valid, but spaces are not acceptable. The default is sensor.
Step 5 Specify the IP interface. The IP interface is in the form of IP Address/Netmask,Gateway:
X.X.X.X/nn,Y.Y.Y.Y, where X.X.X.X specifies the sensor IP address as a 32-bit address written as 4 octets
separated by periods, nn specifies the number of bits in the netmask, and Y.Y.Y.Y specifies the default
gateway as a 32-bit address written as 4 octets separated by periods.
Step 6 Enter yes to modify the network access list:
a. If you want to delete an entry, enter the number of the entry and press Enter, or press Enter to get
to the Permit line.
b. Enter the IP address and netmask of the network you want to add to the access list.