


4-48
Cisco Intrusion Prevention System CLI Sensor Configuration Guide for IPS 7.1
OL-19892-01
Chapter 4 Setting Up the Sensor
Configuring SSH
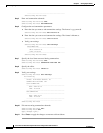
To add a key entry to the SSHv1 or SSHv2 authorized keys list for the current user, follow these steps:
Step 1 Log in to the CLI.
Step 2 Add a key to the authorized keys list for the current user.
Note You recieve an error message if you try to add a key less than the 2048-bit key size and if the
measured key length and input key length do not match.
For SSHv1:
sensor# configure terminal
sensor(config)# ssh authorized-key mhs rsa1-pubkey 512 34 8777777777777
sensor(config)#
For SSHv2:
sensor# configure terminal
sensor(config)# ssh authorized-key phs rsa-pubkey AAAAAAAAAAslkfjslkfjsjfs
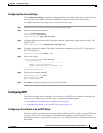
Step 3 Enter yes to add the key to the authorized key list.
Step 4 Verify that the key was added.
sensor(config)# exit
sensor# show ssh authorized-keys
mhs
phs
sensor#
Step 5 View the key for a specific ID.
sensor# show ssh authorized-keys mhs
512 34 8777777777777
sensor#
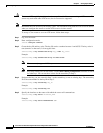
Step 6 Remove an entry from the list of SSH authorized keys.
sensor# configure terminal
sensor(config)# no ssh authorized-key mhs rsa1-key
Step 7 Verify the entry was removed.
sensor(config)# exit
sensor# show ssh authorized-keys
Step 8 If you enter the former ID, you receive an error message.
sensor# show ssh authorized-keys mhs
Error: Requested id does not exist for the current user.
sensor#
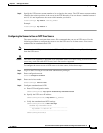
Generating a RSA Server Host Key
The server uses the SSHv1 or SSHv2 host key to prove its identity. Clients know they have contacted the
correct server when they see a known key. The sensor generates an SSHv1 or SSHv2 host key the first
time it starts up.