


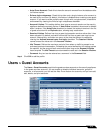
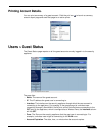


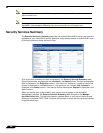

Users > Guest Accounts
682
SonicOS Enhanced 4.0 Administrator Guide
–
Comment: Enter a descriptive comment.
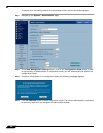
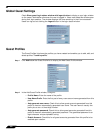
Step 3 In the Guest Services tab, configure:
–
Enable Guest Services Privilege: Check this for the accounts to be enabled upon
creation.
–
Enforce login uniqueness: Check this to allow only one instance of each generated
account to log into the security appliance at one time. Leave it unchecked to allow
multiple users to use this account at once.
–
Automatically prune account upon account expiration: Check this to have the
account removed from the database after its lifetime expires.
–
Account Lifetime: This setting defines how long an account remains on the security
appliance before the account expires. If Auto-Prune is enabled, the account is deleted
when it expires. If the Auto-Prune checkbox is cleared, the account remains in the list
of guest accounts with an Expired status, allowing easy reactivation. This setting
overrides the account lifetime setting in the profile.
–
Session Lifetime: Defines how long a guest login session remains active after it has
been activated. By default, activation occurs the first time a guest user logs into an
account. Alternatively, activation can occur at the time the account is created by
clearing the Activate account upon first login checkbox. The Session Lifetime
cannot exceed the value set in the Account Lifetime.
This setting overrides the
session lifetime setting in the profile.
–
Idle Timeout: Defines the maximum period of time when no traffic is passed on an
activated guest services session. Exceeding the period defined by this setting expires
the session, but the account itself remains active as long as the Account Lifetime
hasn't expired. The Idle Timeout cannot exceed the value set in the Session Lifetime.
This setting overrides the idle timeout setting in the profile.
Step 4 Click OK to generate the accounts.
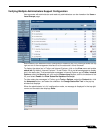
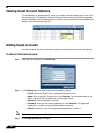
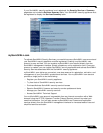
Enabling Guest Accounts
You can enable or disable any number of accounts at one time. To enable one or more guest
accounts:
Step 1 Check the box in the Enable column next to the name of the account you want to enable. Check
the Enable box in the table heading to enable all accounts on the page.
Step 2 Click on Apply in the top right corner of the page.
f
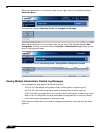
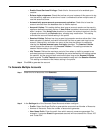
Enabling Auto-prune for Guest Accounts
You can enable or disable auto-prune for any number of accounts at one time. When auto-
prune is enabled, the account is deleted after it expires. To enable auto-prune:
Step 1 Check the box in the Auto-Prune column next to the name of the account. Check the Auto-
Prune box in the table heading to enable it on all accounts on the page.
Step 2 Click on Apply in the top right corner of the page.