Configuring Interfaces
141
SonicOS Enhanced 4.0 Administrator Guide
Transparent Mode
Transparent Mode in SonicOS Enhanced uses interfaces as the top level of the management
hierarchy. Transparent Mode supports unique addressing and interface routing.
Configuring Interfaces
This section is divided into:
• “Configuring the LAN and OPT Interfaces (Static)” on page 141
• “Configuring Advanced Settings for the Interface” on page 142
• “Configuring Interfaces in Transparent Mode” on page 143
• “Configuring Wireless Interfaces” on page 145
• “Configuring a WAN Interface” on page 147
• “Configuring SonicWALL PortShield Interfaces” on page 150
• “Creating a WLAN Subnet” section on page 157
Configuring the LAN and OPT Interfaces (Static)
Static means you assign a fixed IP address to the interface.
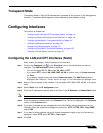
Step 1 Click on the Configure icon in the Configure column for the Interface you want to
configure. The Edit Interface window is displayed.
• You can configure F0, F1, X0 through X9, LAN, or OPT.
• If you select OPT, select LAN, WAN, DMZ, WLAN, a custom zone, or Create new zone
for Zone.
• If you want to create a new zone, select Create new zone. The Add Zone window is
displayed. See
“Network > Zones” section on page 191 for instructions on adding a zone.
Step 2 Select a Zone to assign to the interface. You can select LAN, WAN, DMZ, WLAN, or a custom
zone.
Step 3 Select Static from the IP Assignment menu.
Step 4 Enter the IP address and subnet mask of the Zone in the IP Address and Subnet Mask fields.
Note You cannot enter an IP address that is in the same subnet as another zone.
Step 5 Enter any optional comment text in the Comment field. This text is displayed in the Comment
column of the Interface table.
Step 6 If you want to enable remote management of the SonicWALL security appliance from this
interface, select the supported management protocol(s): HTTP, HTTPS, SSH, Ping, SNMP,
and/or SSH.
Step 7 If you want to allow selected users with limited management rights to log in to the security
appliance, select HTTP and/or HTTPS in User Login.
Step 8 Click OK.


