WEBVISION™
95-7769—01 6
To edit a schedule:
1. Click the Schedule tab. A list of schedules appears.
2. Click the schedule that you want to edit by clicking the
corresponding link in the Schedule Name column.
3. Follow the steps described in the above sections and
make the required changes.
Assign Devices
You can select a number of devices and assign them to a
current configuring schedule. You can change the settings as
and when required.
To assign devices:
1. Click the Schedule tab. The Schedule page appears.
2. Go to Add Schedule. The Add Schedule page
appears.
3. Type a unique name for the schedule.
4. Click Assign Devices. The Assign Devices page
appears.
5. Check the devices from the Device Name list that you
want to assign to the current schedule.
All the devices that are already assigned to schedules
are listed in the Currently Assigned Schedule column.
If a device is already assigned to a schedule,
WebVision un-assigns the device from the earlier
schedule and assigns it to the current schedule.
6. Click Finish to save the settings.
NOTE: To abort the action, click Cancel.
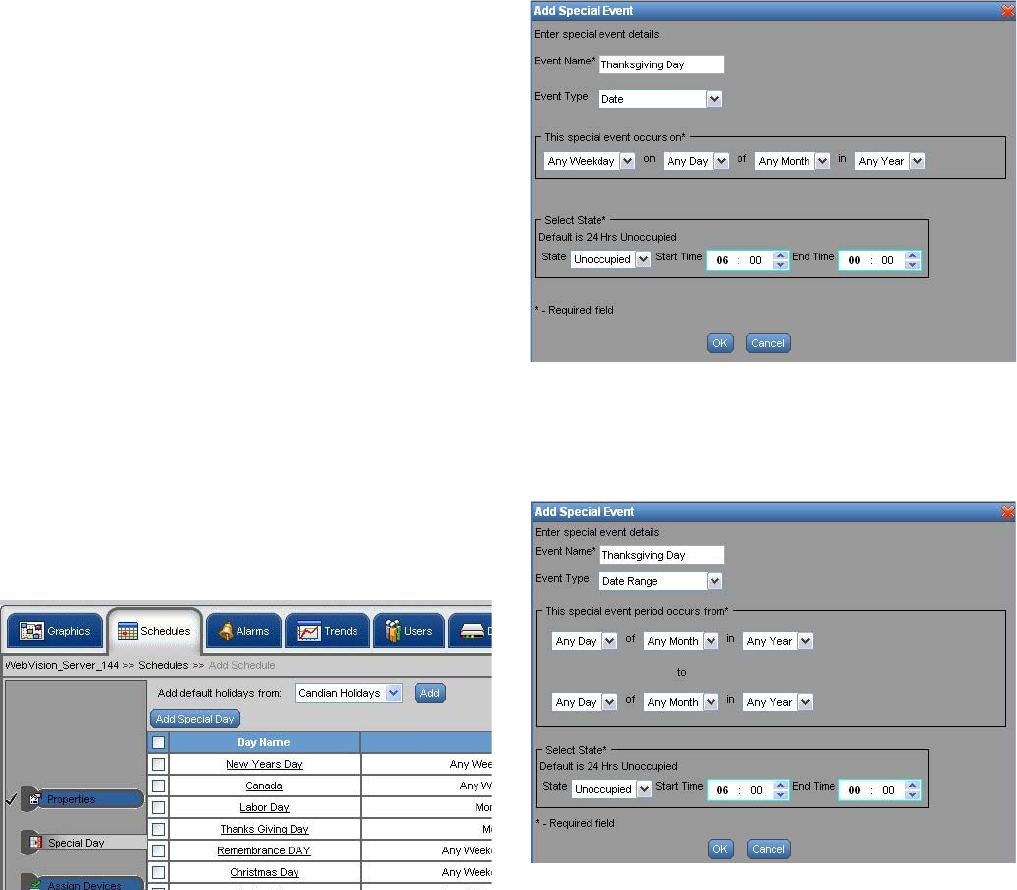
Define Special Event
Holiday schedules and schedules for special events differ
from the normal days. You can define schedules for special
events using WebVision.
NOTE: You can define any number of special events in a
schedule.
To define a schedule for special events:
1. Click Special Event on the Properties page. The
Special Event page appears.
Fig. 11. Schedule Properties page - Special Event.
All the special events along with a summary appear in a
tabular format.
2. Click Add Special Event, to add new special events to
the list. The Add Special Event dialog box appears.
3. Enter/select the following information:
• Event Name – Name of the special event.
Example: Thanksgiving Day.
• Event Type – You can define the type of day using
the three options given: Date, Date Range, and
Week and Day. Depending on the selected criteria,
you get the following output:
Date – If you select Date, specify the day, date,
month, and year.
Fig. 12. Add Special Event dialog box.
Date Range – If you select Date Range, specify the date
range, month, and year (Fig. 13).
Fig. 13. Add Special Event dialog box - Date Range.


