


WEBVISION™
95-7769—01 28
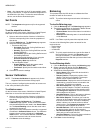
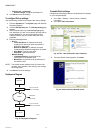
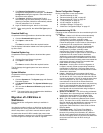
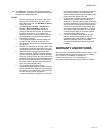
10. Type the user name and password and click Next.
The same credentials are used while enabling dial in
settings in WebVision.
Fig. 41. Internet Account Information - User Name and
Password.
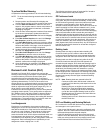
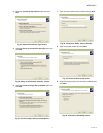
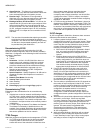
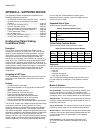
11. Click Finish to complete the connection.
Fig. 42. Completing the New Connection Wizard screen.
To configure E-mail setup:
Complete the following procedure to configure the e-mail
setup details:
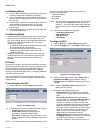
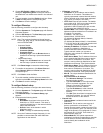
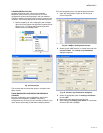
1. Click the Systems tab. The System page with General
Properties appears.
2. Click the Email Setup tab. The Email Setup page
appears.
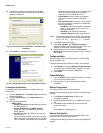
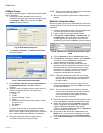
3. Enter the following details:
• SMTP Server
• Enable Email Service: Check this box to enable
the SMTP protocol.
• Use Sever WebVision as SMTP gateway:
Check this box to use WebVision server as
SMTP gateway.
• Email Server: Enter the SMTP e-mail server to
use this service.
You must configure SMTP e-mail server to send
alarm notifications. The Internet Service Provider
(ISP) or Network Administrator has to provide the
server and domain names prior to configuring the
SMTP E-mail server option. An example to
maintain the format: SMTP.server.com.
• Email Address: Enter a valid e-mail address.
The account must be present in the SMTP
server.
• User Authentication: Check this box to provide
the user credentials. On selection it enables the
following parameters.
• User Name: Type the user name of the SMTP
server. Type any name of your choice. For
example, webvision1.
• Password: Type the SMTP password.
• Confirm Password: Retype your password.
NOTE: The password field cannot be empty. The maximum
number of characters is 50. The characters allowed
are: a-z, A-Z, 0-9, _, !, @, #, $, %, ^, *, -, |, SPACE.
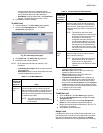
4. Click Save to save the settings.
5. Click Send Test Mail. The Email Service Status
displays the status. A test message is sent to the e-mail
address. A confirmation message appears.
6. If the settings are incorrect then, the Last Failure
Message field displays the reason for failing in sending
the message.
Configuring Admin
These files have .dist as the file extension. You can upload
files up to 5MB in size.
Complete the following procedure to install a new package:
1. Click Browse to upload the Software Update Package.
This allows you to install software updates, if any, that
are published by Honeywell for WebVision.
2. Click Install.
Reboot WebVision
1. Click the Reboot button to reboot WebVision. This logs
you out and then initiates reboot.
2. Re-logon after 5 to 10 minutes after the reboot is
completed.
Backup Configuration
The backup file has .dist as the file extension.
Complete the following procedure to backup the configuration
settings:
1. Click Backup Configuration to backup the
configuration settings.
2. A window appears prompting you to Save the backup
file.
3. Click Save to save the backup file and specify the
location for the file.
or
Click Cancel to close the pop-up.
Restore Configuration
You can restore the backed up files using this feature. The
backup file has .dist as the file extension.
Complete the following procedure to restore the configuration
settings: