WEBVISION™
95-7769—01 12
Trend Setup and Use
TIP: You can enable or disable trends from the Trends Setup
screen.
To setup a trend:
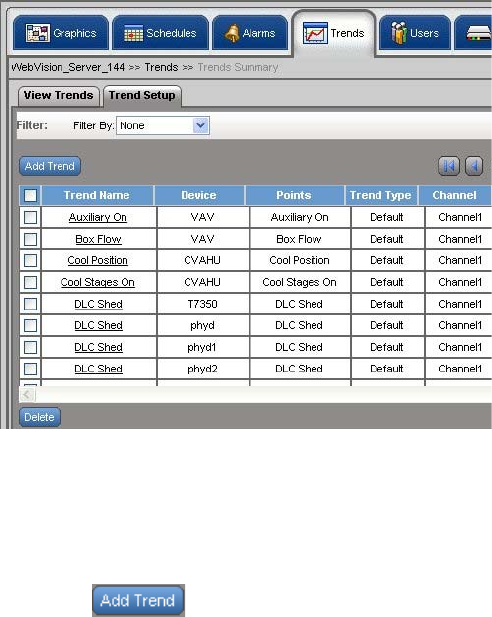
1. Click the Trends tab. The View Trends page appears.
2. Click the Trend Setup tab. The Trend Setup page
appears.
Fig. 20. Trend Setup tab.
To add a new trend:
1. Click the Trends tab. The View Trends page appears.
2. Click the Trend Setup tab. The Trend Setup page
appears.
3. Click . The Add New Trend page appears.
4. Enter/select the following details:
NOTE: All the fields in this section are mandatory.
• Trend Name – The unique name for the trend.
• Select Point – Click Select Point. Select a Channel,
Device, and Point. Click OK. The selected values
appear in the respective fields.
NOTE: Start time must be less than the end time.
• Start Time – The start time of the sampling period.
Click to select the date, month, and year
• End Time – Check Enable End Time to enable the
end time field. The end time of the sampling period.
Click to select the date, month, and year.
• Trend Type – Indicates the type of trend.
• Periodic Sampling – Indicates the time interval
between two successive read operations on the
point. Select Periodic Sampling option and in the
Sampling Interval list, select the desired time
interval.
The sampling interval time can range from a few
seconds to a few minutes. The range covered is:
• 15 seconds
• 30 seconds
• 60 seconds (1 minute)
• 900 seconds (15 minutes)
• 1800 seconds (30 minutes)
• 2700 seconds (45 minutes)
• 3600 seconds (60 minutes)
• Change of Value – Indicates that the next sample
is collected when the point value changes. This
results in less number of samples getting collected
for plotting the same trend as compared to Periodic
Sampling. Change Tolerance is required only for
numeric points. Select a numeric point from the
Select Point option and type a tolerance value after
which the data logging begins.
• Trend Limit – Roll Over is the default selection.
This option trends the point forever.
• Roll Over – Indicates that the readings of
sampling are generated continuously. When the
sample limit is reached, the oldest sample is
replaced with the next sample and trending
continues in that fashion.
• Stop when full – Indicates that the trend
sampling is stopped after it reaches the set limit.
• Max number of Samples – The maximum
number of samples. Select the number of
samples to be generated from the list.
NOTE: WebVision uses the polling mechanism to read point
values at regular interval. It may take up to 30
seconds to detect a point value. If the point value
changes at a higher frequency than 30 seconds,
WebVision may not be able to detect the changes.
5. Click Save to save the settings.
NOTE: Click Cancel to clear the fields.
To edit trends:
1. Click the Trends Setup tab. The View Trends page
appears.
2. Select a Trend from the Trends list. The details of the
selected Trend appear.
3. Modify the required fields as described in step 4 of “To
add a new trend:”.
4. Click Save to save the settings.
NOTE: Click Cancel to cancel the settings.
To delete a trend:
1. Click the Trends tab. The View Trends page appears.
2. Go to Trends Setup. Select the trend that you want to
delete from the Trends listed on the left corner of the
screen.
3. Click Delete. A confirmation message appears.
4. Click OK to confirm the deletion.
NOTE: Click Cancel to cancel the deletion.
TIP: To delete all the trends simultaneously, select the check
box in the column header and click Delete Trend.


