WEBVISION™
95-7769—01 4
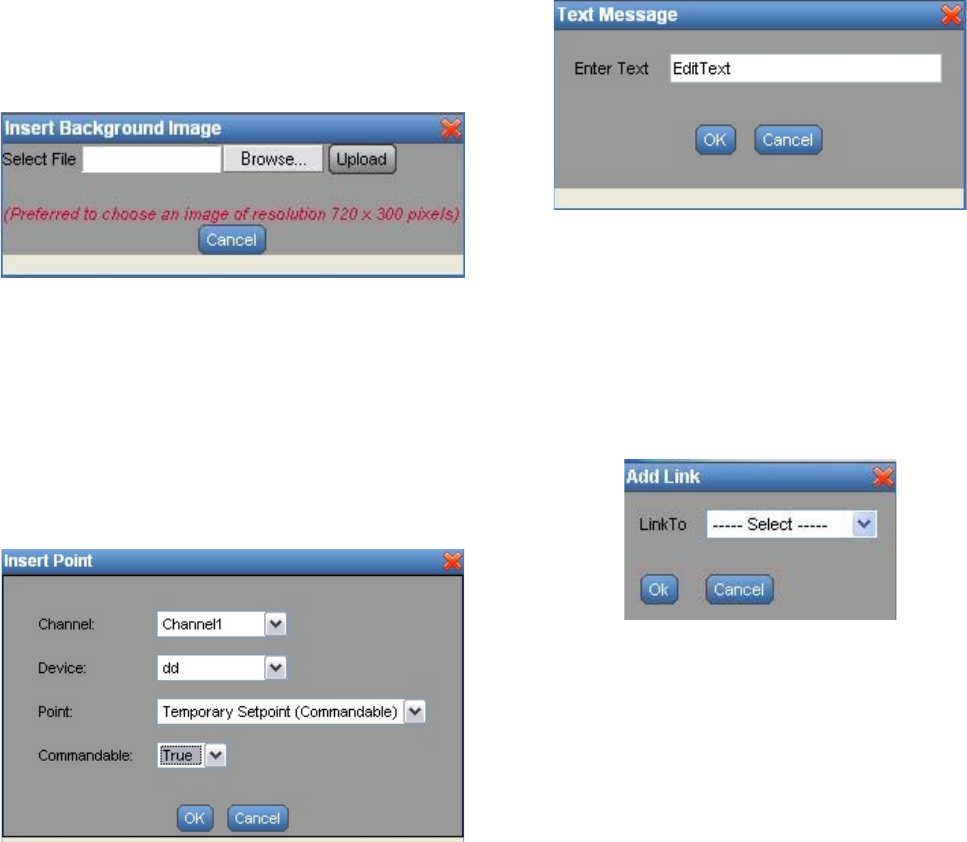
To insert a background image:
NOTE: The supported background image formats include:
jpg, jpeg, and gif.
The size of the image file must not exceed 1MB.
1. Click the Insert Background Image button. The Insert
Background Image dialog box appears.
Fig. 5. Insert Background Image dialog box.
2. Browse and select an image that you want to use as
background image.
3. Click Upload to insert the image.
NOTE: To abort the action, click Cancel.
To insert a point:
1. Click the Insert Point button. The Insert Point dialog
box appears.
Fig. 6. Insert Point dialog box.
2. Select the Channel, Device, and Point that you want to
add to the graphic from the corresponding drop-down
lists.
3. Click OK. The Point properties are displayed in the
background image.
NOTE: To abort the action, click Cancel.
To insert text:
1. Click the Insert Text button. A Text Message box
appears.
Fig. 7. Text Message Box.
2. Type the required text in the Edit Text field.
3. Click Save to reflect the changes in the image.
NOTE: To abort the action, click Cancel.
To insert an external link:
1. Click the Insert External Link button. The Add Link
dialog box appears.
Fig. 8. Add Link dialog box.
2. Select a link from the Link To drop-down list. You can
select from Device Graphics, Locations Graphics, or an
External URL.
3. If you select the Device Graphics option, the Insert
Device dialog box appears. Select a Channel and
Device and click OK.
4. If you select the Locations Graphics option, the Add
Link dialog box appears. Check the locations that you
want to add as link and click OK.
5. If you select the External URL option, the Insert
External Link dialog box appears. Type the Display
name for the url and type the url in the URL field.
6. Click OK to view the URL in the image.
NOTE: To abort the action, click Cancel.
NOTE: A maximum of fifty links can be inserted in a graphic
in WebVision.


