WEBVISION™
95-7769—01 10
To replicate an alarm:
1. Click the Alarms tab. The View Alarms page appears.
2. Click the Alarm Setup tab on the View Alarms page.
The Alarm Setup page appears.
3. Click corresponding to the alarm that you want to
replicate. The Replicate Alarm dialog box appears.
4. Type the alarm name in the Alarm Name text box.
5. Select an alarm and device that you want to replicate
from the Replicate Alarm and Device drop-down list.
6. Choose a prefix or suffix to name the replicated copy of
the alarm. Select the Prefix with or Suffix with option as
required.
7. Type a label name for the alarm in the Label text box.
8. Click Replicate to confirm the replication.
NOTE: Click Cancel to cancel the replication.
To setup alarm E-Mail notification:
1. Click the Alarms tab. The View Alarms page appears.
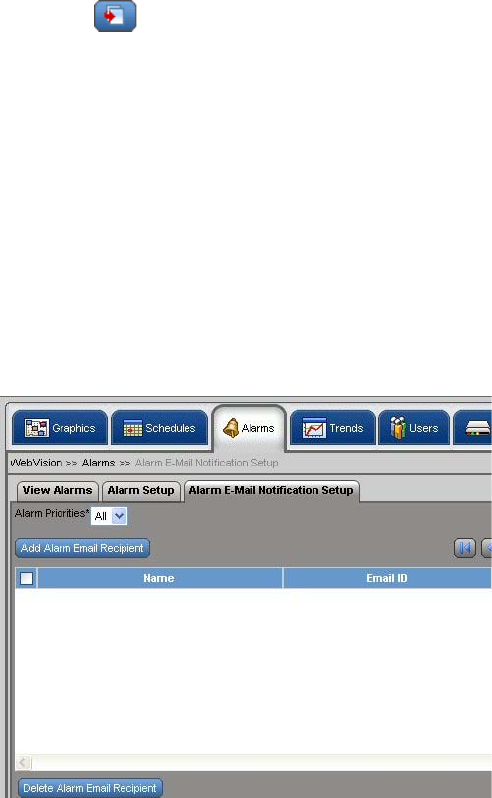
2. Click the Alarm E-Mail Notification Setup tab on the
View Alarms page.
Fig. 18. Alarm E-Mail Notification Setup Tab.
3. The Alarm E-Mail Notification Setup page appears
with the following information in the tabular format:
TIP: Select the check box in the header row to select all the
listed alarms e-mail recipients.
• Name – Lists names of the users who will receive
the alarm E-Mail notification.
• E-Mail ID – Lists the E-Mail IDs of the
corresponding users.
• Recipient Type – Lists the type of user.
• Associated Alarm Priorities – Lists the alarm
priorities associated to the corresponding user if the
user is external. Alarm priorities range from 1 to 10.
1 being the lowest priority level and 10 being the
highest priority level. Check Select All to select all
the alarm priorities.
Add, Edit, or Delete Alarm E-Mail Recipient
To add an alarm E-Mail recipient's details:
1. Click the Alarms tab. The View Alarms page appears.
2. Click the Alarm E-Mail Notification Setup tab on the
View Alarms page. The Alarm E-Mail Notification
Setup page appears.
3. Click Add Alarm E-Mail Recipient. The Add Alarm
E-Mail Recipient page appears.
4. Select the recipient type using the Select Recipient
Type drop-down list.
• For an External recipient, enter:
• Recipient Name – Name of the recipient.
• Recipient E-Mail ID – E-Mail ID of the recipient.
• For an Internal recipient, enter:
• Select User – Select the type of the user using
the drop-down list.
5. Select the alarm priorities that must be informed to the
recipient. Check the Select All check box to select all
the alarm priorities.
6. Click Save to add a new recipient.
NOTE: Click Cancel to abort the action.
To edit an alarm E-Mail recipient's details:
1. Click the Alarms tab. The View Alarms page appears.
2. Click the alarm name that you want to edit. The Alarm
Setup page of the selected alarm appears.
3. Edit the fields as explained in step 3 of “To add an alarm
E-Mail recipient's details:”.
4. Click Save to save the changes.
NOTE: Click Cancel to abort the action.
NOTE: The alarm priority information for internal user is
available in the user account configuration page.
To delete an alarm E-Mail notification recipient:
1. Click the Alarms tab. The View Alarms page appears.
2. Click Alarm E-Mail Notification Setup. The Alarm E-
Mail Notification Setup page appears.
3. Select a user from the Name list that you want to delete.
4. Click Delete to delete the selected recipient.
TIP: To delete all recipients at once, check the All check box
in the header and click Delete.
Trends
Trends depict the values of points over time in a graphical
format. Use the Trends tab to view trends for the selected
points over a period ranging from a day to a year.
You can store a maximum of 1000 samples per trend. By
default you can store 500 samples per trend. Once you cross
the limit, the oldest sample is overwritten and rolled over
based on trend configuration. Five trends can be plotted
simultaneously. For example, outside air temperature and
space temperature plotted for a period of one month.
A trend point can be a data point from any supported
L
ONWORKS network device. A data point can be used in
multiple trend configuration. There are few default sample


