WEBVISION™
23 95-7769—01
seconds and at the end of a staging interval,
compares the power consumption with that of the
active demand setpoint and the dead band.
• Dead Band: Enter the dead band in the Dead Band
text box. The dead band peak value is 1000.
5. Click Save to save the settings.
To add a Load:
1. Click the DLC tab. The DLC Status page appears.
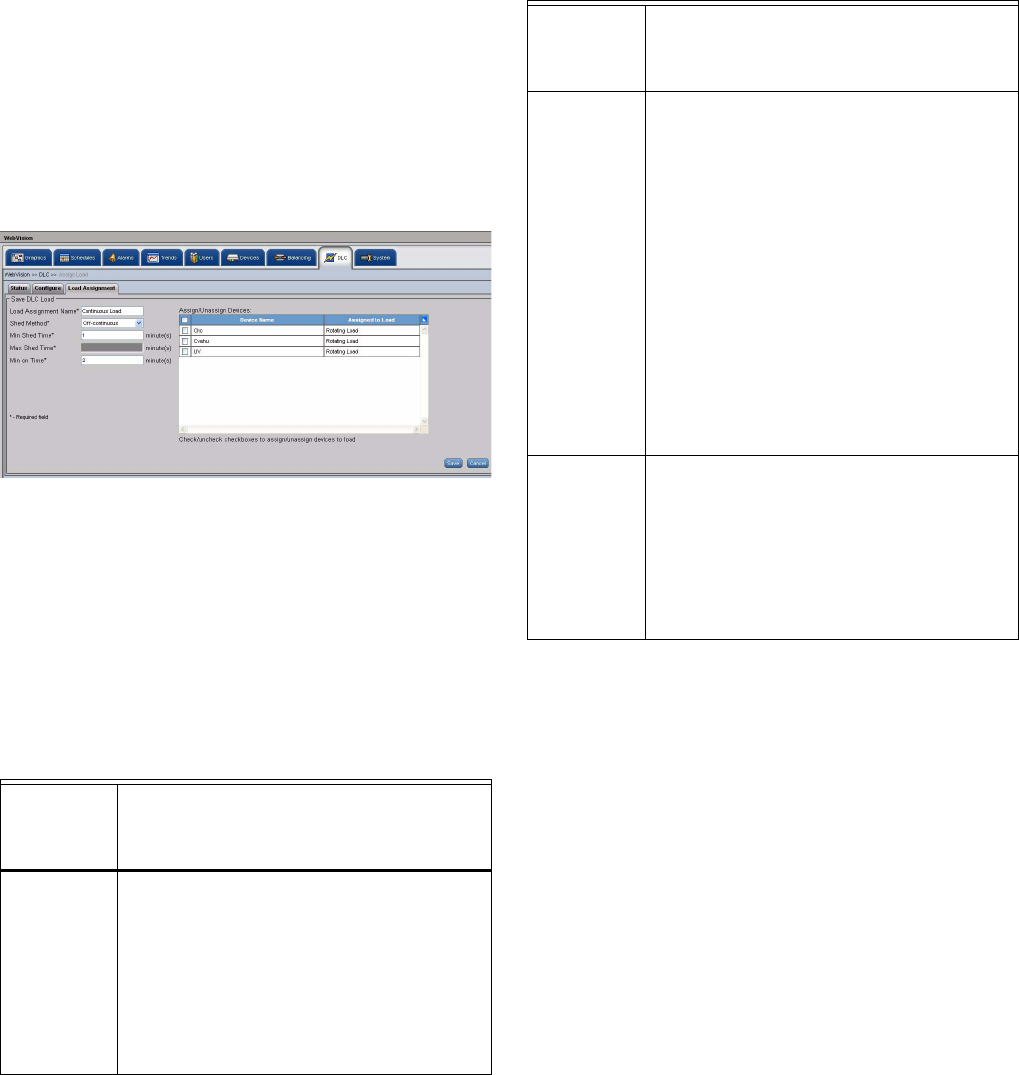
2. Click the Load Assignment tab. The Load
Assignment page appears.
Fig. 29. Load Assignment page.
3. Click Add Load. The Add Load page appears.
4. Enter/Select the following details:
NOTE: All the fields marked with and asterisk (*) are
mandatory.
• Load Assignment Name: Enter a unique name for
load assignment.
• Shed Method: Select a load shed method from the
Load Shed Method drop-down list.
• Min Shed Time: Enter a valid value within the
specified 0-99 minutes range.
• Max Shed Time: Enter a valid value within the
specified 0-99 minutes range.
• Min On Time: Enter a valid value within the
specified 0-99 minutes range.
• Assign/Unassign Devices: After configuring a
load, you can assign it to an external load object,
which in turn controls the electrical loads. All the
devices with the Device Name and their Assigned
Load (the name of the load that is assigned to that
device) are listed. Check the devices that you want
to assign to the current load.
5. Click Save to save the settings.
To edit the Load:
1. Click the DLC tab. The DLC Status page appears.
2. Click the Load Assignment tab to display the Load
Assignment page.
3. Select the load to edit from the Load Assignment
Name list and the selected load's details appear.
4. Modify the required fields as described in step 4 of “To
add a Load:” on page 23.
5. Click Save to save the settings.
Assign Load
It displays the status of an individual load assignment or all
load assignments. If the DLC load configuration is modified,
then the load assignment status is displayed as Normal.
WebVision restores all the load assignments immediately by
Table 4. Load Shed Methods.
If you have
selected the
Load Shed
Method as… Then…
OFF
Continuous
Load
In the Minimum Shed Time box, enter the
minimum length of time a load must be off
after it is shed by the DLC. In the Minimum On
Time box, enter the minimum length of time
the load must be active before it can be shed
or restored by the DLC.
NOTE: The valid range for the minimum
shed time and minimum on time is 0
to 99 minutes.
Rotating
Load
In the Minimum Shed Time box, enter the
minimum length of time a load must be off
after it is shed by the DLC. In the Maximum
Shed Time box, enter the maximum time a
load that is shed by the DLC, must remain off
or inactive.
NOTE: The maximum shed time must
always be greater than the minimum
shed time. A load cannot be in the
shed state for more than the
configured maximum shed time. It
can be restored after the minimum
shed time has elapsed (lesser than
the setpoint minus the dead band).
In the Minimum On Time box, enter
the minimum time that the load must
be active ('On').
Last
Resort
Load
In the Minimum Shed Time box, enter the
minimum length of time a load must be off
after it is shed by the DLC.
NOTE: The maximum shed time for a Last
Resort load is twice its minimum
shed time and is displayed as
disabled text in the Maximum Shed
Time box.
Table 4. (Continued)Load Shed Methods.
If you have
selected the
Load Shed
Method as… Then…
