8. Getting started
Image 8-59
Transferring control to navigation buttons on the eRACU hand held unit
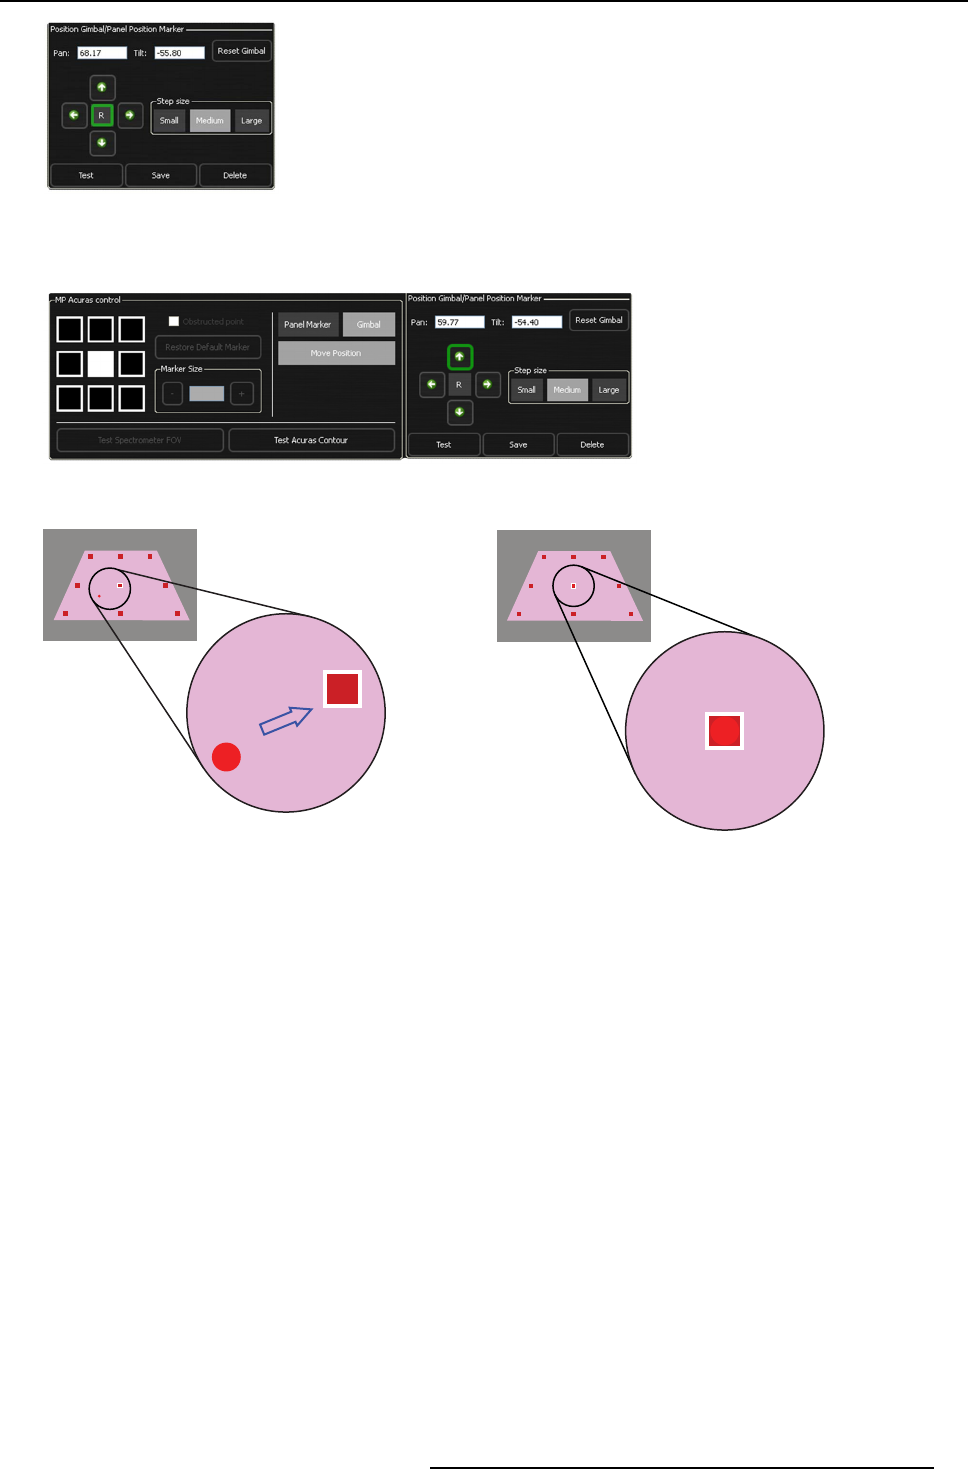
5. Use the Gimbal control arrows to direct the laser beam to the center of the selected red square on the projected image.
Image 8-60
Gimbal control arrows
A
Image 8-61
A Laser beam: at a random position
B
Image 8-62
B Laser beam: at the center of the red square
Note: Use the S tep size buttons to increase or decrease the adjustment steps of the Gimbal.
6. Press the button Move Position again to store the Gimbal orientation (pan and tilt) along with the Panel Marker position.
R59770509 AUTOALIGNMENT HEAD GEN II 26/11/2013
73


