8. Getting started
Note: ThelineonwhichPanel Marker 1–3 can be moved is indicated o n the image by a dashed line, partly yellow and partly
green (not visible on the projected image). Moving the Panel Marker to the yellow zone results in a higher rate of
interpolation while performing the automa tic br ightness and color measurement. This can affect the u niformity o f the
color/brightness alignment.
4. Press the button M ove Position again to automatically save the corrected Pan el Marker 1–3 position.
A green check mark appearing in front of Panel Marker 1–3 indicates that the default position of this Panel Marker has been
changed and saved.
5. Repeat this procedure for Panel Marker 2–4, if desired.
8.6.2.2.3 Defining the Gimba l positions
Gimbal position
An orientation (pan and tilt) of the Gimbal of the AutoAlignment Head. A Gimbal Marker links the spectrometer
on-screen measurement to the according Panel Marker: its definition ensures that the spectrometer measures at the
location indicated by its Panel Marker.
Introduction
In this procedure, we are going to point the laser dot to the center of each Panel Marker in turn. When pressing the Gimbal button
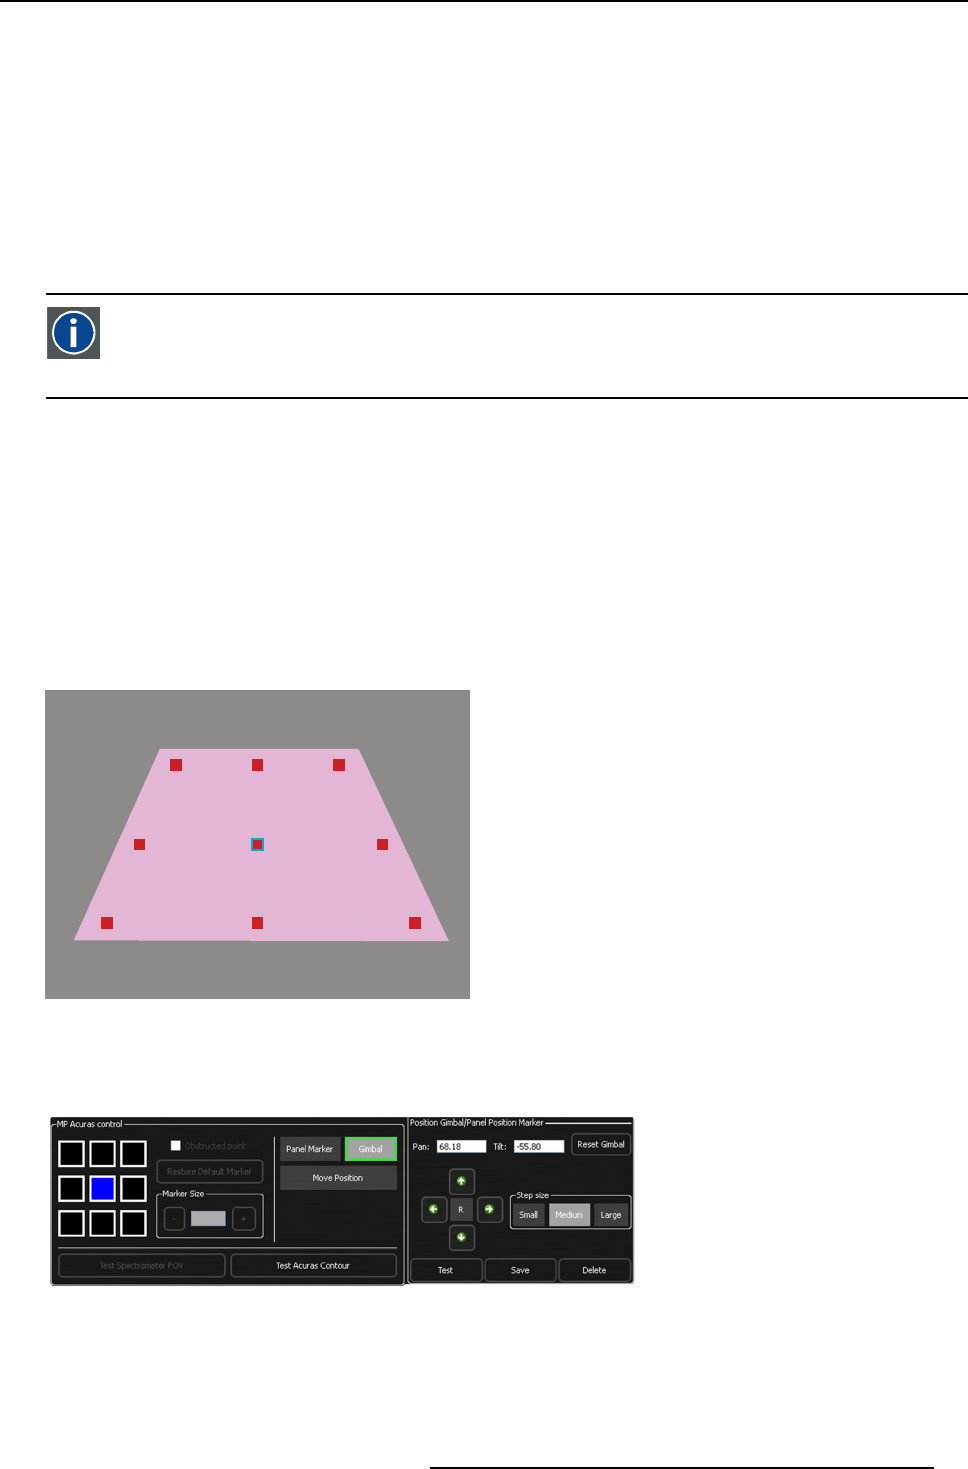
in the MP Acuras c ontrol section, nine (or seven) red squares appear, each one at the center of a Panel Marker.
• a small red square on the projected image indicates a Panel Marker for which no Gimbal position is available
• a small green square on the projected image and a green check mark in the GUI indicate a Panel Marker for which a Gimbal
position is available
• a focused Gimbal position is indicated by the small square having a blue outline on the projected image and a blue background
on the GUI: this Gimbal position can be selected to be defined or the Gimbal arrows can be used to jump to another Gimbal
position
• a selected Gimbal position is indicated by the small square having a white outline on the projected image and a white back-
ground on the GUI: the Gimbal control arrows can be used to move the laser dot to this position
Visible image area
Image 8-53
Gimbal points: Gimbal Center is focused
How to define the G imbal positions?
1. Press the Gimbal button in the section MP A curas control of the GUI.
Image 8-54
Gimbal center is focused
By default the Gimbal Center is focused.
2. Optionally, set the focus on another Gimbal position in one of the following ways:
R59770509 AUTOALIGNMENT HEAD GEN II 26/11/2013
71


