


181
Arranging Embroidery Designs (Layout & Editing)
4. Click OK.
c
“Displaying a preview of the embroidery”
on page 172
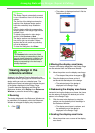
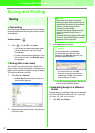
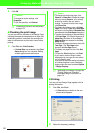
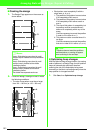
■ Checking the print image
You can preview the contents of the Design Page,
including the separate hoop sections of large-size
embroidery patterns, and check the sewing color
order, the dimensions and the stitch count before
printing.
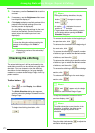
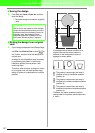
1. Click File, then Print Preview.
→ If Actual Size was selected in the Print
Setup dialog box, the Layout & Editing
window appears as shown below.
c
“Specifying print settings” on page 180,
“Printing” below and “Checking
embroidery design information” on
page 174
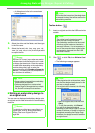
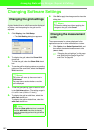
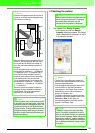
■ Printing
You can print the Design Page together with its
sewing information.
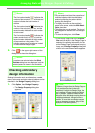
1. Click File, then Print.
→ A Print dialog box similar to the one
shown below appears.
2. Select the necessary settings.
b Memo:
• To change the printer settings, click
Properties
.
• To quit the operation, click
Cancel
.
b Memo:
• To enlarge and reduce the page, click
Zoom In
or
Zoom Out
. Enlarge the image
either by clicking
Zoom In
, or by clicking
directly the location that you want to
enlarge. To reduce the size of the image,
click
Zoom Out
.
• To display the following page, click
Next
Page
. (For Design Pages set to
Hoop Size
,
this button is not available if
Reduced Size
was selected in the
Print Setup
dialog box.)
• To go back to the display of the embroidery,
click
Prev Page
. (For Design Pages set to
Hoop Size
, this button is not available if
Reduced Size
was selected in the
Print
Setup
dialog.)
• To display two pages at the same time, click
Two Page
. (The
Two Page
button
becomes the
One Page
button.)
• To display one page at a time, click
One
Page
.
• To open the
Print
dialog box, click
Print
.
• If you need to view an image in detail,
displaying only one page at a time allows
you to enlarge it more.
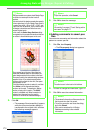
If you want to check the sewing information
for individual objects in your embroidery
design, select the menu command
Option
– Design Property
.