


126
Arranging Embroidery Designs (Layout & Editing)
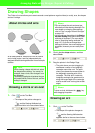
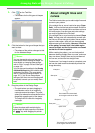
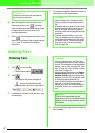
Another possibility is to load a template image and
redraw it using manual punching patterns. The
advantage of this method is that you have a better
control on the thread orientation.
1. Open a template or prepare an image that you
will use as a guide. (For more details, refer to
“Importing Image Data” on page 76.)
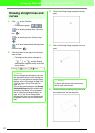
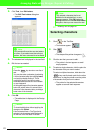
2. Click on the Tool Box.
→ Five buttons appear:
is for creating straight block-type
punching patterns. (Shortcut key: )
is for creating curved block-type
punching patterns. (Shortcut key: )
is for semi-automatically creating block-
type punching patterns. (Shortcut key: )
is for creating running-type punching
patterns (the broken line is sewn). (Shortcut
key: )
is for creating feed-type punching
patterns (the broken line is not sewn).
(Shortcut key: )
While creating a manual punching pattern,
you can alternate between the various types.
For example, you can start with a straight
block-type pattern, then switch to a running-
type pattern (to draw an outline of the block-
type pattern), then switch to the feed type to
move to the beginning of the next block-type
pattern. The whole pattern, consisting of
different types of punching patterns, will be
considered a single pattern (all parts will have
the same sew type and color).
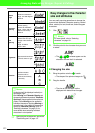
In this example, we start with a straight block-
type pattern, use the feed-type pattern to
move the pointer, and then create a running-
type pattern.
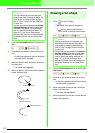
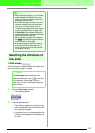
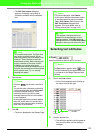
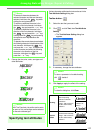
3. Click to start creating a straight block-
type pattern.
→ The shape of the pointer changes to
, and the Sewing Attributes bar
appears similar to the one shown below.
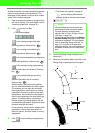
4. Click in the Design Page to specify point 1
(start point).
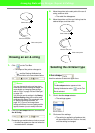
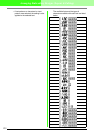
5. Refer to the illustration below, and click in the
Design Page to specify points 2 through 8.
!!btn59.bmp!!
Z
X
C
V
B
b Memo:
• You can change the color and sew type
either before or after creating the pattern.
For more details on changing these
settings, refer to “Color” on page 149 and
“Sew type” on page 150.
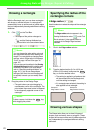
• You can also use the settings in the
Sewing
Attribute Setting
dialog box to define other
attributes of the pattern. (For more details,
refer to “Specifying sewing attributes” on
page 151.) If you do not change these
settings at this time, the current settings will
be applied, however you can modify them
later.
1
2
3
4
5
6
7
8
9
10
11
12
13
1
2
3
4
5
6
7
8
9
10
11
12
13
Run pitch