Pelco Manual C501M-B (10/97) 5-27
5.5.2.5 Programming Presets
The CM8500 system has the capability to program re-
ceivers equipped to accept preset positions. In addition,
when programming Spectra™ or Intercept
®
series re-
ceivers, the user has the added benefit of defining a
label for each preset position. The label will appear in
the upper right corner of the monitor screen. The amount
of available presets depends on the receiver. Refer to
the corresponding receiver documentation for additional
information on preset positions. To define preset posi-
tions, refer to the following procedure:
1. Call up the camera to be programmed by pressing
the corresponding digits on the numeric keypad
and pressing the [CAM] key. The camera should
now be selected and the camera number should be
displayed in lower left corner of the monitor.
NOTE: The keyboard must be able to control
the camera. If the keyboard has control an as-
terisk will be displayed next to the camera num-
ber. If no asterisk is present, refer to Section
5.5.2.9, Programming User Profiles, for addi-
tional information.
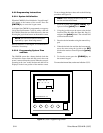
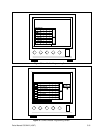
2. From the CAM menu, [js to Preset], high-
light and release the [point] button. At this time
a “Set Presets” prompt should appear at the bot-
tom of the screen.
3. Using the joystick, move the camera to the desired
preset location.
4. Enter the desired preset number using the numeric
keypad and press the [PRESET] key located on
the keypad.
5. If the receiver being programmed is a Spectra™
or Intercept
®
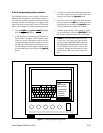
receiver, the on-screen keypad will
appear on the monitor screen at this time. Using
the joystick, enter a 20-character alphanumeric de-
scription.
6. Repeat steps 3, 4 and 5 for each preset to be added
for the selected camera. To enter a preset for a dif-
ferent camera, it will be necessary to first call up
the desired camera prior to defining the preset po-
sitions. Once called up, repeat steps 3, 4 and 5.
7. When finished entering preset positions, press the
[CLEAR] key to return to the “run” mode.
5.5.2.6 Programming Patterns
The CM8500 system can program receivers to scan a
specific pattern, as defined by the needs of the user.
This option is available only with Spectra™ and Inter-
cept
®
series receivers. Each receiver is capable of stor-
ing one pattern with 60 seconds of scanning time. For
more information regarding patterns, refer to the cor-
responding receiver documentation.
NOTE: When programming a pattern, if the
pattern utilizes the full 60-second time allot-
ment, when that pattern is selected to run it will
only scan once and stop. The camera will then
be positioned at the end of the scan pattern. If,
however, the pattern is programmed for less
than 60 seconds, when the pattern is selected it
will run continuously until manually stopped.
To program a pattern using the CM8500 system, refer
to the following procedure.
1. Call up the camera to be programmed by pressing
the corresponding digits on the numeric keypad
and pressing the [CAM] key. The camera should
now be selected and the camera number should be
displayed in lower left corner of the monitor.
NOTE: The keyboard must be able to control
the camera. If the keyboard has control an as-
terisk will be displayed next to the camera num-
ber. If no asterisk is present, refer to Section
5.5.2.9, Programming User Profiles, for addi-
tional information.
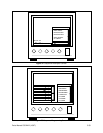
2. From the CAM menu, [js to Pattern], high-
light and release the [point] button. At this time
a “Set Pattern Start” prompt should appear at the
bottom of the screen.
3. Using the joystick, move the camera to the desired
pattern start location.
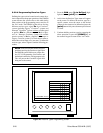
4. Press the [PATTERN] key on the keyboard to
initiate the start of the pattern programming. At
this time the prompt should change to “Set Pattern
Stop” and a “Programming Pattern” prompt should
appear at the top of the monitor screen.
5. Using the joystick, move the camera in the desired
pattern. When the pattern is complete, press the
[PATTERN] key. This stores the desired pattern
in the receiver.


