


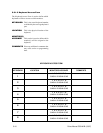
5-24 Pelco Manual C501M-B (10/97)
5.5.2 Programming Instructions
5.5.2.1 System Initialization
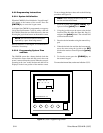
When the CM8500 is first initialized a “Logon Prompt”
will appear at the bottom of the screen. Press the
[ENTER] key to access the Logon screen.
As shipped, the CM8500 is programmed to accept any
2-digit user field between 1 and 16, with a valid user
ID of 99999. Enter the user field followed by the user
ID using the joystick and cursor on the monitor screen.
NOTE: The user field and the user ID must be
separated by a space when being entered.
Refer to Section 5.4.2 and Figure 15 for additional in-
formation, if necessary.
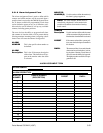
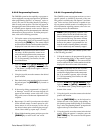
5.5.2.2 Programming System Time
and Date
The CM8500 system has a battery-backed clock that
will retain the correct time and date even in the event
power is removed from the system. When the system is
operating in the “run” mode, the time and date will be
displayed in the lower portion of the monitor screen.
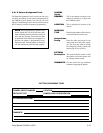
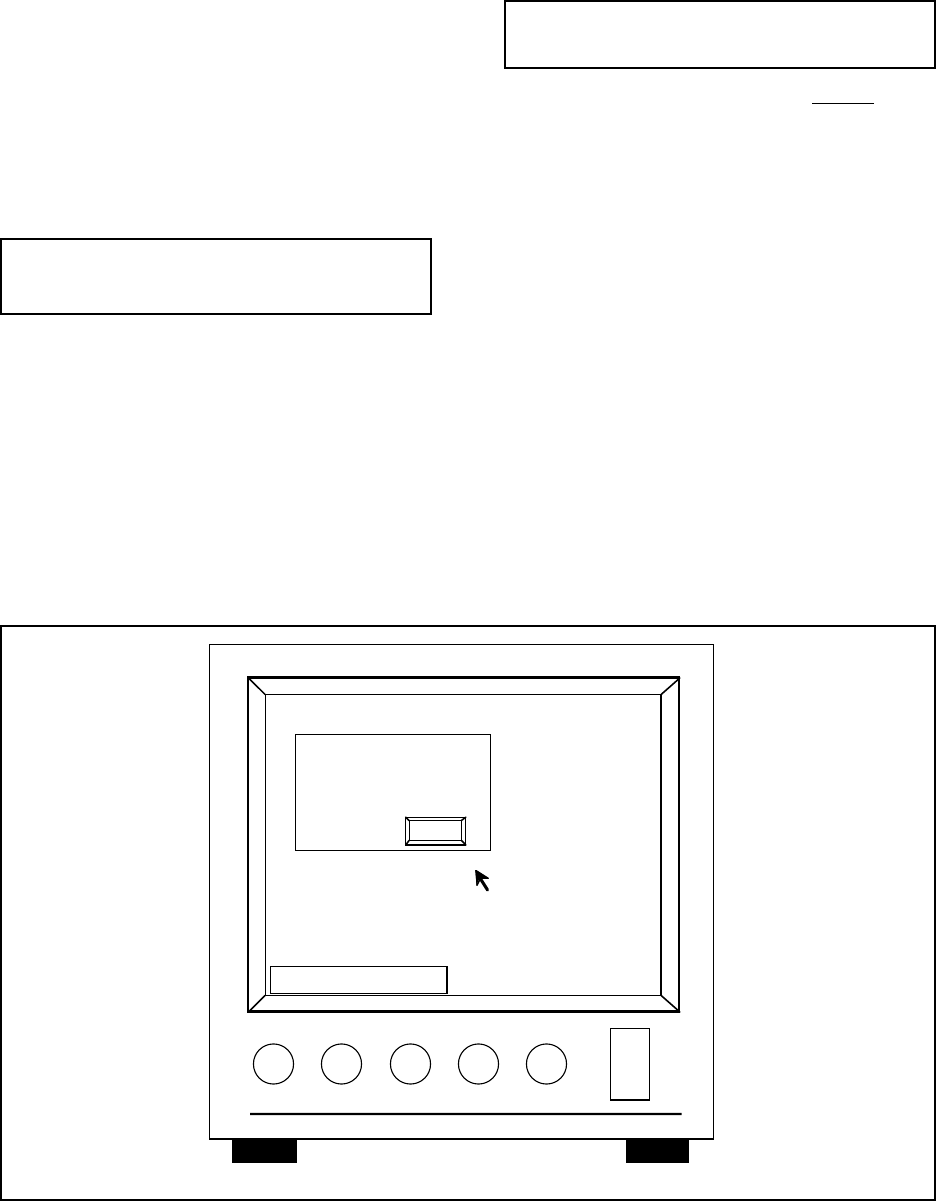
To set or change the time or date, refer to the following
procedure and Figure 26.
NOTE: When changing the time or date, both
the time and date must entered.
1. From the System menu, [js to Clock], high-
light and release [point] button.
2. Using the joystick, move the cursor to the desired
location (Time: Hrs, Min, Sec; Date: Mo, Day, Yr)
and press the [point] button. The selected field
will then become blank.
3. Enter the desired numbers using the numeric key-
pad.
4. When the desired time and date has been entered,
move the cursor using the joystick to the SET
block on the monitor screen and press the [point]
button.
5. To clear the screen, press the [CLEAR] key on
the numeric keypad.
To remove the time and date, see the note in Section 5.5.2.3.
07/09/9309:10:12
Mon: -- Cam: ---
Time00 00 00
SET
Date 00 00 00
Figure 26. Clock Programming Screen