10. ASSEMBLY
KE-430F, BE-438F
85
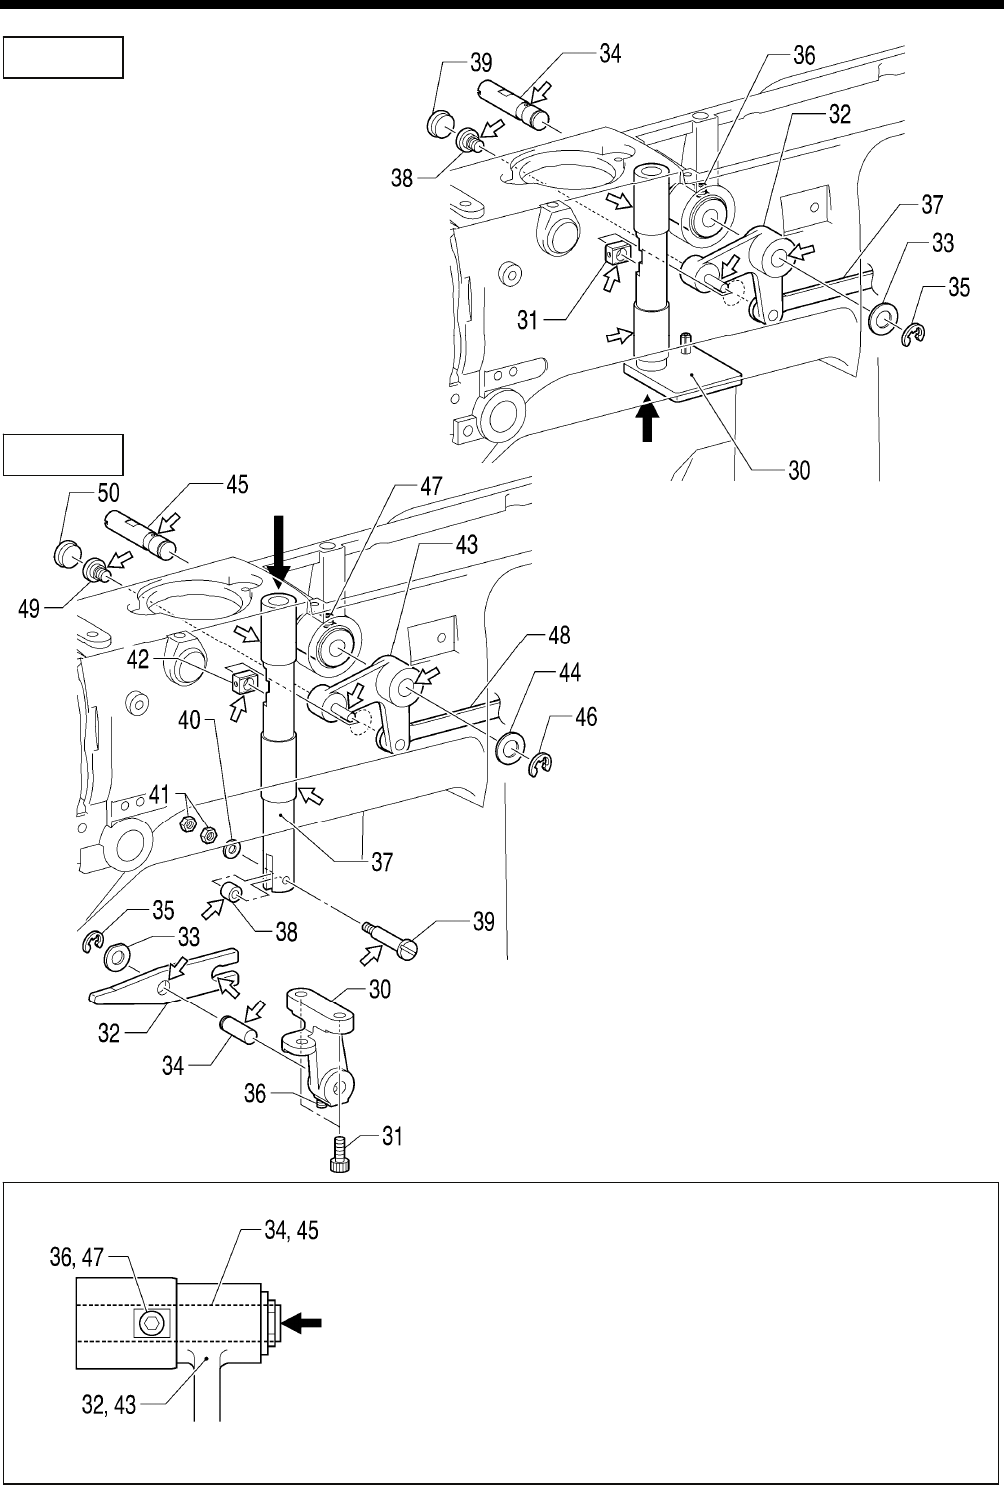
30. Work clamp lifter plate assembly
31. Needle bar guide slide block
32. Lifter lever assembly
33. Plain washer
34. Lever shaft
35. Retaining ring, E
36. Set screw [Tighten]
37. Link
38. Link shoulder screw
39. Rubber cap
KE-430F
BE-438F
2844B
2843B
Align the set screw 36 (430F) or 47 (438F) with the screw stop on the
lever shaft 34 (430F) or 45 (438F), and then tighten the set screw while
gently pushing the lifter lever assembly 32 (430F) or 43 (438F) so that
there is no play in it.
Check that the lifter lever assembly 32 (430F) or 43 (438F) moves
smoothly.
30. Button clamp lever holder
31. Bolts [2 pcs]
32. Button clamp lever
33. Plain washer
34. Button clamp lever shaft
35. Retaining ring, E
36. Set screw [Tighten]
37. Button clamp roller shaft
38. Roller
39. Button clamp roller shaft
40. Plain washer
41. Nuts [2 pcs]
42. Needle bar guide slide block
43. Lifter lever assembly
44. Plain washer
45. Lever shaft
46. Retaining ring, E
47. Set screw [Tighten]
48. Link
49. Link shoulder screw
50. Rubber cap
2845B
NOTE:
When the work clamp lifter plate assembly 30 (430F)/button clamp rod 37
(438F) is lowered, the needle bar guide slide block 31 (430F) or 42
(438F) moves away, so hold the work clamp lifter plate assembly 30
(430F)/button clamp rod 37 (438F) in place until the link shoulder screw
38 (430F) or 49 (438F) is tightened.


