


11. ADJUSTMENT
115
KE-430F, BE-438F
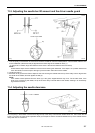
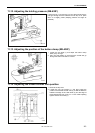
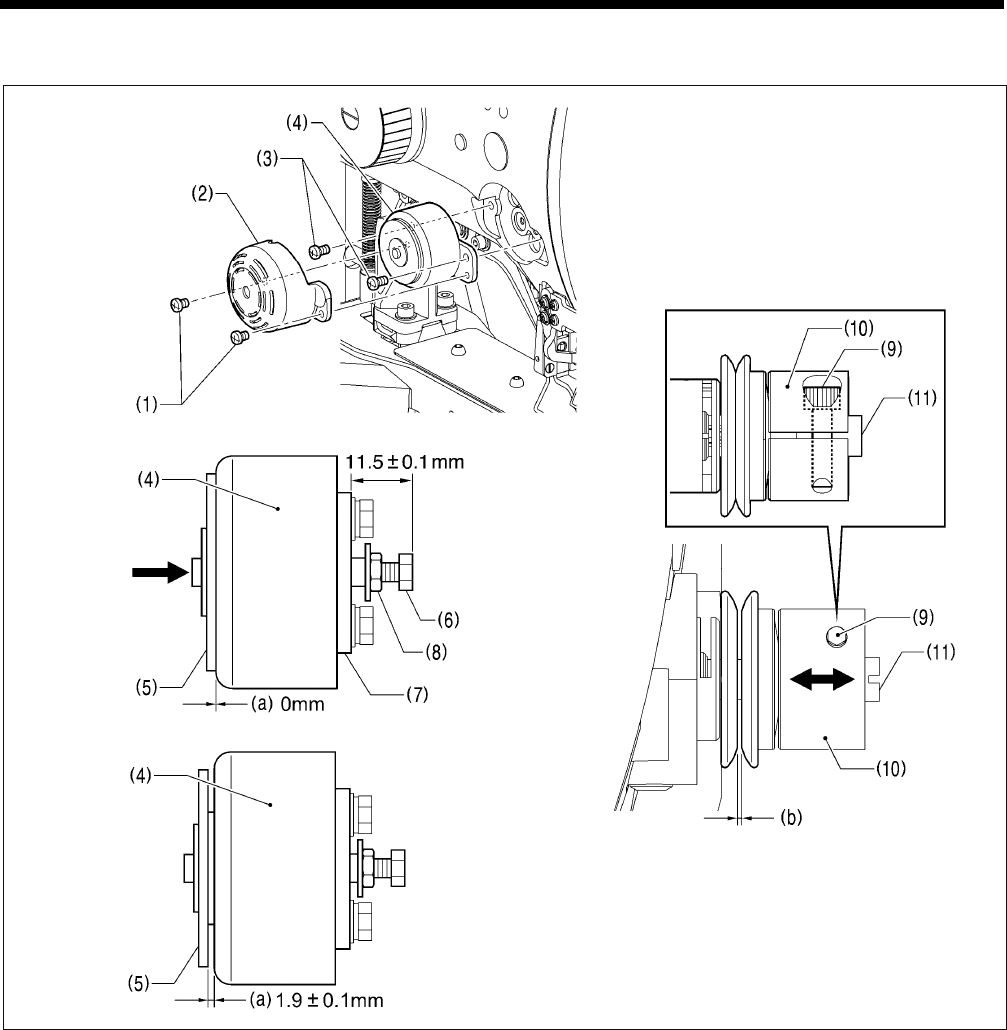
11-16. Adjusting the tension release amount
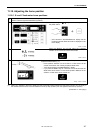
1. Remove the two screws (1), and then remove the solenoid cover (2).
2. Remove the two screws (3).
3. With the plunger (5) of the tension solenoid (4) pushed all the way in, loosen the nut (8) and turn the bolt (6) to adjust so
that the end of the bolt (6) is 11.5 m from the side of the solenoid setting plate (7). (Figure A)
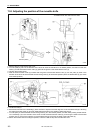
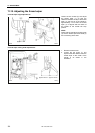
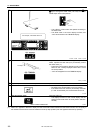
4. With the tension solenoid (4) installed to the arm with the two screws (3), insert spacers or similar to operate the thread
tension so that distance (a) is 1.9±0.1 mm. (Figure B)
* Select a spacer that can maintain the distance (a) without becoming bent when the tension solenoid (4) operates.
* Refer to “11-1-1. Upper and lower thread tension” for details on operating the thread tension.
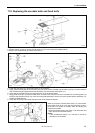
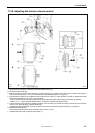
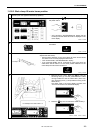
5. Loosen the bolt (9) and adjust the sideways position of the set collar (10) so that the opening amount (b) for the tension
discs is 0 mm. After adjusting, retighten the bolt (9).
* Make sure that the movement range for the set collar (10) does not pass the edge of the shaft (11) at this time.
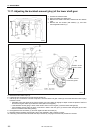
6. Release the thread tension.
Check that the opening about (b) for the tension discs is 0.8 to 1.5 mm.
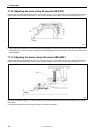
7. Install the solenoid cover (2) with the two screws (1).
2738B
2928B 2739B
2737B
A
B