Configuring the conference system
30
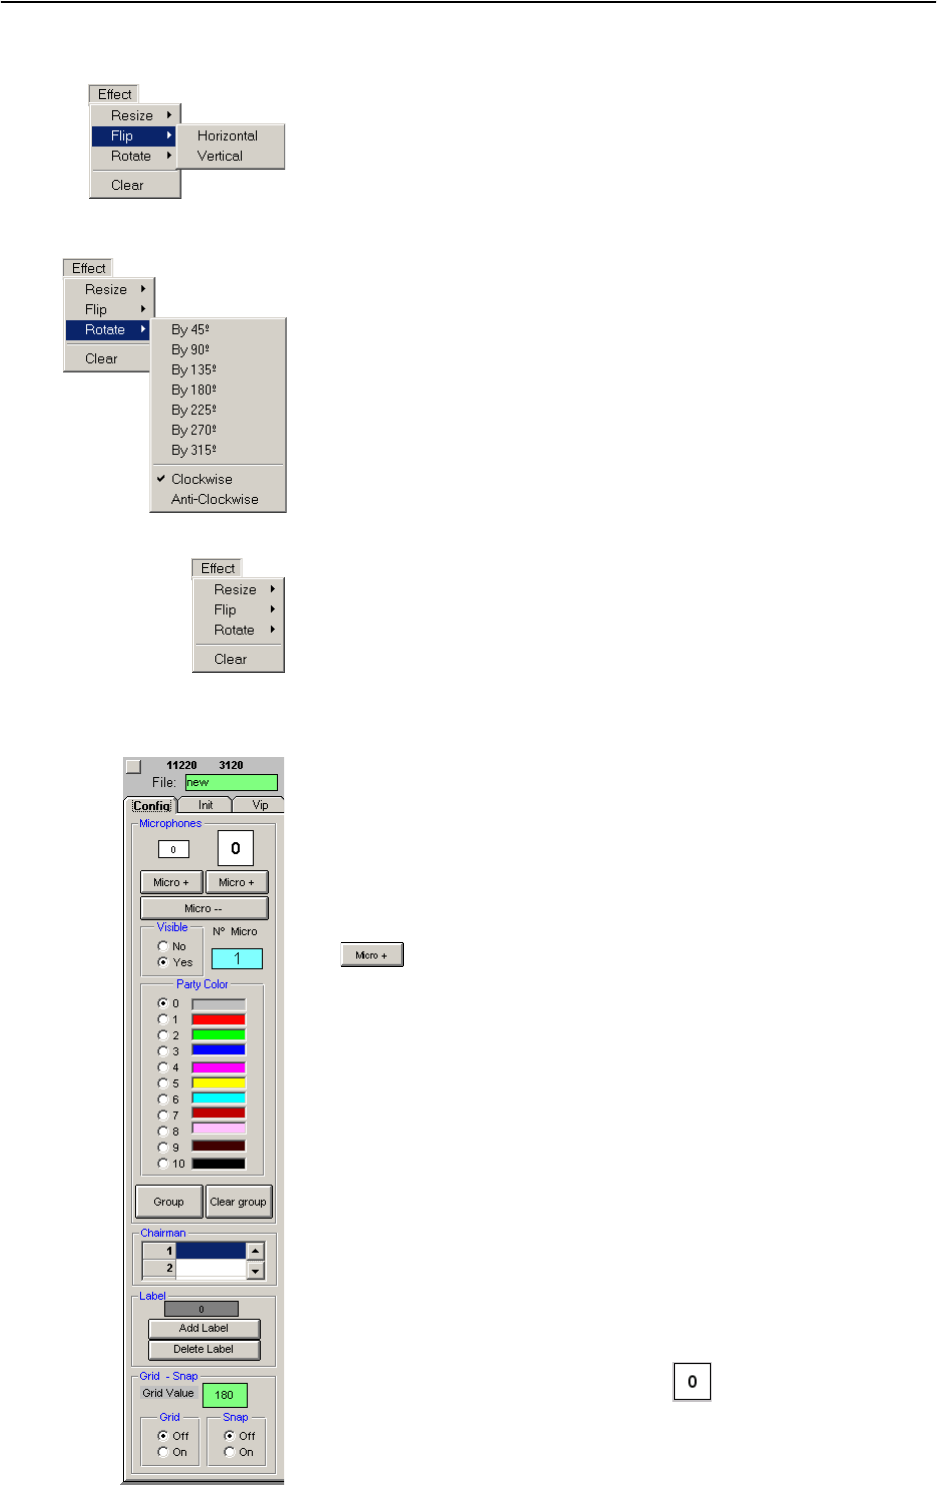
To flip the background picture:
̈ From the “Effect” menu, choose “Flip”.
̈ Select the desired flipping axis.
y Horizontal: flips the picture horizontally, along the vertical axis
y Vertical: flips the picture vertically, along the horizontal axis
To rotate the background picture:
̈ From the “Effect” menu, choose “Rotate”.
̈ Select the rotating direction.
y Clockwise: rotates the picture clockwise
y Anti-Clockwise: rotates the picture anti-clockwise
̈ Select the desired rotation angle.
The background picture is rotated by the selected angle.
To delete the background picture and the drawing objects:
̈ From the “Effect” menu, choose “Clear”.
The background picture and the drawing objects are deleted.
The synoptic view remains unchanged.
Positioning new conference console icons
To add a conference console icon:
̈ In the “Party Color” box on the “Config” tab, click the color for the
conference console icon.
You can change this color at any time by clicking the conference console
icon and then clicking another color in the “Party Color” box.
̈ Click one of the two “Micro +” buttons.
Clicking the left “Micro +” button adds a small icon, clicking the right
“Micro +” button adds a large icon.
The icon appears in the upper left corner of the window. If you click one
of the two “Micro +” buttons several times in succession, the icons
appear side-by-side in the upper left corner of the window.
The conference console icons are automatically assigned a provisional
microphone number which is displayed both on the icon and in the
“N° Micro” field. The icon with the provisional microphone number “1”
is configured as the chairman unit. You can, however, configure any
other conference console as the chairman unit at any time, i.e. before
(see “Defining the console icon for the chairman unit” on page 33) or
during a conference (see “Configuring the chairman unit during a
conference” on page 73).
Or:
̈ Drag the conference console icon, e.g. , from the “Config” tab to
the desired location.
The provisional microphone number is assigned.
