


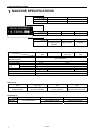


S-7200C
9-10.
Knee lifter lever mechanism ..............................98
9-11.
Needle bar and thread take-up mechanism.......99
9-12.
Presser foot mechanism ..................................100
9-13.
Feed rock shaft................................................ 101
9-14.
Feed mechanism (1)........................................101
9-15.
Feed mechanism (2)........................................102
9-16.
Feed bar mechanism .......................................102
9-17.
Tube holder, safety switch and
quick reverse solenoid .....................................103
9-18.
Thread trimmer mechanism............................. 104
9-19.
Oil tank, bed bottom cover and sub tank .........105
9-20.
Needle, presser foot and R-actuator................ 106
9-21.
Thread tension mechanism ............................. 107
9-22.
Tension release wire and
thread trimmer solenoid ...................................108
9-23.
Wick holder and oil tube (-[]0[] specifications) ...109
9-24.
Tension pulley.................................................. 109
9-25.
Rotary hook .....................................................110
9-26.
Stand ...............................................................111
9-27.
Needle plate, feed dog, etc.............................. 111
9-28.
Covers and operation panel (1) .......................112
9-29.
Covers and operation panel (2) .......................113
9-30.
Cable tie ..........................................................113
9-31.
Connector ........................................................114
9-32.
Knee lifter lever................................................114
10. ADJUSTMENTS ...............................115
10-1.
Adjusting the actuator switch position.............. 115
10-2.
Adjusting the safety switch position ................. 116
10-3.
Adjusting the thread take-up spring ................. 117
10-4.
Adjusting arm thread guide R ..........................118
10-5.
Adjusting the presser foot height .....................118
10-6.
Quick reverse device ....................................... 119
10-7.
Matching the stitch lengths for forward feed
and reverse feed.............................................. 119
10-8.
Adjusting the feed dog height ..........................120
10-9.
Adjusting the feed dog angle ...........................121
10-10.
Adjusting the needle bar height .....................122
10-11.
Adjusting the needle and
feed mechanism timing ................................. 122
10-12.
Adjusting the needle and rotary hook timing.. 123
10-13.
Adjusting the thread trimming timing .............124
10-14.
Adjusting the thread take-up amount
(-[][]3 specifications)....................................... 125
10-15.
Adjusting the needle up stop position ............126
10-16.
Adjusting the treadle...................................... 128
10-17.
Adjusting the presser foot floating amount
(minute lifting amount) ................................... 128
10-18.
Adjusting the tension release wire................. 129
10-19.
Adjusting the rotary hook lubrication amount
(-[]0[], []3[] specifications).............................. 130
11. REPLACING PARTS........................ 131
11-1.
Fixed knife....................................................... 131
11-2.
Movable knife .................................................. 131
11-3.
Motor and timing belt....................................... 132
11-4.
Rotary hook RP............................................... 135
11-5.
Feed bar shaft, lifting feed shaft ...................... 136
12. APPLYING GREASE
(-[]3[], []5[] SPECIFICATIONS) ........
137
12-1.
When “GrEASEUP” appears…
When using the G50 operation panel .............. 137
12-2.
When “GrUP” appears…
When using the G10 operation panel .............. 139
13. SETTING METHOD FOR STANDARD
DEPRESSION STROKES ..............
141
13-1.
When using the G50 operation panel .............. 141
13-2.
When using the G10 operation panel .............. 143
14. CONTROL BOX AND MOTOR......... 145
14-1.
Checking the motor and power supply ............ 145
14-2.
Checking the solenoids ................................... 146
15. STANDING OPERATION PEDAL .... 147
15-1.
Installing the foot plug ..................................... 147
15-2.
Connectors...................................................... 148
16. WIRING DIAGRAMS (X-7200C).......
149
17. CONNECTOR LAYOUT DIAGRAM
(MAIN PCB) ...................................... 150
18. COMBINATION OF TRANSFORMER
SPECIFICATIONS AND CONTROL
DEVICE SPECIFICATIONS..............
152
19. TROUBLESHOOTING......................
153
19-1.
Sewing ............................................................ 153
19-2.
Error code displays.......................................... 158
20. 7-SEGMENT DISPLAY..................... 162