C1554M-A (4/05) 87
VIDEO FOR WINDOWS GADGET
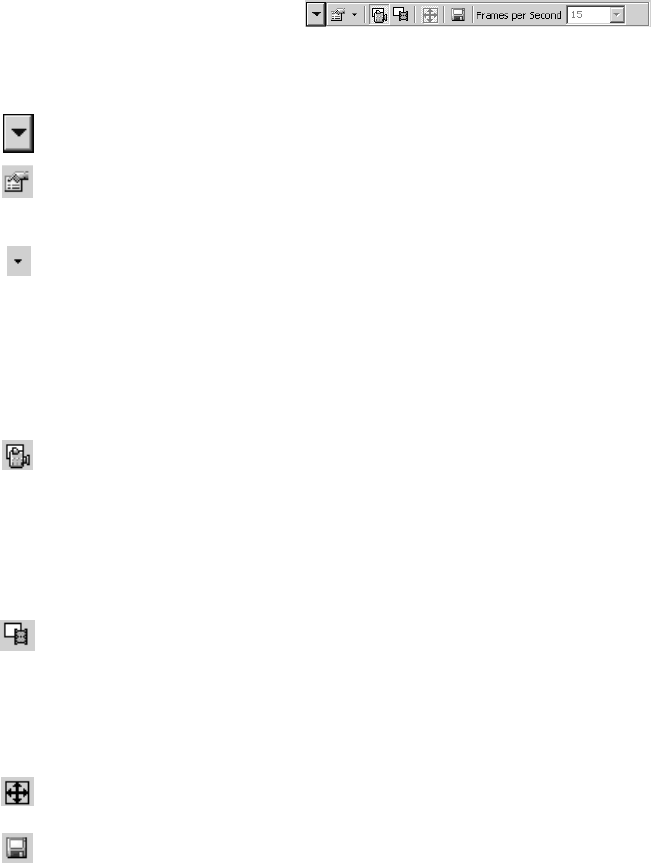
Figure 93. Video for Windows Gadget
The gadget for the Video for Windows canvas has the following tools:
1. Gadgets: The Gadgets button allows you to open the gadgets for the other devices in the switch path.
2. VFW devices: This button is used by administrators for troubleshooting the server configuration. If the workstation has more than one
Video for Windows card in it, click this button to see a list of installed cards, including the card number for each card. This allows you to
double-check that you used the correct card numbers when you configured the Video for Windows canvases in the server configuration.
3. Properties: Clicking the Properties button opens a drop-down menu with three options:
• Format
• Source
• Display
Each of these options allows you to set device settings for the Video for Windows card associated with the canvas. The device settings are
specific to the model of Video for Windows card installed in your workstation. For more information on the device settings for your Video for
Windows card, refer to the card’s product documentation.
4. Overlay: Video for Windows canvases allow you to display video at a higher quality setting, Overlay, or lower quality, Preview. Click the
Overlay button to display video at the higher quality setting. Motion appears smooth in Overlay mode.
Video displayed in Overlay mode cannot be maximized. If you maximize a custom window displaying Overlay video, the window itself will
maximize, but the video will not change size.
In a multi-monitor system, Overlay mode only works on the primary monitor. Older workstations might not have the processing power
required to display Overlay video.
5. Preview: Video for Windows canvases allow you to display video at a higher quality setting, Overlay, or lower quality, Preview. Click the
Preview button to display video at the lower quality setting. Motion appears choppy in Preview mode.
Unlike video displayed in Overlay mode, video displayed in Preview mode can be maximized. If you maximize a custom window displaying
Preview video, the window and video will both maximize.
In a multi-monitor system, Preview mode works on any monitor.
6. Fit to window: Click the Fit to Window button to fit the video perfectly within the video display area. This eliminates the black areas that
appear on one or more sides of the video when the video does not fit exactly.
7. Capture and save image: The Capture and Save Image button allows you to take a snapshot of the video displayed in the window and
save the image as a JPEG file. Clicking the button opens the Save JPEG As dialog box. Browse to the desired folder and type in a file name.
Click Save to save the file and close the dialog box.
8. Frames per second: The Frames per Second setting controls how many video frames are displayed every second in Preview mode. Select
a number from the drop-down list. A larger number results in smoother video, but requires more processing time. A smaller number gives
choppier video, but requires less processing power.
The Frames per Second setting is not available in Overlay mode.
