64 C1554M-A (4/05)
CONTROLLING AN ASCII CAMERA
NOTE: Fixed cameras are not controllable. This section applies to controllable cameras only.
To control a particular camera, you must belong to, and be logged in under, a user group that grants you the necessary privileges. Your system
administrator should instruct you in what privileges you have.
Before you can control a camera, you must switch the camera to a destination device, such as a custom window or external monitor. To switch the
camera, drag the camera to the destination device. You can drag from/to device icons placed on maps or devices listed in the Device List. Refer
to Devices - Switching a Device for more information on switching devices.
All ASCII camera controls are available through the camera’s Device Control dialog box. Some controls are also available in the camera’s gadget
(go to a preset, run a pattern) or in the custom window display area (pan, tilt, zoom, iris, focus).
You cannot control an ASCII camera if it is locked by another user or by a script. If you attempt to control a locked camera, VMX300(-E) displays a
message saying the camera is locked and identifying who placed the lock. For more information, refer to Locking a Camera.
NOTE: To access ASCII camera controls, the Pelco ASCII device driver must be running. Device icons appear as a hollow outline when the device
driver is not running. If you try to open the Device Control dialog box when the driver is not running, you will get a connection error. Notify your
system administrator if the driver is not running.
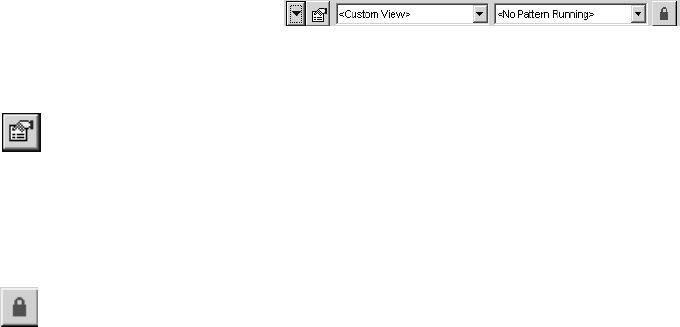
ASCII CAMERA GADGET
Figure 64. ASCII Camera Gadget
The camera gadget has four parts:
• Device control button: The Device Control button opens the camera’s Device Control dialog box.
• Presets drop-down list: The Presets drop-down list lists the user-defined presets for that camera. Click a preset to make the camera go
to the preset. If the camera’s current view is not the result of going to a preset, <Custom View> appears in the drop-down list. Refer to
Presets for more information.
• Patterns drop-down list: The Patterns drop-down list lists the user-defined patterns for that camera. Click a pattern to make the camera
run the pattern. The camera will run the pattern repeatedly until it receives a new movement command. If the camera is not currently
running a pattern, <No Pattern> appears in the drop-down list. Refer to Patterns for more information.
• Lock button: The Lock button allows you to take exclusive control of the camera. Click the Lock button to prevent a script or another
operator from controlling the camera. Refer to Locking a Camera for more information.
OPENING THE CAMERA’S DEVICE CONTROL DIALOG BOX
To access the camera’s Device Control dialog box, you must belong to, and log in under, a user group that allows you to access the Device Control
dialog box.
Open the Device Control dialog box for an ASCII camera using one of the following methods:
• Double-click the camera’s icon on a map.
• Double-click the switcher in the Device List.
• Right-click the camera in the Device List, and then click Show Control Dialog from the pop-up menu.
• Open the camera’s gadget and click the Device Control button.
PAN, TILT, ZOOM, IRIS, AND FOCUS
VMX300(-E) provides both mouse and keyboard controls for panning, tilting, zooming, focusing, and adjusting the iris of ASCII cameras that
support pan/tilt/zoom functionality. Your administrator should instruct you in which cameras support pan/tilt/zoom.
