


Heat & Glo • RED60 • 2159-900 Rev. R • 9/1276
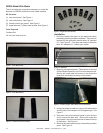
RED60ModelWithMedia
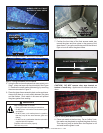
This kit contains the components necessary to install the
porcelain on RED60 models that have media installed.
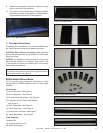
KitContents:
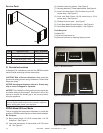
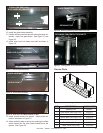
(1) Inner back panel. See Figure 1.
(2) Inner side panels. See Figure 2.
(2) Outside corner trim pieces. See Figure 3.
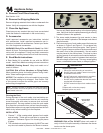
(7) Angle tabs and (7) Sheet metal screws. See Figure 4.
ToolsRequired
Cordless Drill
1/4 inch hex head driver tip
Figure1.InnerBackPanel.
Figure2.InnerSidePanels.
Figure3.OutsideCornerTrimPieces.
Figure4.AngleTabswithScrews.
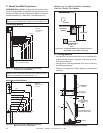
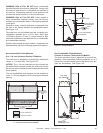
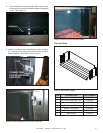
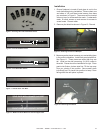
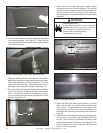
3. Using a at blade screwdriver, bend up the tabs located
on each side of the basepan to a 90 degree angle. See
Figure 7.
4. Slide each inner side porcelain panel in from the front
until it touches the back wall. Secure with angle tabs
and screws in the pilot holes that are located on the top
of the rebox. See Figure 6.
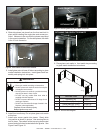
5. Bend the tabs mentioned on step 3 toward the porcelain
panel. See Figure 8.
Figure6.InstallingAngleTabtoSecureInnerBackPanel.
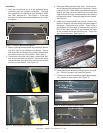
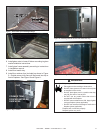
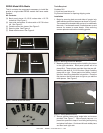
Installation
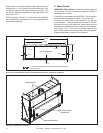
1. Verify the correct base pan is in the appliance before
proceeding with the porcelain installation. The base pan
required for this application has the letter “M” stamped
in it. See Figure 5. If the base pan does not have the
letter “M” stamped in it, contact your dealer.
2. Begin by placing back panel. Place bottom in rst and
tilt top backward carefully until it touches the back wall.
Secure with angle tabs and screws in the three pilot
holes that are located on the top of the rebox.
Figure5.BasePan
M