


Heat & Glo • RED60 • 2159-900 Rev. R • 9/1272
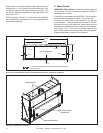
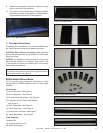
Figure6.FrontAccessMediaTray
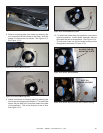
7. Position the front tabs of the front access media tray
toward the glass and then place in the groove of the
glass frame. Line up the media tray so that the left and
right cut-outs t within the glass frame.
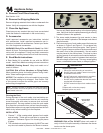
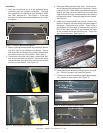
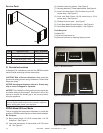
5. Using the at rock media pieces that were sorted out in
Step 1, place one layer over the pilot shield. See Figure
5. Remove the stone media placement jig by removing
the screw as noted in Figure 2.
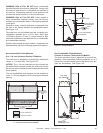
6. Place the glass frame assembly back on the appliance.
Assure that there is no rock media between the glass
and the rebox. Rock media in this area will prevent
the glass gasket from sealing.
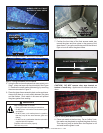
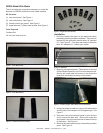
Figure8.PlacingRockMediainFrontTray.
Figure4.PlacingRockMediainBasePanonTopofMesh.
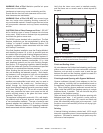
WARNING
Risk of Asphyxiation or Fumes.
• Place rock media according to instructions.
• Do NOT place rock media in area between glass
and rebox.
• Do NOT place rock media pieces in a position
that they may fall into area between glass and
rebox.
• Do NOT use any media other than the rock media
supplied with this replace.
Fireplace will not function properly.
Gas leak may occur.
PILOTSHIELD
ROCKMEDIA
PLACEMENTJIG
Figure5.PlacingRockMediaOverPilotShield.
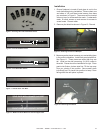
PILOTSHIELDROCKMEDIA
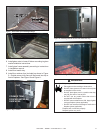
Figure3.PlaceRockMedia
BURNER PORT SLOT MUST
BE FREE OF ROCK MEDIA
RIGHT
CUT-OUT
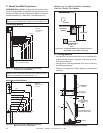
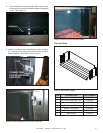
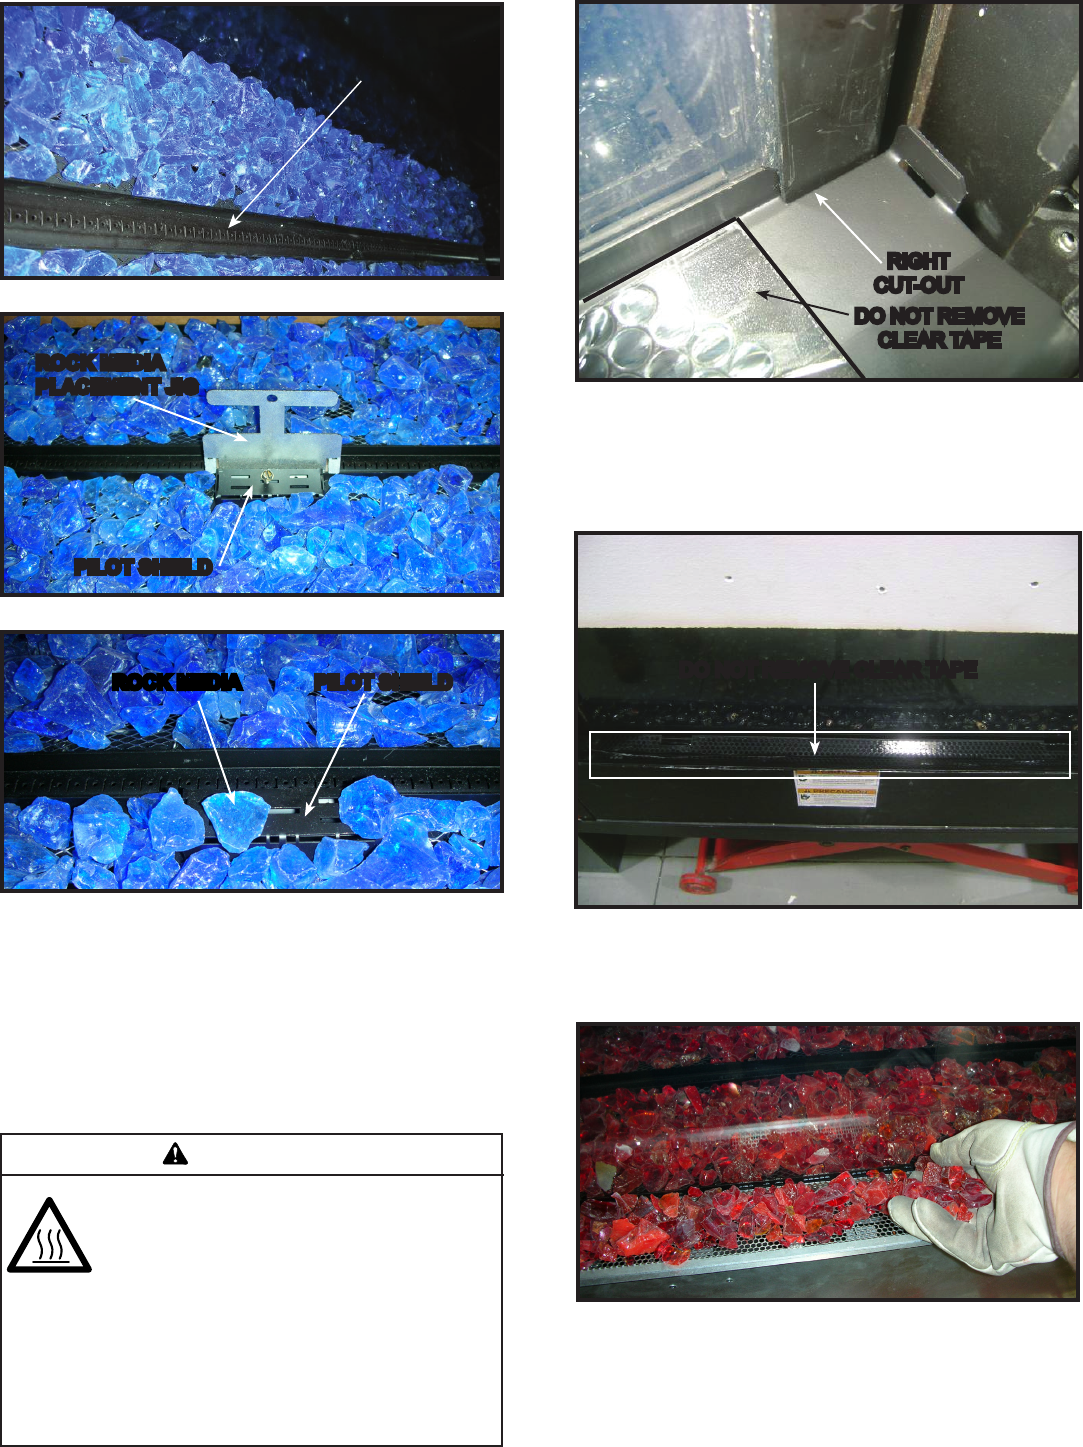
Figure7.LocationofClearTape
CAUTION! DO NOT remove clear tape located on
bottom of media tray. Appliance will overheat and shut
down.
8. Place rock media in the front tray. For an “Innity” look,
the media may be placed up against the glass and tray.
This step may only be done when the replace is not
activated and the glass is cool.
DO NOT REMOVE CLEAR TAPE
DO NOT REMOVE
CLEAR TAPE