


91
Lubrication
COMPRESSORS — Each compressor is charged with the
correct amount of oil at the factory. The correct oil charge is
shown in Tables 1A and 1B. If oil is visible in the compressor
sight glass, check unit for operating readiness as described in
Start-Up section, then start the unit. Observe oil level and add
oil, if required, to bring oil level in compressor crankcase up to
between
1
/
4
and
1
/
3
of sight glass during steady operation.
If oil charge is above
1
/
3
sight glass, do not remove any oil
until the compressor crankcase heater has been energized for at
least 24 hours with compressor off.
When additional oil or a complete charge is required, use
only Carrier-approved compressor oil:
Petroleum Specialties, Inc. . . . . . . . . . . . . . . . . . . . . . Cryol 150
Texaco, Inc. . . . . . . . . . . . . . . . . . . . . . . . . . . . . Capella WF-32
Witco Chemical Corp. . . . . . . . . . . . . . . . . . . . . . . Suniso 3GS
FAN SHAFT BEARINGS — Lubricate bearings at least ev-
ery 6 months with suitable bearing grease. Do not over grease.
Typical lubricants are given below:
*Preferred lubricant because it contains rust and oxidation inhibitors.
CONDENSER- AND EVAPORATOR-FAN MOTOR
BEARINGS — The condenser- and evaporator-fan motors
have permanently-sealed bearings, so no field lubrication is
necessary.
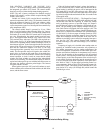
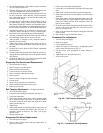
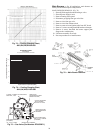
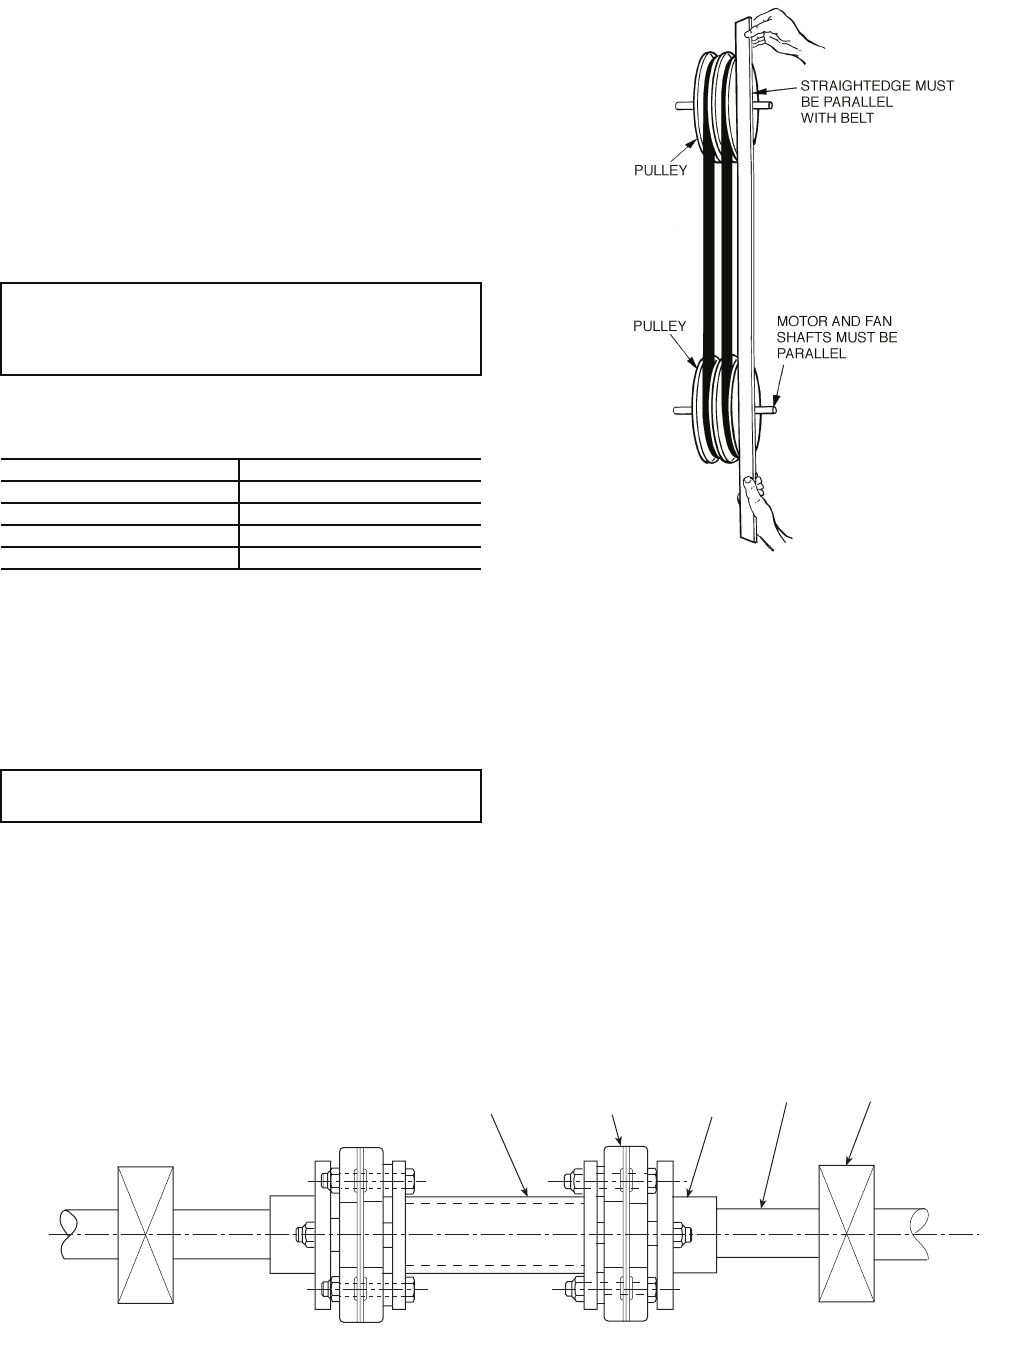
Evaporator Fan Performance Adjustment
(Fig. 67) — Fan motor pulleys are designed for speed
shown in Tables 1A and 1B (factory speed setting).
To change fan speeds, change pulleys.
To align fan and motor pulleys:
1. Shut off unit power supply.
2. Loosen fan shaft pulley bushing.
3. Slide fan pulley along fan shaft.
4. Make angular alignment by loosening motor from
mounting plate.
5. Retighten pulley.
6. Return power to the unit.
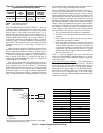
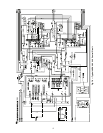
Evaporator Fan Coupling Assembly — If the cou-
pling has been removed for other blower assembly component
repair or replacement, it is critical that the coupling be reassem-
bled and aligned correctly to prevent premature failures.
REASSEMBLING THE COUPLING INTO THE UNIT
(Fig. 68)
1. Prior to reassembling the coupling, loosen the 4 bearing
mounting bolts, which secure the 2 bearings on either side
of the coupling. Remove the drive belts.
2. Reassemble the coupling with the bearings loose. This al-
lows the coupling to find its own self-alignment position.
3. Check the hub-to-shaft fit for close fitting clearances.
Replace hubs if high clearances are determined.
4. Check the key for close-fitted clearances on the sides and
0.015 in. clearance over the top of the key. Replace key if
necessary.
IMPORTANT: Do not use reclaimed oil or oil that has
been exposed to the atmosphere. Refer to Carrier Standard
Service Techniques Manual, Chapter 1, Refrigerants sec-
tion, for procedures to add or remove oil.
MANUFACTURER LUBRICANT
Texaco Regal AFB-2*
Mobil Mobilplex EP No. 1
Sunoco Prestige 42
Texaco Multifak 2
IMPORTANT: Check to ensure that the unit drive matches
the duct static pressure using Tables 19-31.
Fig. 67 — Evaporator-Fan Alignment
and Adjustment
CENTER DRIVE
SHAFT
FLEX
MEMBER
SHAFT
FLANGE
BEARINGSSHAFT
Fig. 68 — Evaporator Fan Coupling