75NetBotz Appliance User’s Guide
Custom Audio Clips
Use the Custom Audio Clips icon to upload custom audio clips (in WAV or OGG format) to your
appliance or to delete clips from the appliance.
For more information about the Play Custom Audio alert action, see “Creating a play custom
audio alert action” on page 114.
Adding custom audio clips
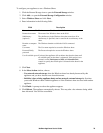
To upload a custom audio clip to your appliance:
1. Double-click the Custom Audio Clips icon.
2. Click Add custom audio clip.
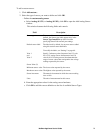
3. Select a sound file. Files must conform to the following specifications:
– OGG format: 8 khz or 16 khz sample rate, mono or stereo.
– Windows WAV format (PCM only): Any sample rate, mono or stereo. WAV files are encoded
into OGG files on upload, so the actual storage space used is less than the initial WAV file size.
4. Click OK to upload the file to your appliance.
Once the file is uploaded, it is available for use with the Play Custom Audio Alert action.
Deleting custom audio clips
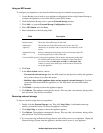
To delete a custom audio clip from your appliance, select the audio clip from the Custom Audio Clips list
and click Delete custom audio clip.
Data Center Expert
Note: The StruxureWare Data Center Expert icon only appears if you have configured the
appliance to post data to a StruxureWare Data Center Expert server or if a StruxureWare Data
Center Expert server is configured to monitor the appliance.
The StruxureWare Data Center Expert window displays a list of the StruxureWare Data Center Expert
servers that are monitoring the NetBotz appliance or have been designated as a target to which the
NetBotz appliance posts data (POST-Only). The entry in the “Type of Post” column denotes the type of
data that the server will be monitoring.
You can remove a server from the list by highlighting the StruxureWare Data Center Expert server and
clicking Remove. The server will no longer monitor the type of data listed in the “Type of Post” column.
See “Using Advanced View POST-only Mode” on page 18 for information on posting data to
a StruxureWare Data Center Expert server.


