115NetBotz Appliance User’s Guide
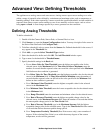
Creating a send custom HTTP GET alert action
To create an Alert Action to use Send Custom HTTP GET alert notification:
1. Double-click the Alert Actions icon.
2. Click Add... to open the Add Alert Action window.
3. Select Send Custom HTTP GET and click OK.
4. Enter a name for this alert action in the Alert action name field.
5. Select the language and territory using the Locales drop-down list.
6. Specify Advanced Scheduling (optional). By default, all Alert Actions are active 24 hours a day,
7 days a week. You can specify an Alert Action to be active only when alert conditions occur
during specific time ranges. To configure Advanced Scheduling:
a. Click Advanced Scheduling.... The Advanced Scheduling window opens.
b. By default, all time periods are Enabled. To disable the alert action, click-and-drag to
highlight the time range, and click Disable. To enable a disabled time range, click-and-drag
to highlight the time range, and click Enable.
c. Click OK to save the schedule and return to the Add Alert Action window.
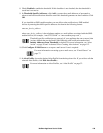
7. Check the alert Severities that apply to buttons to be activated.
8. In the Basic tab:
– Type the custom HTTP GET statement generated by the appliance in Target URL.
– Type the Target User ID and Target Password needed to execute the custom HTTP GET
command at the Target URL.
– Type the Target Password again in the Verify Password field.
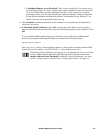
The Target URL field accepts BotzWare macros. For more information on macros
supported by BotzWare see “BotzWare Macros” on page 133.
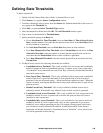
9. Click the Advanced tab and select optional SSL Verify Options for the custom HTTP GET
commands, used for both the primary and backup hosts, or to provide information to deliver the
custom HTTP GET command to an alternate Web host. This backup URL is used only if attempts
to deliver the alert data to the primary Target Host fail. You can also select:
– Include XML-encoded Alert Parameter (xmlalert): Appends the parameter
“xmlalert=<xml alert encoding>” to the provided URL for the action. The encoded XML is
the same as that generated by the HTTP POST code, but is URL-encoded to enable those that
cannot easily handle multi-part/form-data encoded POSTS to get the XML for the alert.
– Use POST instead of GET: Uses the POST command instead of the GET command.
10. Click OK to save this Alert Action.


