LCD SCREEN
Getting Ready
39
1
■ Saving a Settings Screen Image to
USB Media
An image of the settings screen can be saved as a
BMP file.
A maximum of 100 images can be saved on a single
USB media at one time.
a
Insert the USB media into the primary (top)
USB port on the right side of the machine.
a Primary (top) USB port
b USB media
b
Press .
→ The Sewing settings screen appears. Select the
settings screen page that you want to save the screen
image of.
c
Press .
→ The image file will be saved to the USB media.
d
Remove the USB media, and then check the
saved image using a computer.
The files for Settings screen images are saved with the
name “S**.BMP”.
* “**” in the name “S**.BMP” will automatically be
replaced with a number between 00 and 99.
■ Changing the Pointer Shape When a
USB Mouse Is Used
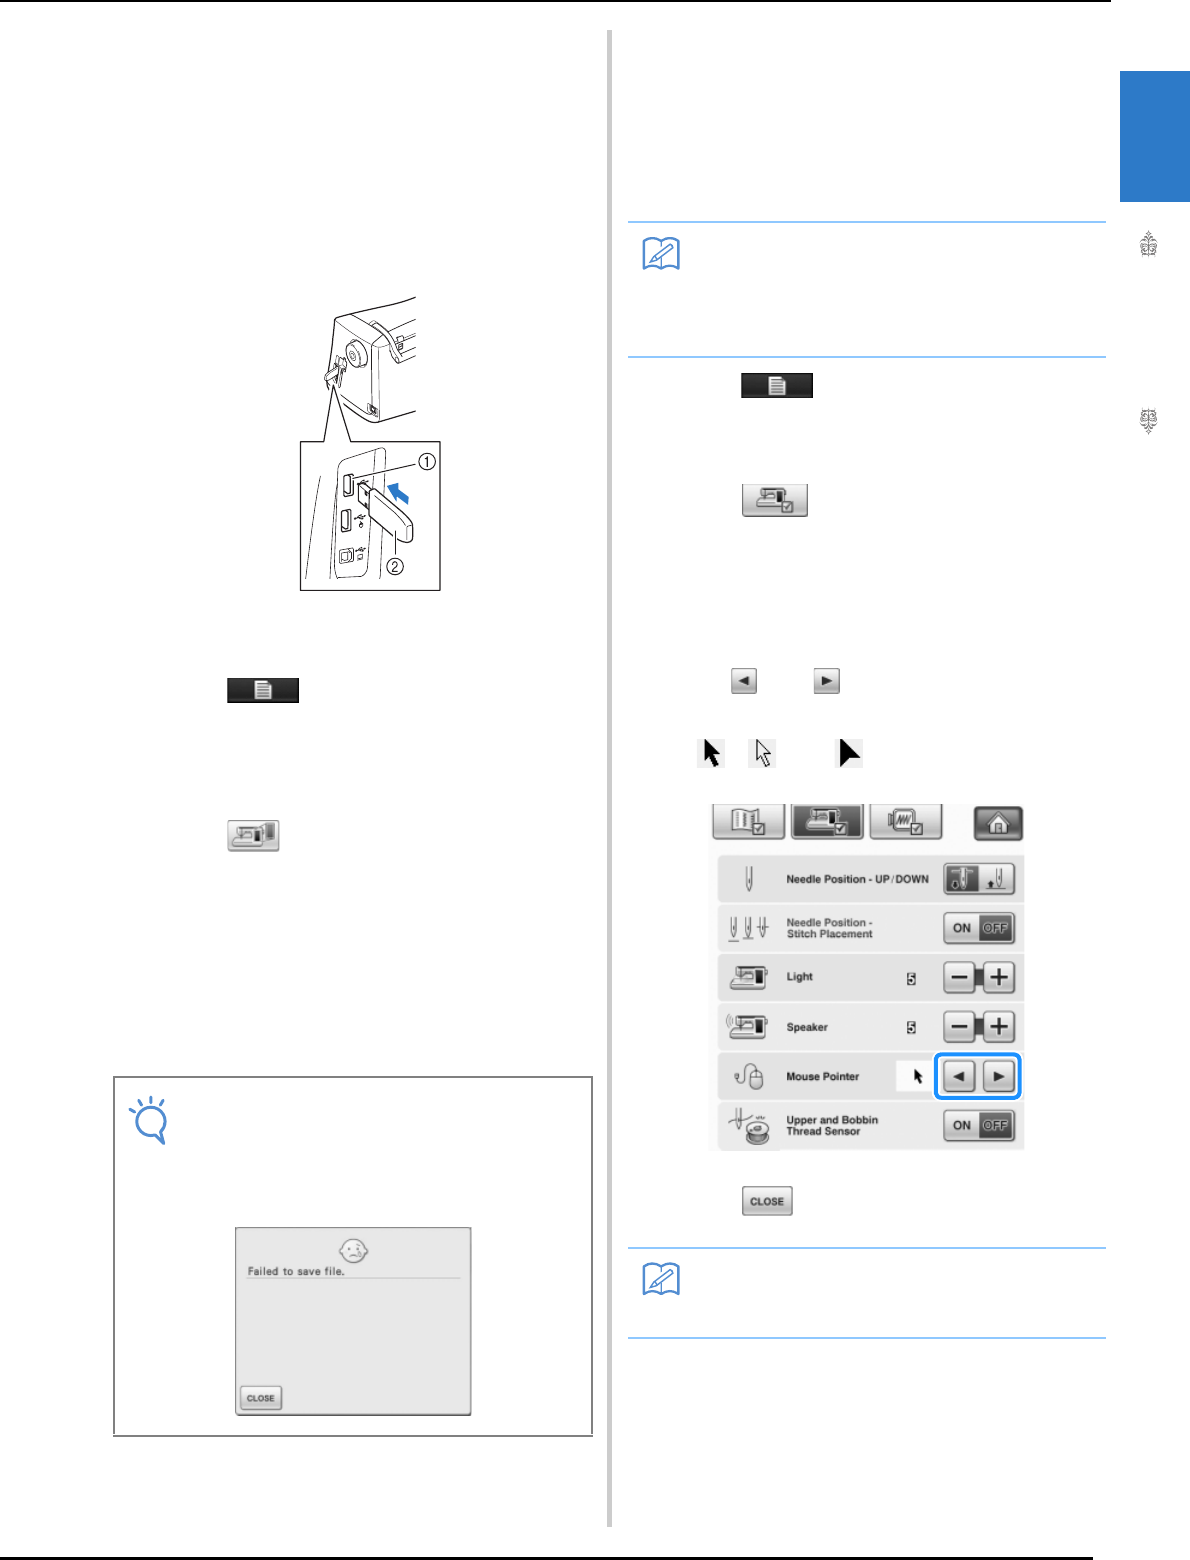
In the settings screen, the shape can be selected for
the pointer that appears when a USB mouse is
connected. Depending upon the background color,
select the desired shape from the three that are
available.
a
Press .
→ The Sewing settings screen appears.
b
Press .
→ The General settings screen appears.
c
Display 3/8 (page 3 of 8) of the General
settings screen.
d
Use and to choose the pointer
shape from the three settings available
(, and ).
e
Press to return to the original screen.
Note
• If 100 image files have already been saved
on the USB media, the following message
appears. In this case, delete a file from the
USB media or use different USB media.
Memo
• For details on changing the background
color, refer to “Changing the Background
Colors of the Embroidery Patterns” on page
42.
Memo
• The setting remains selected even if the
machine is turned off.


