


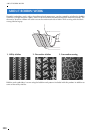


CREATING BOBBIN WORK (SEWING)
316
p
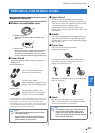
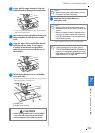
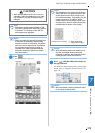
Select a low speed, gently hold the threads
behind the presser foot and start sewing.
Threads can be released after several
stitches have been made.
q
When you have reached the end of the
stitching area, stop the machine.
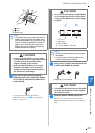
r
Raise the needle and presser foot.
s
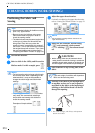
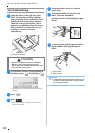
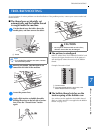
Leaving about 10 cm (approx. 4 inches) of
thread at the ends, use scissors to cut the
threads.
a 10 cm (approx. 4 inches)
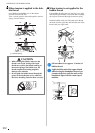
■ Finishing the thread ends
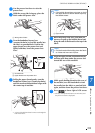
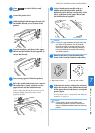
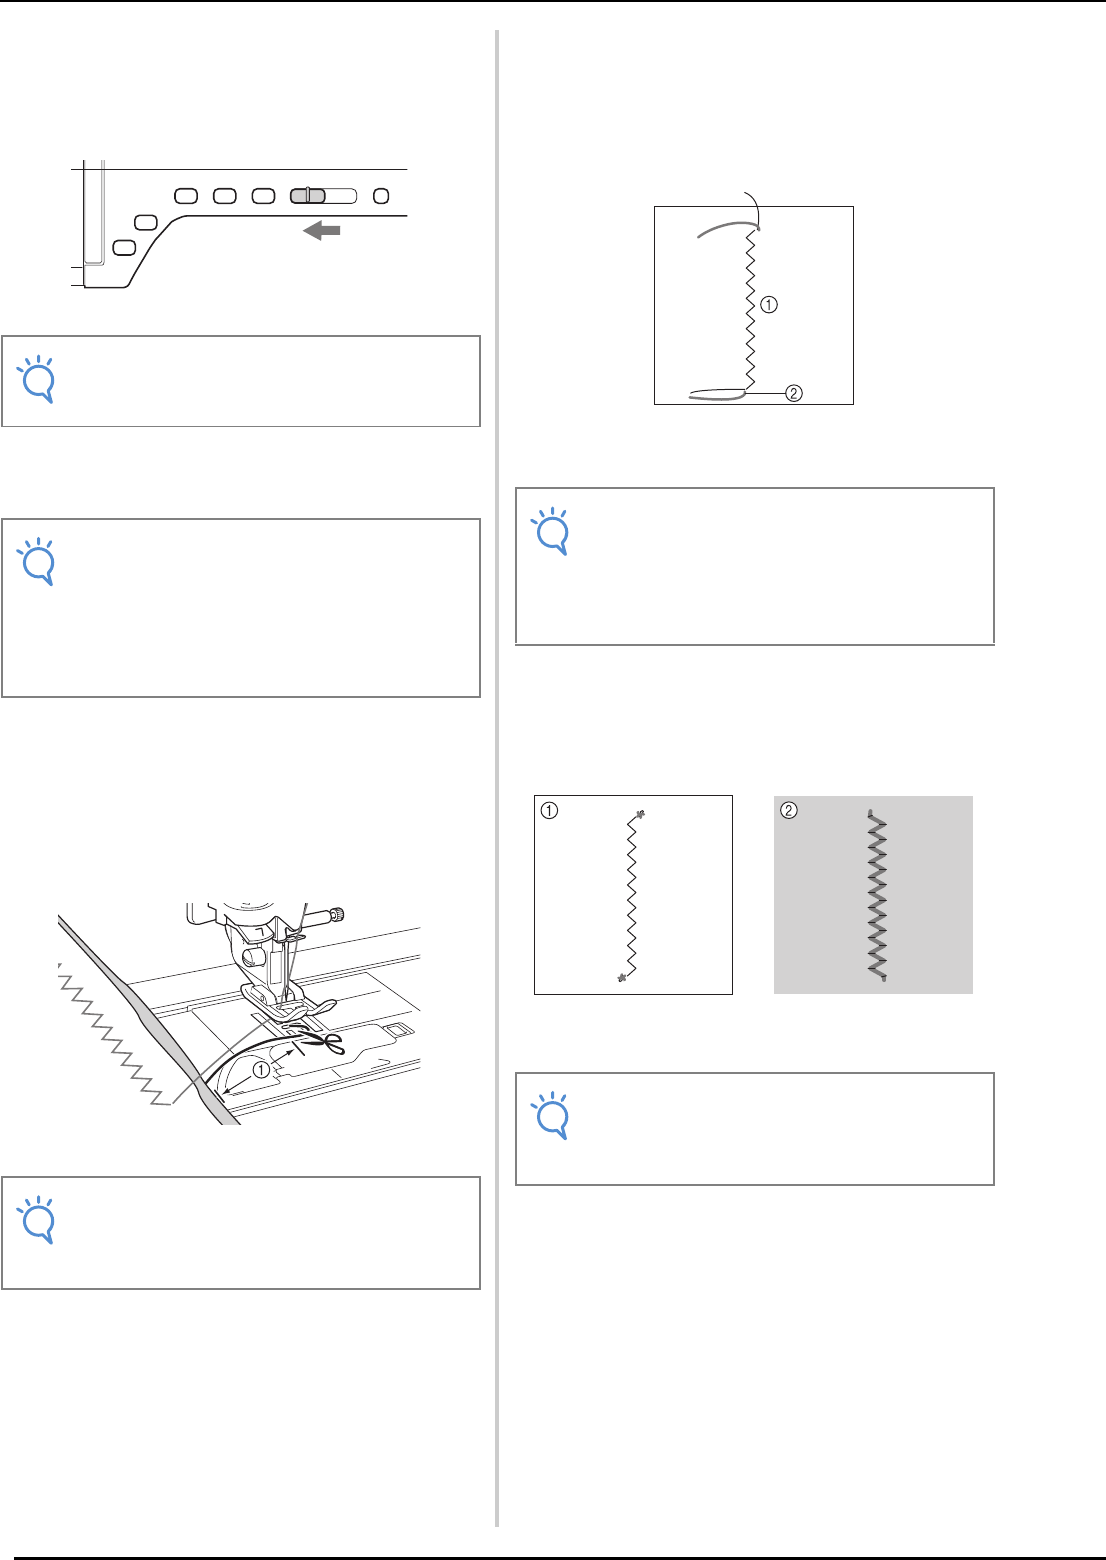
a
At the end of the stitching, use a hand
sewing needle to bring the bobbin thread
up to the wrong side of the fabric.
a Wrong side of fabric
b Bobbin thread
b
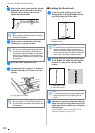
Working from the wrong side of the fabric,
tie the bobbin and upper threads together
by hand. Cut away excess threads with
scissors.
a Wrong side of fabric
b Right side of fabric
c
If the desired results could not be achieved,
adjust the tension of the bobbin thread and
of the upper thread, and then try sewing the
stitching again.
For more details, refer to “ADJUSTING THE
THREAD TENSION” on page 322.
Note
• Before sewing, check that there is enough
thread in the bobbin.
Note
• Do not sew reinforcement/reverse stitches
at the end of the stitching, otherwise the
threads may become tangled or the needle
may break. In addition, it will be difficult to
pull the bobbin thread up to the wrong side
of the fabric.
Note
• Do not press the “Thread Cutter” button to
cut the threads, otherwise the machine may
be damaged.
Note
• If it is difficult to place bobbin thread through
the eye of a hand sewing needle, use a
ribbon embroidery needle to pull the thread
up to the wrong side of the fabric. Otherwise,
use an awl to pull up the bobbin thread.
Note
• To ensure threads do not come undone after
being tied place a drop of fabric glue on
knots.