LCD SCREEN
Getting Ready
33
1
■ Connecting the Machine to the
Computer
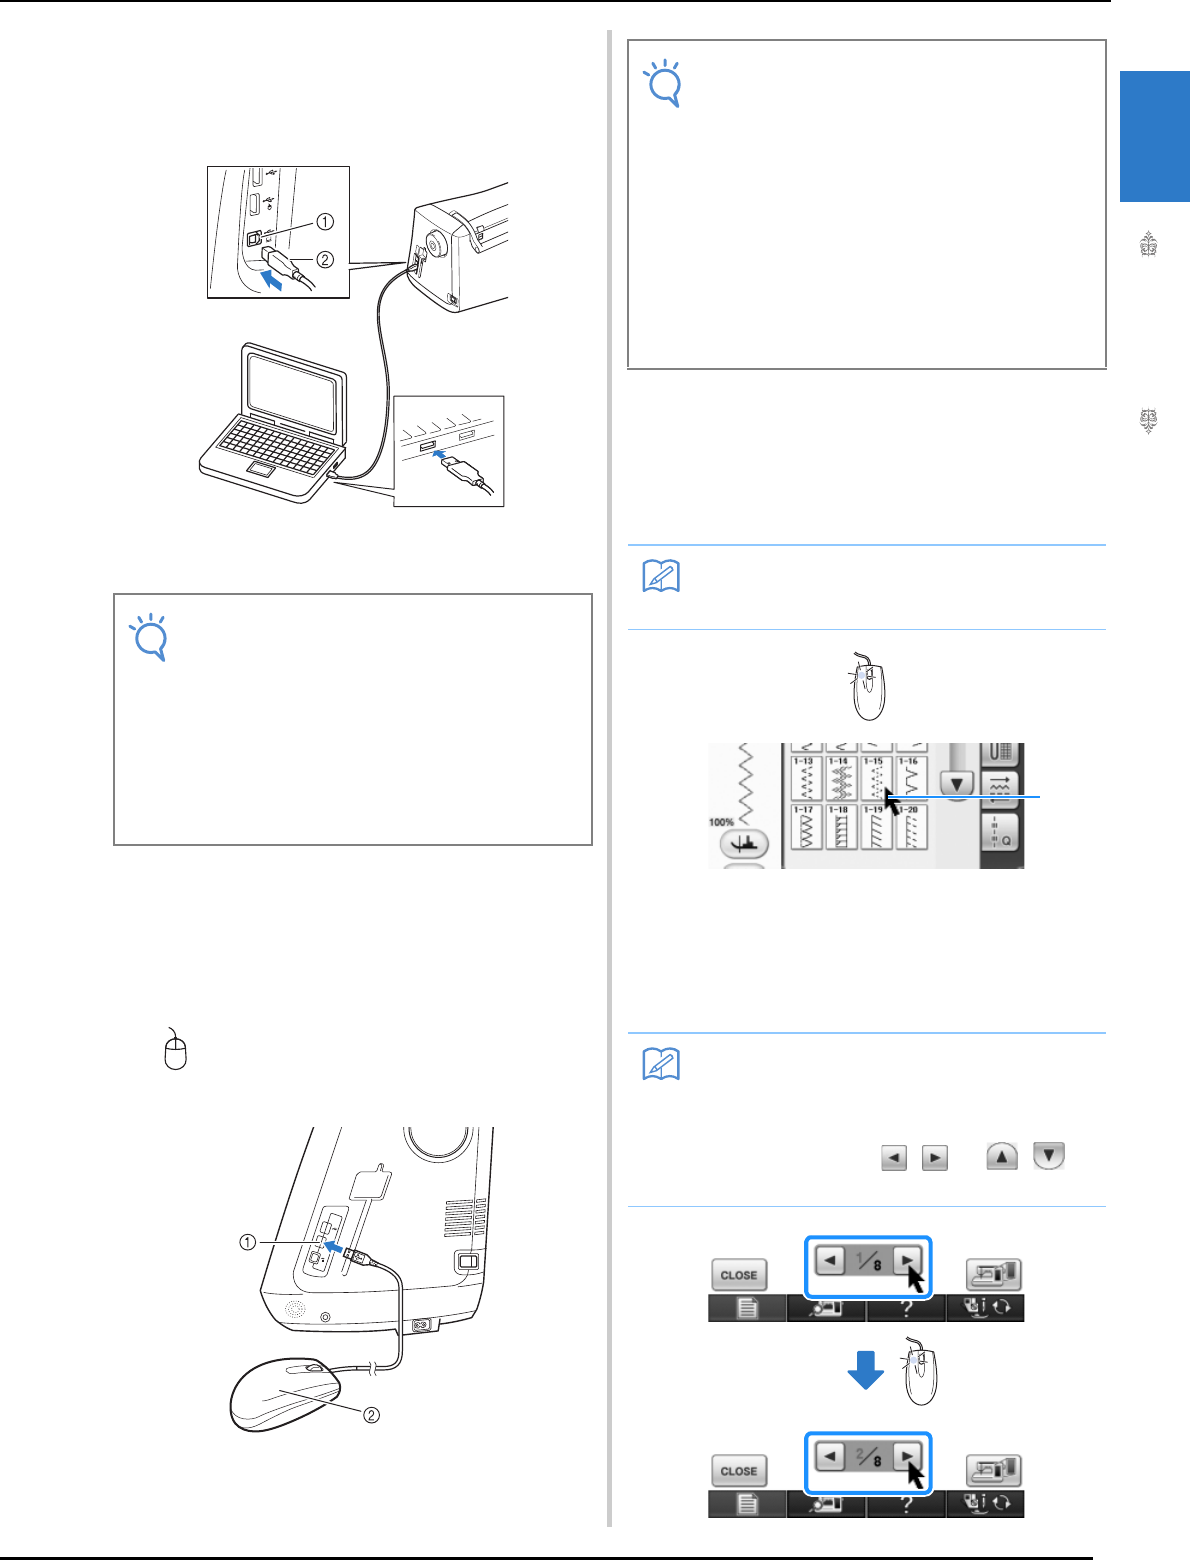
Using the included USB cable, the sewing machine
can be connected to your computer.
a USB port for computer
b USB cable connector
■ Using a USB Mouse
The USB mouse, connected to the sewing
machine, can be used to perform a variety of
operations in the screens.
Connect a USB mouse to the USB 1.1 port marked
with . You can also connect a USB mouse to
the other USB port (USB 2.0).
a USB port for mouse
b USB mouse
■ Clicking a Key
When the mouse is connected, the pointer appears
on the screen. Move the mouse to position the
pointer over the desired key, and then click the left
mouse button.
a Pointer
■ Changing Pages
Rotate the mouse wheel to switch through the tabs
of the pattern selection screens.
• The connectors on the USB cable can only
be inserted into a port in one direction. If it is
difficult to insert the connector, do not insert
it with force. Check the orientation of the
connector.
• For details on the position of the USB port
on the computer (or USB hub), refer to the
instruction manual for the corresponding
equipment.
• Do not perform operations with the mouse at
the same time that you are touching the
screen with your finger or the included touch
pen.
• A USB mouse can be connected or discon-
nected at any time.
• Only the left mouse button and its wheel can
be used to perform operations. No other but-
tons can be used.
• The mouse pointer does not appear in the
camera view window, the screen saver or
the home page screen.
• Double-clicking has no effect.
• If page numbers and a vertical scroll bar for
additional pages are displayed, rotate the
mouse wheel or click the left mouse button
with the pointer on / or
/ to
display the previous or next page.
