


92 PI-MTE System Manual Version 4.C
4. After the vacuum is fully vented, clamp or
support the camera with the CCD array
looking up.
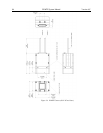
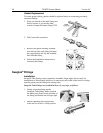
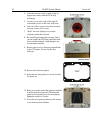
5. Loosen, by one turn, each of the eight (8)
socket head screws on the face of the nose.
6. After all of the 8 screws have been loosened
one turn, remove all 8 screws.
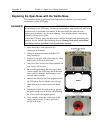
7. "Rock" the nose slightly to be sure the
elastomer gasket has released.
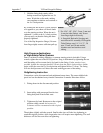
8. Be careful in performing the next step. Unless
you are careful, the CCD array and/or the bond
wires could be damaged. Such damage is not
covered under warranty.
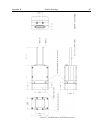
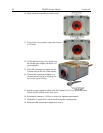
9. Remove the nose in a direction perpendicular
to the CCD plane. Do not slip the nose
sideways.
10. Remove the elastomer gasket.
11. Store the nose and gasket in a secure location
for future use.
12. Being very careful, mount the open nose with the
8 screws previously removed. (The elastomer
gasket is not required.) In a criss-cross pattern,
tighten the screws to 15 in-lbs.
13. Cover the nose opening whenever the camera
is not in the vacuum chamber.