10. Operating Acuras
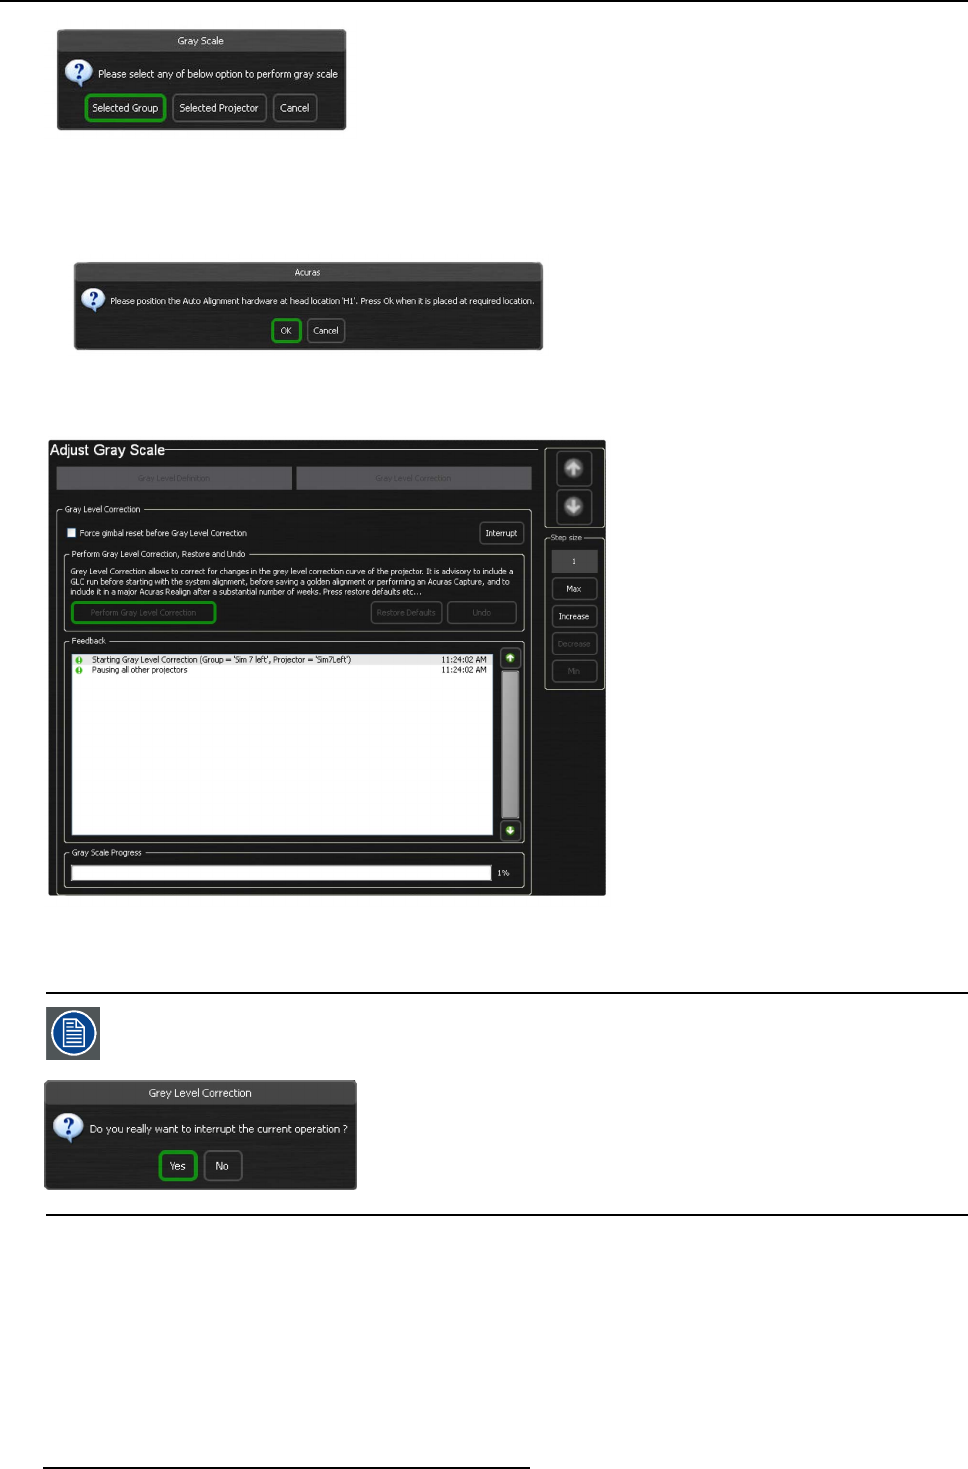
Image 10-7
Gray Scale dialog
Note: If an additional head location is defined or if you have selected projector(s) that ha ve a different head lo
cation, the fol-
lowing A curas dialog ap pears. This reminds the user to physically position the AutoAlignment Hea d to the hea d location
mentioned in the dialog. Press OK to start the Gray Level Correction process.
Image 10-8
Acuras dialog: head location “H1”
Gray Level Correction process is started.
Image 10-9
Gray Level Correction process is started
The unselected projector(s) and the projector(s) on which the Gray Level Correction process is not running go to pause state.
Pressing the Interrupt button w ill stop the Gray Level Correction process. The G imbal will come b ack to its
home position and the following confirmation dialog ap pears. The system will ret urn to its previous situation
and no data will be lost.
Image 10-10
10.2.2 Restoring the Gray Level Correction
Overview
The Restore Defaults function allows you to restore the Gray Level Correction values to the factory defaults.
How to restore the factory Gray Level Correction values?
1. In the Gray Level Correction page, navigate to Restore Defaults and press it.
120
R59770509 AUTOALIGNMENT HEAD GEN II 26/11/2013
