


[ IX Troubleshooting ]
- 351 -
HWE09080 GB
(2) Replacement procedures for check valve assembly
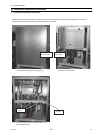
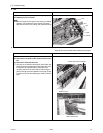
● Removing the check valve assembly
Remove the check valve (CV8), elbow, and the pipe shown in the figure below at left by removing the brazing flux
from the sections that are indicated with arrows.
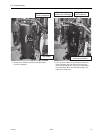
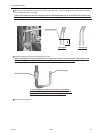
Check the shape of the water heat exchanger pipe end. Depending on its shape, the pipe end needs to be cut.
When cutting the pipe end, keep burrs from entering the refrigerant circuit.
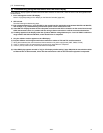
● Installing the check valve assembly
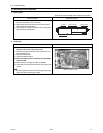
Install the replacement check valve assembly on the unit.
Depending on the shape of the pipe end, the connecting pipe needs to be brazed to the pipe.
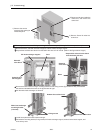
Screw the screws back on.
Remove the brazing flux. (2 places)
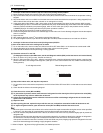
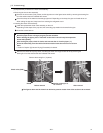
Remove the check valve (CV8), elbow, and the pipe shown in the figure below at left by removing the
brazing flux from the sections that are indicated with arrows.
Check valve (CV8)
Elbow
Before removal
Section of the pipe to
be removed
After removal
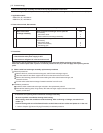
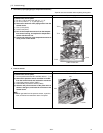
Notes on replacing the check valve assembly
Braze the pipes under a nitrogen purge to prevent oxidation.
Before heating the pipes, place a wet towel on the check valve to keep its temperature
below 120
°C [248°F].
After brazing the pipes, check for leaks, and evacuate the air from the pipes. (*1)
Direct the flame away from the cables and sheet metals inside the unit so as not to burn
them.
*1 Refer to Chapter I [8] Vacuum Drying (Evacuation) for details.
The figures above are the views from behind to present a better view of the section to be removed.