


Setup
Leica GS20 Field Guide-1.1.0en
68
4. One AT String you may wish to change is dial. By default
it is set to pulse dialing, but it can be set to tone with an
additional T.
Dial ATDT^#^M
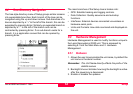
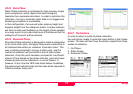
5. The Device Also Requires that a station be selected.
However, it is necessary to create a station list or transfer
from an external source. To create a station file, select
Menu and 3
Station. Create a New Station
6. From the Station list, enter a dialing number and station
name. For the initial test, keep the station Analog, unless
experience dictates otherwise. You can also add
coordinate values if you have them.
7. Save the Station file, and select the newly created station
in the Device.
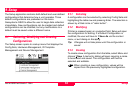
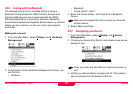
9.3.8 Modifying your Configuration
For this exercise, we will select the existing Beacon
configuration, and create a user defined configuration from it.
1. From the Main Menu, select 8
Setup, and 1 Config Sets
2. Highlight the Beacon Configuration, Select Menu and
Create New
3. Name the configuration GSM or Modem and Select and
Open the configuration
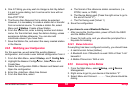
4. Enter the +Interface +Real-time Screen
5. From the Real-time, select
a. The format of the reference station corrections. (i.e.
RTCM, Leica, or CMR)
b. The Device Being used (Press the right arrow to go to
the end of the list “Z”)
c. The Port being used (Virtual 1)
6. Save the configuration
If you chose to use a Bluetooth Device
• After saving the Configuration, power off both the GS20
and the Mobile Phone
• Power On both units, and you should be prompted for a
Keycode for bonding.
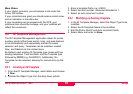
9.3.8.1 Status Indication
If everything has been configured correctly, you should have
• A real-time icon Arrow (Hollow)
• A Bluetooth Icon: If Bluetooth is used: With a Chain “Link”
beneath it
• A Mobile Phone Icon: With a Link
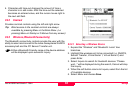
9.3.9 Connecting to the Station
1. From the Main Menu, select 8 Setup, and 4 Device
Management.
2. Right arrow to get to your device at the bottom “Z”
3. Select Menu and Connect…………Your phone should be
dialing