


XR2500F Installation Guide Digital Monitoring Products
3
IntRoduCtIon
Mounting
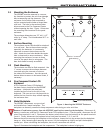
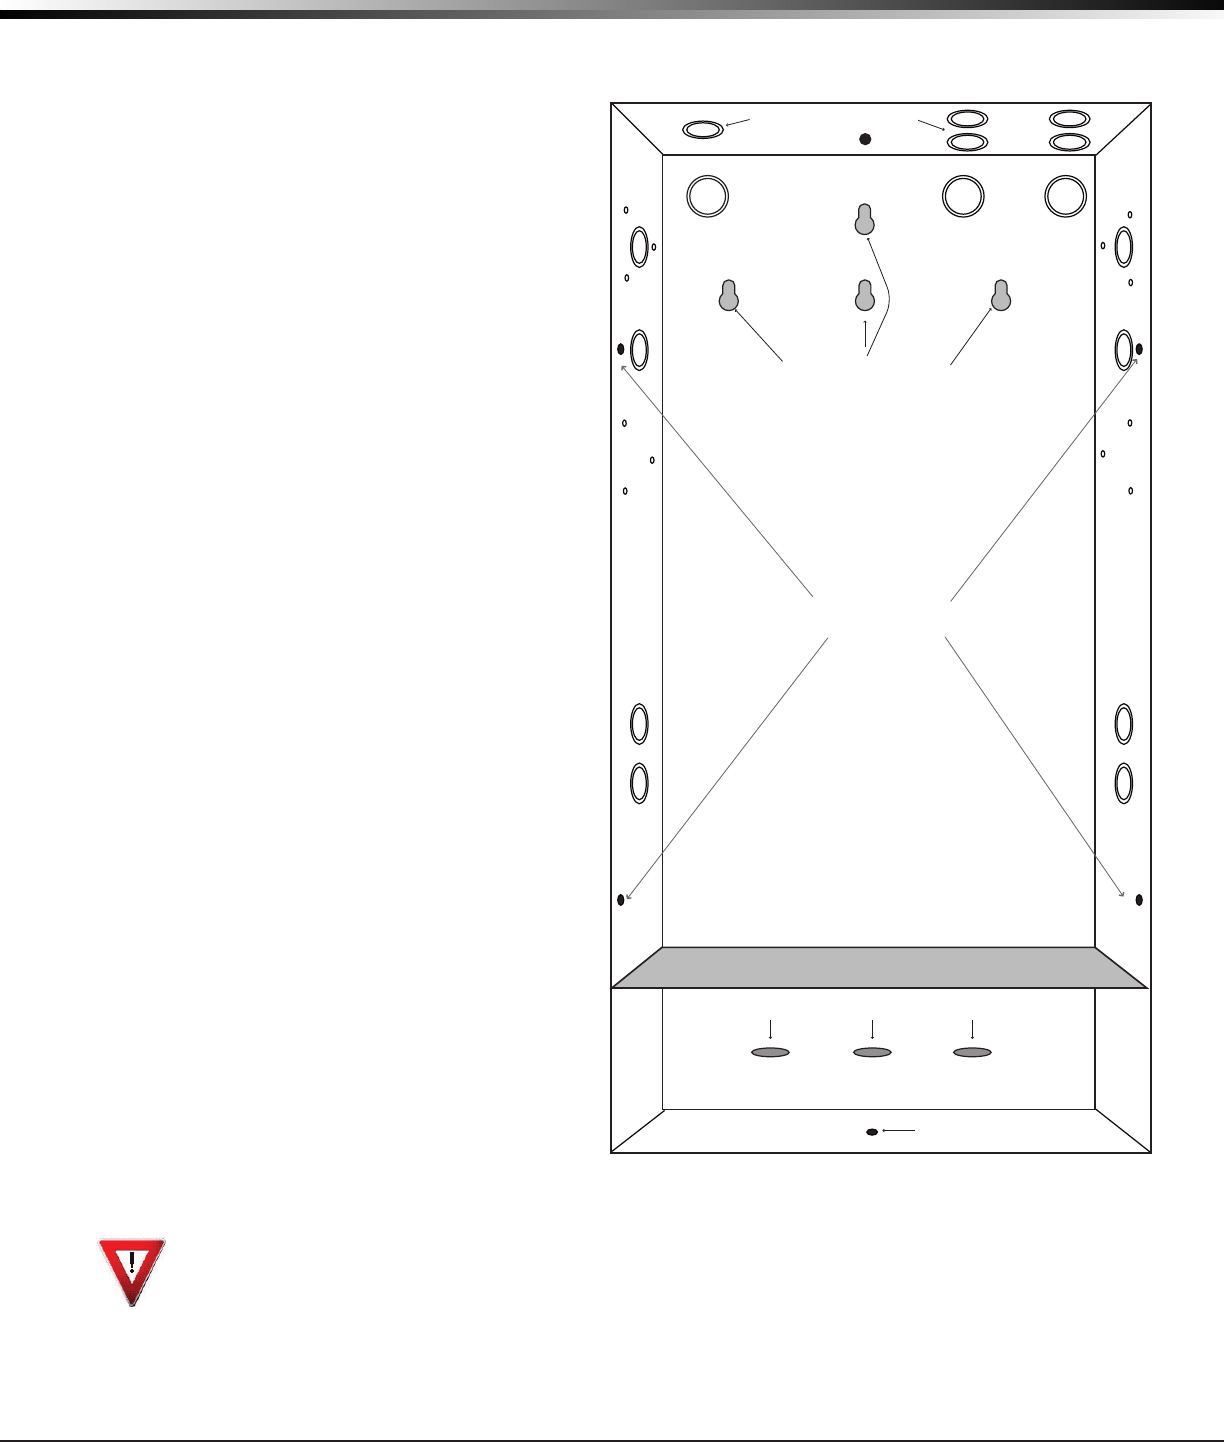
2.1 Mounting the Enclosure
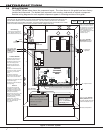
TheXR2500Fmustbemountedinasecure,
drylocationtoprotecttheunitfromdamage
duetotamperingandtheelements.The
enclosurecanbeeitherushmountedor
surfacemountedandincludesahingeddoor
with lock. The hole in the enclosure door
allows access to the Fire Command Center
withoutopeningthedoor.Figure1illustrates
themountingholelocationsforthepanel
enclosure.
Theenclosuredimensionsare32”tall,14.5”
wide,by4”deep.Thelidaddsabout0.5”to
each side.
2.2 Surface Mounting
The enclosure center hole should be attached
toawallstud.Duetotheenclosureweight,
especiallythebatteries,itisextremely
important to mount the enclosure on the
stud. Attach the two holes beside the center
holetosheetrocktosecureenclosure.When
mountingtheenclosure,besuretoleave
roomforthepaneldoortoswingopen.The
door lock should be easily accessible.
2.3 Flush Mounting
Theenclosurecanalsobeushmounted.Use
1”screwstosecuretheenclosurebetween
twostudsusingthetwosetsofholeson
thesidesoftheenclosure.Usethetopand
bottomholestosecuretohorizontalstuds,if
necessary.
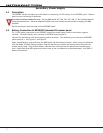
2.4 Fire Command Center LCD
Keyboard
A Fire Command Center LCD Keyboard
hasbeenfactoryinstalledontheXR2500F
enclosure. A keyswitch has also been
installedandpre-wiredtotheleftofthe
keyboard. The user can turn the keyswitch to
enablethefourfunctionkeyswithoutopening
the enclosure door.
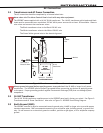
2.5 Metal Backplate
The XR2500F components are pre-wired
and installed on a metal backplate. The
backplatecanbeeasilyremovedtokeepcomponentssafeduringpre-wireactivities.
Remove AC and battery power from the XR2500F panel before removing the backplate. Disconnect all
battery,transformer,andtheFireCommandCenterLCDkeyboardwires.Fromthepanel,disconnecttheAC
wiresfromterminals1and2.Disconnectthebatterywireseitherfromthebatteriesorthepanelterminals
3and4.Finally,disconnectthekeyboardwiresfrompanelterminals7,8,9,and10.
Removethescrewssecuringthebackplatetotheenclosure.Loosenthetwotopscrewsthatthebackplate
hangson.Afterlooseningandremovingthescrews,liftthebackplateupslightlyandpullthebackplate
towardyou.Whenreinstallingthebackplate,besureallconnectionsaresecure.
Figure2illustratesthebackplateandthecomponents.Thebackplateisshowninlightgray.
3/4" X 1/2" Knockouts
Hole for Flush
Mounting
Holes for Surface Mounting
Holes for 1" screws for
Flush Mounting
Battery Shelf
Hole for Flush Mounting
Additional Holes for Surface Mounting
Figure 1: Mounting the XR2500F Enclosure